I did this interesting cook about two years ago when I was working on trying to get the Backwoods Party cooker to work the way I wanted for my contest cooking. Used some different methods and a different type of charcoal in this test. My biggest problem with the cooker is that I couldn't get over about 5 hours of un-attended cook time and this is not near enough to suit me for overnight cooking at a contest.
I do need my beauty sleep!!
Along with the cook, I was charting the cooker with a fairly large amount of meat with 4-7 probes. It was just a little less than what I would cook for a contest. The cook was done with a new charcoal from Wicked Good which is in briquette form but a fully hardwood lump with no chemicals, additives, or fillers. It is suposed to burn long and hotter than other charcoals. It is made from the same 4-5 hardwoods that the Wicked Good Competition blend is made from that is no longer available in this country. This was a very highly rated charcoal. I was looking for a charcoal that would burn longer than the 5-6 hours I was getting out of a full load of Ozark Oak or Royal Oak lump in my upgraded Party using water.
The cook was done without water with a new technique that I tried which is kinda a mix from information I have read on other forums. This empty waterpan method seemed to work fine at the lower temps. I wanted to try without water as it takes a lot of fuel to heat water and I was looking for a longer cook time on my one load of fuel. I also don't like sand as this changes the cooker completely with the lower grates hotter than the upper grates and very uneven cooking. The cook was done with a "sump pump" in temps of about 26-33 degrees and the meat was put on the cooker about 1:30am. The day turned out very windy!!
The cook was 2 pork butts that weighed about 7-1/2 pounds each, 1 brisket flat that weighed about 6-1/2 pounds, 3 slabs of loin back ribs, 1 four pound whole chicken which I butterflied, and 1 can of Spam.
The cook was planned to have all the meat done and ready at 3:00pm in the afternoon so the meat went on at staggered times and the cooker only had to total load on for about 3 hours near the end of the cook.
Setting up the charcoal pan....
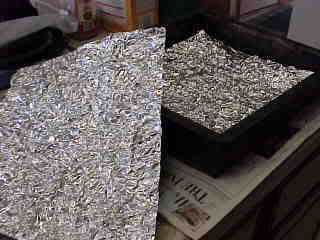
I cut 5-6 sheets of the wide heavy duty foil about 2" larger than the pan and then slightly wadded it up into a ball, and then unwadded it out and cut it to fit the pan. The idea of this is to make several layers in the pan with an airspace between each layer to kinda filter the heat from going up into the cooker and this did work fine and I was able to keep all the grids in the cooker where I wanted them. The cooker ran with only 13 degrees difference from the 2nd grid from the top to the lower grid in the cooker. An example is the reading I took at 1:10pm where I found the upper grid at 255*, the two middle grids at 251* and the lower grid at 242*. This was with a fully loaded cooker.
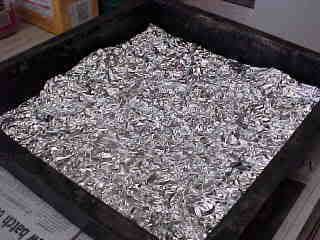
This is the pan ready for the cover.
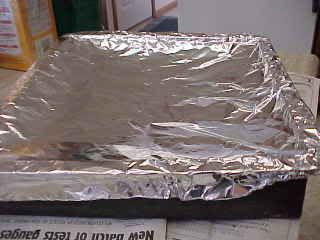
I covered the pan with the wide foil and used two layers to make for easy cleanup.
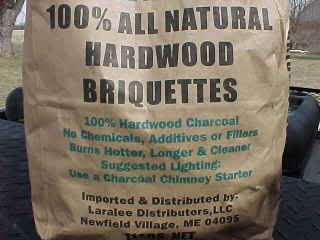
The new Wicked Good all Hardwood Brickettes...
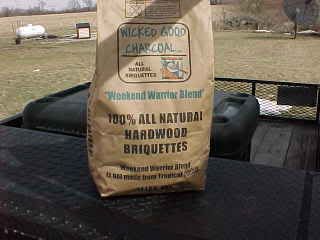
This stuff is kinda pricy if you just order a few bags from them but the costs do go down if you order a pallet. I ordered 4 bags for the test and the shipping was as much as the charcoal. Dura-Flame also has a new all wood brickette but it's next to impossible to just order a few bags. They are very difficult to deal with unless you want a truckload.
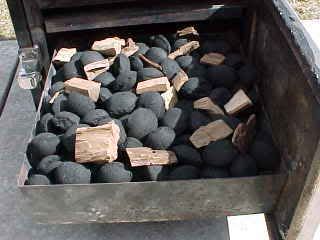
I filled the firebox up as full as I could get it and it took 11 pounds or one full bag of charcoal. I also added some small chunks of hickory..I couldn't get any larger chunks in the box and get the firebox pushed back in the cooker.
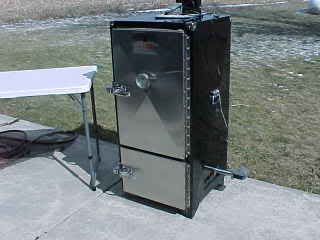
The smoker was setup with the Sump Pump (Guru) running a 10 cfm fan and the gate on the fan was set to about 30% open.
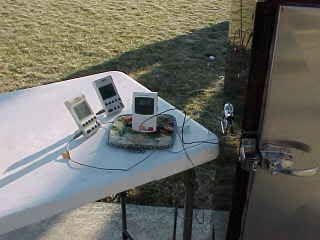
I used several probes thru the cook so I would know how the cooker was doing and recorded the cook.
I started the cook with a Weber Firecube which I placed right in front of the vent on the right side of the cooker. As soon as the fire was out on the cube, I started the sump pump and brought the cooker up to temp. It took about 45 minutes.
I got the butts and brisket loaded about 1:30am and just turned the cooker loose and let it go until morning. It did fine without the water and the temp really held well until the wind kicked up and then I had to cut the fan back some more and close down the top vent to about 1/3 open to keep the cooker at the temp I wanted. I loaded the balance of the meat as the cook progressed. The temp in the cooker from the top to the bottom at all times ran just as it would with water. Really surprised me as I thought it might run hotter in the lower area of the cooker.
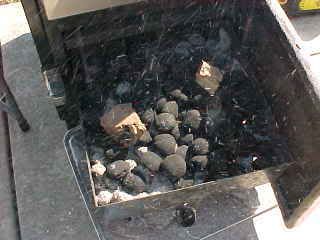
At 10 hours into the cook (which was about twice as long as I usually get), I loaded 2 more pounds of the brickettes into the cooker to be sure it would run to the end of my cook which turned out to be about 13 total hours. As it turned out, I didn't need this charcoal.
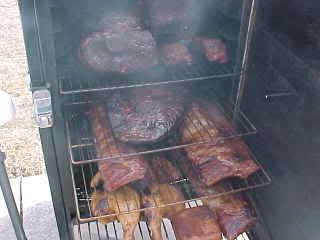
There are two butts on the top grid in the picture with one loaded to the back and one loaded to the front of the grid, next grid down is my brisket, next down is two slabs of loin backs and the lower grid has the third rack of ribs along with the whole butterflied chicken and the Spam.
The only problem I had was with the wind but I was able to control the cooker at all times at the lower temps and running without any water in the pan.
After the meat came off, I shut down the cookers vents and let the fire go out and this is the remaining charcoal I took out of the cooker.
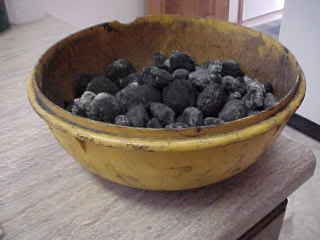
Like I said, I don't think I needed this extra charcoal but I wasn't sure as this was my first cook with it setup this way.
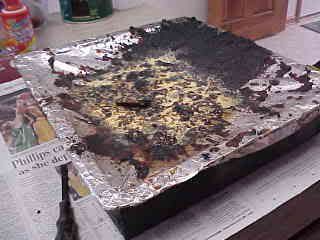
This is the waterpan after I pulled it from the cooker and you can see all the grease and fat that is left on top on my foil. It was about 3/4" thick.
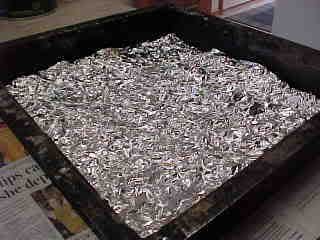
This is the pan after I remove the foil covering the waterpan. It is clean and ready to go again.
The food came out as good as it would have with my normal setup using Ozark Oak lump and with water in the waterpan except for a couple of items. The bark on the butts was a little harder than I wanted and I should have foiled them earlier in the cook. I also should have added more smoke wood to the fire when I put the ribs and chicken on the fire as they came out with less smoke flavor. I believe the new lump flavor is not as strong as the Ozark Oak.
I was very happy with the cook as my number one priority was to be able to get a longer cook out of a single load of fuel and it sure did that!! If it wasn't for the very high wind, the cooker would probably have run untouched for about 10-12 hours. Should be great for any overnight or contest cooking.
Just about the time I was ready to order a pallet of the Wicked Good charcoal, the Rancher charcoal showed up at Home Depot and I purchased 40 bags of this as it gave me the same cooking time as the Wicked Good. However, I think the Wicked Good was slightly better charcoal.
Later, during the contest cooking season, I found out I could also use water if I wanted and still get the longer cooking times that I needed with either the Rancher or the Wicked Good charcoal.
Saturday, January 31, 2009
Friday, January 30, 2009
Pig Pickins / Backwoods Competitor
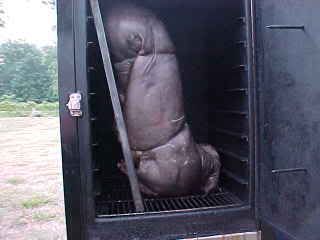
We did this whole pig cook for our Friday evening party in June of 2005 at the King City BBQ contest in Mt. Vernon, Illinois for the organizers, sponsors, cooks, and friends in a Backwoods Competitor.
We set the cook up as a "Pig Pickins" where the pig was cooked whole and then prepped to where the guests just come thru the serving line and just "pick" off the meat they want and place it on their plate. It is an old fashioned way of doing a whole hog or pig.
I got the idea of cooking a whole pig upright and on a rack from Candy Weaver who did a similiar cook in her FEC-100 which is another upright cooker about the same size as the Backwoods Competitor.
Myself and my cooking buddy Mike Zinkan teamed up with Randy and Marla Twyford (Ulcer Acres) for this cook and this is how it went.
I had two racks built for both myself and Randy to fit the Competitor on which we mounted the pig for the cook.
Randy did all the hard work as he killed and butchered two pigs that weighed about 60-70 pounds each and got them ready for the contest. It is difficult to get a whole pig anymore with both the head and feet on it so this worked great for our cook. He used the other pig for a later party.
The Competitor is really not designed for pig cooking but with all the grids out and the pig mounted on the pig rack, it will do a great job on a whole pig. We did have to turn the pigs head to the back of the cooker to get it in.
The pig was rubbed on the inside cavity and injected with some good stuff and placed into the cooker. It took about 10 hours to cook and came out looking great.
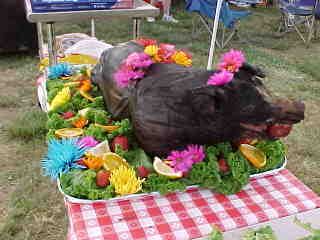
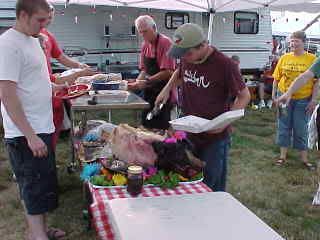
Marla Twyford, ( Randy's wife) did this beautiful presentation and we gave the people at the contest about 30 minutes to get their pictures before we prepped it for the Pig Pickins. Note the pigs head as it looked like the pig was looking at you as you came thru the serving line.
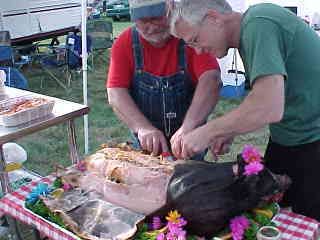
Since we wanted a pig pickins, which in my opinion is the only way to do a whole pig, we prepped the pig by cutting away the skin and got it ready for the serving line. This allows each guest to pick off the meat he or she wants on the pig going thru the serving line. I cut the skin from the top of the head right down the back to the tail and laid the skin aside.
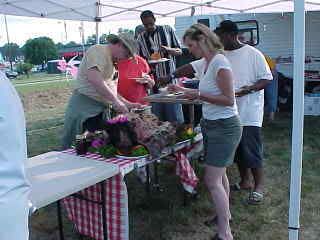
Got our guests started thru the line and they sure did enjoy the event. Several of the guests brought a dish so we had plenty to go with the pig.
The pig went quick!
Bonesmokers Bahama Mamas
We serve this wonderful drink a few times each year at the BBQ contests and it always goes over very well and may also help put your competition under the influence which might give you an advantage in the contest. You know...drink up it's free!!
This drink has put me to bed early on a couple of occasions as it really sneaks up on a fellow. I tasted this drink for the first time at the Nelsonville, Ohio contest several years ago when my friend Ford Alison (Great Lakes BBQ & Feed) had us over for their Friday evening party. He not only does this great drink but also does what he calls "Hot Apple Pie" which is another great drink that does taste like hot apple pie. Course, he also does about the best beef tenderloin that you will ever taste for breakfast at a contest.
Ray Lampe (drbbq) whose team name is called Bonesmokers, posted the recipe on the BBQ forum in 2001 and I will just copy it over to my site.
Bonesmokers Bahama Mamas (4/18/2001 5:30:56 PM by drbbq)
As long as you asked, these will be served immediatly after the Butt to Butt turn in. Wish I had one right now. David Roper once said
"The only thing these need is drinking".
BAHAMA MAMAS
½ gal rum
1 quart dark or meyers rum
½ gal coconut rum
1 gal orange juice
1 gal pineapple juice
1 quart lemon juice
1 12oz can cherry juice concentrate or 16 oz grenedine
stir with ice makes about 5 gallons
We make this drink up in a 5 gallon Igloo round drink cooler.
Just add a 7-8 pound bag of ice and then all the above ingredients into the Igloo cooler and stir it up and serve.
One great drink...
Thursday, January 29, 2009
Small Utility Trailer -- Contests/Parties/Catering
This has been an on going project for about a couple of years and although I have used it in several contests, it is still not done and kinda a work in process.
I wanted a standard utility trailer that my medium size SUV could pull easily and I didn't want to block a whole lot of wind as the car uses plenty of gas the way it is.
While still in the planning stage, I got a note from a friend that River City Rub (Theron Malone) who is also a Backwoods contest cook has his small trailer for sale.
Theron had really done a lot of work on the trailer by installing the roof and it was perfect for what I wanted to use it for so we made the deal and met on the road about half the distance between us and swapped the trailer over to my car.
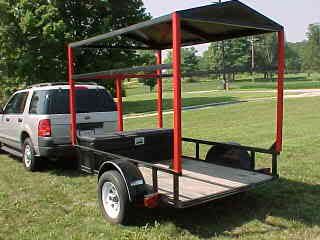
This is what it looked like when I got it home and I also purchased the very heavy duty lockable tool box that he had mounted in the front of the trailer. Theron had also done some wiring in the trailer as well and it sure was perfect for my plans.
The trailer is heavy duty with a real 3500# axle under it with springs and it also came with 15" tires.
The first thing I did was put it together for the way I wanted to do a contest and it worked out great.
The cooker in the picture is the Backwoods Fatboy and I have the trailer setup with one 4 foot prep table and then I found another big lockable storage box that fits perfectly under the prep table so I would have plenty of security in my travels. I also wanted to be able to cook on or off the trailer as well as both heat an air condition the trailer as well when the cover was on the trailer.
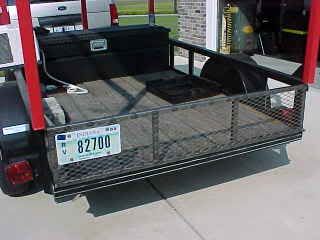
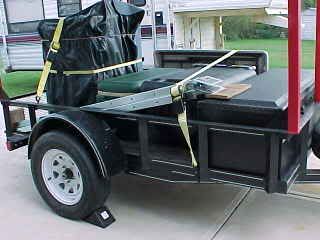
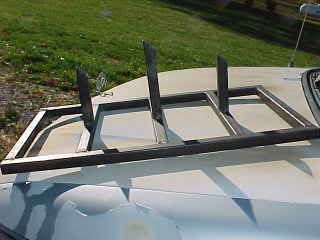
Next job was to make a tailgate.
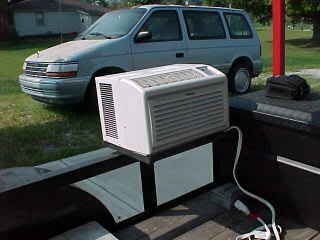
Then the air conditioner mount.
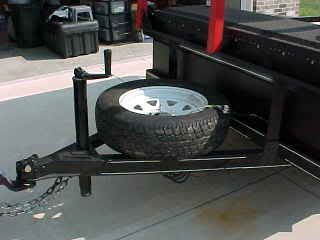
I also made a spare tire mount.
At this point, I decided to try it out and purchased a cheap tarp to use as a cover for the first contest to see if everything would work like I wanted.
This picture shows us all loaded up and ready to roll. The cooker of choice for this trip was the Backwoods Fatboy. Was able to keep everything pretty low in the trailer so I wouldn't be blocking much wind. I planned to take the cooker off the trailer at this first contest as it was cold and we needed the cover so we could heat the trailer. The cooker is strapped to a dolly and the loading ramps are on the trailer as well.
I wanted options for this type of setup and we now have them. We can use the trailer with a tarp cover for a contest with the cooker on or off the trailer, or we can take an EZ-UP and then just set the trailer up for cooking with the cooker on the trailer, or just use the trailer to haul all our contest equipment to an event.
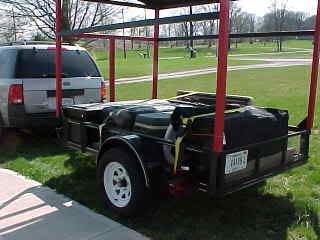
We are now cooking the contests with one Backwoods Party cooker and we lay it down in the trailer and we just don't block any wind at all with this cooker. Using this cooker, we did eliminate taking the loading ramps and the 2 wheel dolly as it is very easy to handle this cooker by hand. The picture shows the trailer all loaded up and ready to roll.
If the gas price goes back up, I am sure we will be using this setup again for the contests that are a good distance from the Po-Farm and we will continue to improve upon this project.
I also didn't include a picture of the trailer with the tarp over it as it looks kind of trashy and my good friend Dr Chuckie calls it Old Dave's Shanty! It Fits!
The old mans work is never done....
Jambalaya on a Cooker/Smoker
This is a great recipe that we often use at home and at BBQ contests for our Friday evening parties as it is very simple to make and always gets great reviews.
My recipe is based off of a great recipe from a friend a Mr. Kevin Taylor (Stogie) ie. the BBQ Guru and does have some changes for my style of cooking and presentation.
I will start with the introduction from the original recipe...
Couzan Billy's Jambalaya
From the kitchen of Kevin Taylor, the BBQ Guru
"I know there are many Jamba recipes out there. This one is unique in that you throw everything into the pot and cook. No making a roux, no browning the meat, no cooking the rice. It is ideal for doing on the grill. Matter of fact, I cook this for Friday night supper at the cook-offs! This recipe I adapted from one given to me by my good friend Bill Conklin…Couzan Bill, a real Cajun"
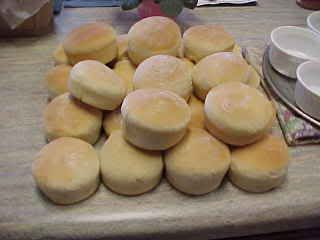
Old Dave's version of this great recipe does use much more liquid or broth as we like to serve this treat in homemade bread bowls and we also need more liquid as we do it in an open pot on the smoker for the total cooking (boiling) time which will use up some of the broth.
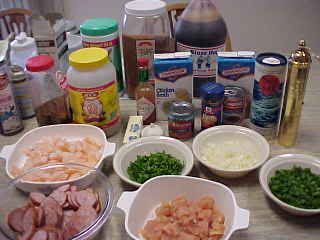
1 pound converted rice, uncooked
1 can French onion soup
1 (8 ounce) can tomato sauce
1/4 pound butter, cut into pieces
1-1/2 cup onions, chopped
1 cup green onion, finely chopped
1 small green pepper, diced
1/4 cup fresh parsley, chopped
5 large garlic cloves, minced
1 teaspoon crab boil
3 tablespoons Cajun seasoning
3 tablespoons Tabasco
1 pound smoked sausage
1 pound of fresh or frozen package of crawfish tails (Walleyworld has them in the seafood freezer) or as a last resort, substitute shrimp but it won't be near as good.
3 pieces chicken breasts, cubed
8 cans of chicken broth or about 100-110 ozs
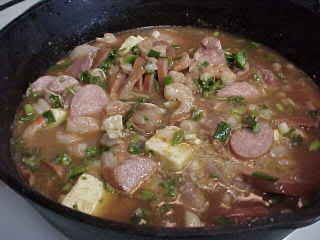
Combine everything in a 5-quart or larger ovenproof type of pot or just use a Dutch oven without the lid for the cook.
Place the pot into the cooker or smoker with no lid and be sure that you get the pot up to a low boil or simmer and then cook at the low boil for at least one hour stirring about every 15 minutes.
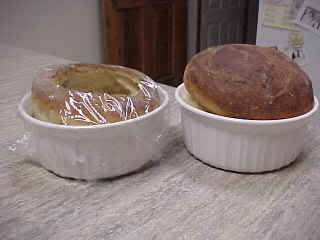
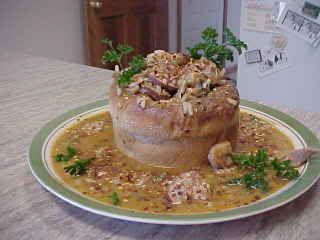
I use a bread bowl of this size to serve this dish as an appetizer. I hollow out the center of the bread bowl and then fill it with the Jambalaya.
To make this dish a total meal, I like to use a much larger bread bowl. The bowl on the left in the picture shows how I hollow out the center of the bowl for the Jambalaya.
We serve it with some extra broth or juice as the bread really needs the extra "soppie".
The orginal recipe can be found here..http://www.recipegoldmine.com/bbqgurucass/couzan-billys-jambalaya.html
Tuesday, January 27, 2009
ABT Pictorial with a Twist!
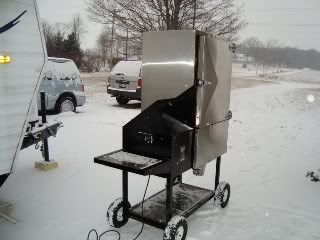
I did an interesting cook yesterday in the start of a projected big 6-12" snow storm in my low-tech FE100 pellet cooker. The temperature during the cook was about 19-22 degrees above zero with just a light wind.
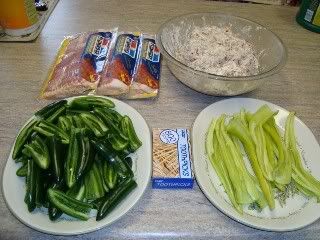
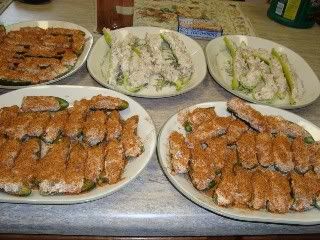
This cook was to be about 60 Jalapeno stuffed ABT's and 10 very long Anaheim stuffed ABT's for the wife as she doesn't do the hot stuff.
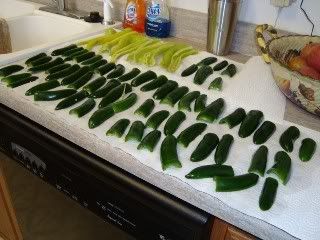
I cut the ends off of the peppers, sliced them into two pieces, cleaned out the seeds very carefully without removing any of the veins in the peppers as I like this treat as hot as possible.
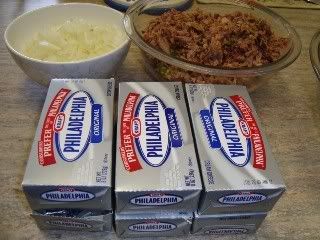
While the pepper halves were drying out, I got the balance of the cook ready. I finely chopped up a medium onion and placed it into a bowl. I got a 1-3/4 pound bag of pulled pork out and chopped it up as well. Figured I would need about 5-1/2 pounds of cream cheese for the peppers so I got that ready for my cheese ball.
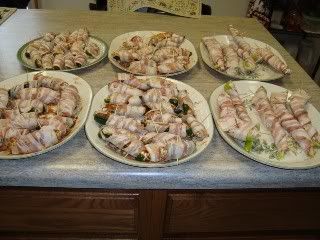
Made up the large cheese ball with the cheese, onions, and the chopped pork which makes stuffing these things real simple. Got the bacon out and a box of toothpicks and we were ready to stuff the peppers.
We got the 70 ABT's stuffed and ready for the next step in the process. I then applied a coat of Smokin' Guns hot rub to the Jalapeno's and then dusted them with ground cayenne pepper. Mommy didn't want any rub or hot stuff on her peppers.
I rolled the cooker out of the garage and onto the snow covered garage apron and fired it up with pecan logs and set the temp to "smoke" for the first 45 minutes.
Finished up the ABT's by wrapping them in Plumrose bacon and they were ready for the cooker.
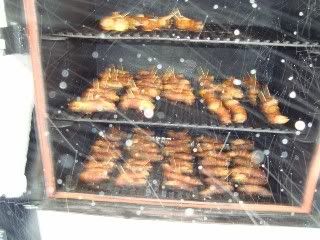
After smoking for about 45 minutes I raised the temp up to 275 degrees for the balance of the cook. Snowing pretty good at this time.
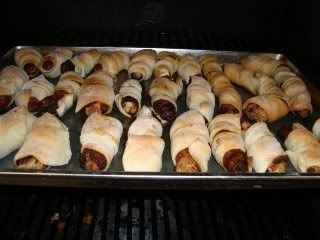
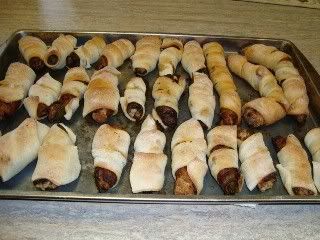
As soon as the bacon was cooked right, I took the ABT's off of the cooker for my next step. I dusted my counter top with some flour, and then I popped open a tube of Pillsbury Pizza Crust dough and rolled it out on the counter top. Cut the dough into strips about 1 to 1-1/2" wide for my wraps. I then wrapped up the ABT's until the dough run out.
Pulled a layer of foil out of the cooker to get rid of all the bacon grease so I wouldn't start a fire and raised the temp to about 425 degrees.
Placed the ABT's back into the cooker for a few minutes to get the dough wraps baked to suit me.
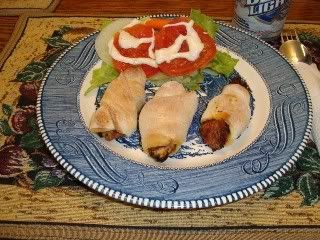
These are the results of my wrapped ABT's.
Made for a nice supper and these things are very good.
4-1/2 Hour Pork Butts / Backwoods Chubby
I did a couple of high temp pork butts awile back with two slightly different methods and one of them came out great and the other one came out darn near as good but just slightly less moist.
The butts weighed a little over 8 pounds each. The cook was done at about 350 degrees with a dry water pan using my foil sheets. I used the Chubby and had it loaded up with the Rancher charcoal and pecan chunks for the smoke.
I started this cook about 8:00am in the morning by getting the butts out of the fridge and then I fired up the cooker.
I made up my injection yesterday to save some time. I used the following recipe for the two butts.
1-1/2 cup apple juice
1 cup water
1 cup Splenda (we are low carbing)
1/4 cup salt
1/4 cup sugar free maple syrup
4 TBL Worcestershire sauce
4 TBL Smokin' Guns Hot rub
This was heated up in a pan to help dissolve but do not boil. Cool before injecting. You can replace the Splenda with brown sugar and use real maple syrup in your injection if you like.
After I injected the butts, I then applied the Smokin' Guns hot rub and placed one in a pan and the other one will be cooked directly on the grid. I then poured about 9 ozs of Stubb's pork marinade around the butt in the pan. I didn't pour it over the top of the butt as it would have washed some of the rub off the meat.
At 9:15am, the cooker was up to about 375 degrees so I loaded the butts into the cooker with the one in the pan over the one on the grid. The outside temp was 1 degree above zero.
For the most part, I kept the temp around 350 degrees.
At 12:15am (3 hours into the cook) I foiled the pan and then wrapped the other butt using the balance of the marinade which was 3 ozs. The internal of the butts at this time was about 155 degrees. I also had to add some charcoal as the 350 degree temp does use up the fuel.
The Butts were pulled off the cooker at 1:45pm (4-1/2 hours) and rested for one hour and then pulled. The internal when I pulled them was at 200 degrees. I also pulled the fire out of the cooker so I could get the cooker cleaned up quickly.
The butt that was cooked in the pan came out the best but both were very good.
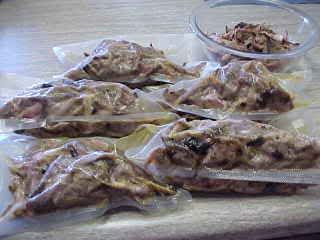
By 4:00pm I had the cooker cleaned up and put away and the meat all bagged and in the freezer.
The total cooking time was 4-1/2 hours and then with getting the cooker out and fired up, the meat all prepped, the meat processed and then the cooker cleaned up and put up took a total of about 8 hours.
The butts came out plenty moist, pulled nicely, and tasted very good but with the high temp method, I think that the bark wasn't quite as good and I should have used more smoke wood with this short cooking time.