Monday, February 25, 2013

High Temp Grilling GMG Pellet Cooker

This is my attempt to modify my new Green Mountain Daniel Boone grill to sear, grill, and cook high temperature items. About all pellet cookers are setup to cook indirect which makes it a little more difficult to accomplish this task. A few of the better pellet cookers do have an insert which can be installed or setup for just this purpose. Much of the ideas and data used in this modification comes from the Pelletheads.com forum and I have refined it to suit my method of cooking. 

In my opinion, the very best steak or chop must be cooked direct at the “Tip of a Charcoal or Wood Flame” and I feel that this modification comes pretty close to what I can get out of cookers that are designed for this task. 


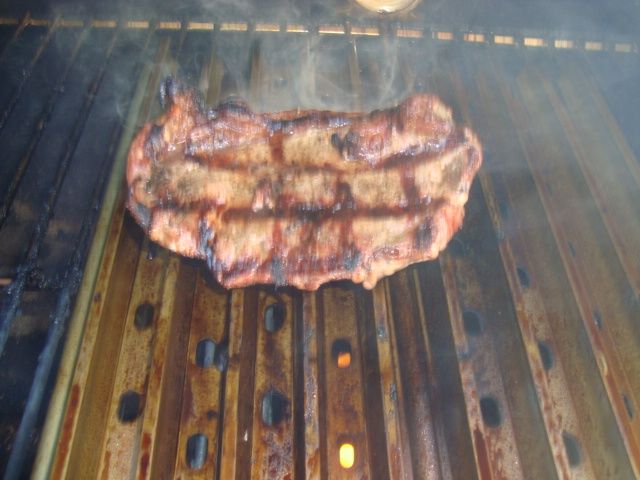
This is a State Fair cut ribeye which I have cut 3/4” thick out of the whole ribeye loin and will be used in a sandwich just like one would purchase at the fair. It was cooked for 4 minutes, turned 90 degrees and cooked for 4 more minutes, turned over and cooked for 4 minutes, and the turned again 90 degrees for 4 more minutes and removed from the cooker. Totally overcooked at well done but this was my first attempt and very easy to fix.

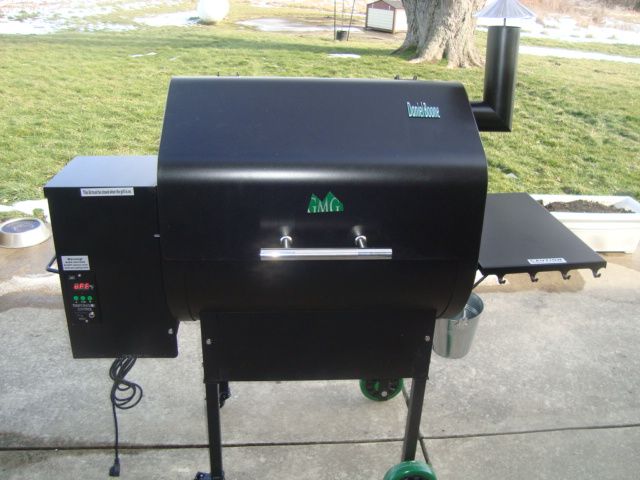
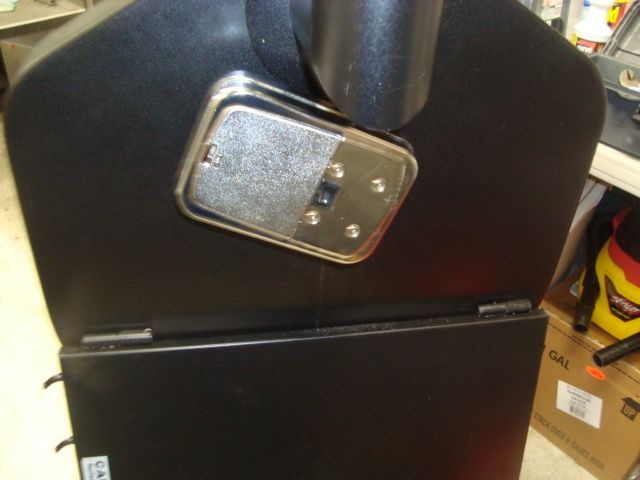
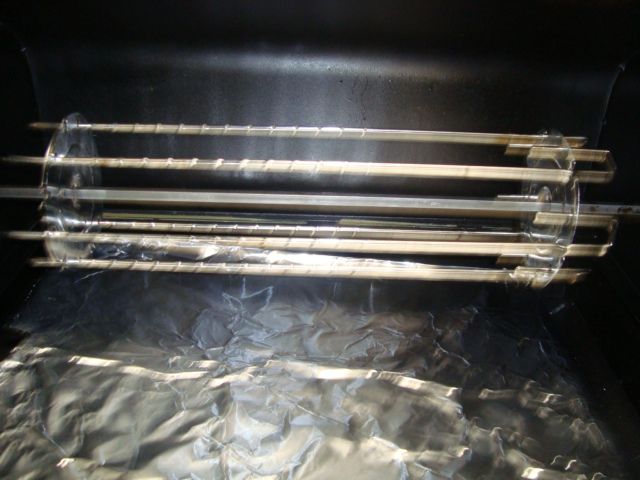
Here is my setup in my Daniel Boone GMG cooker. 


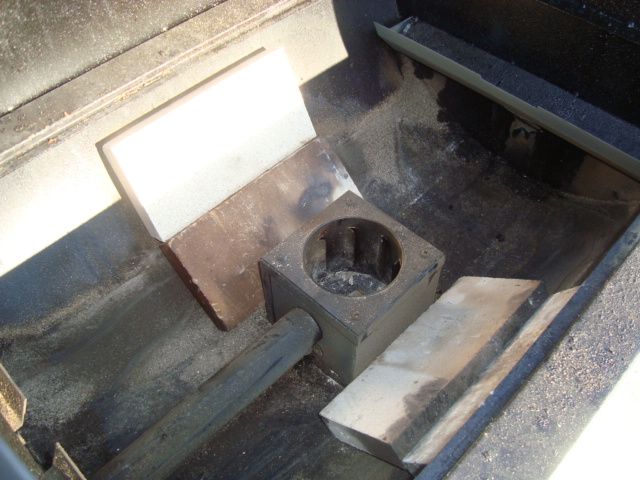
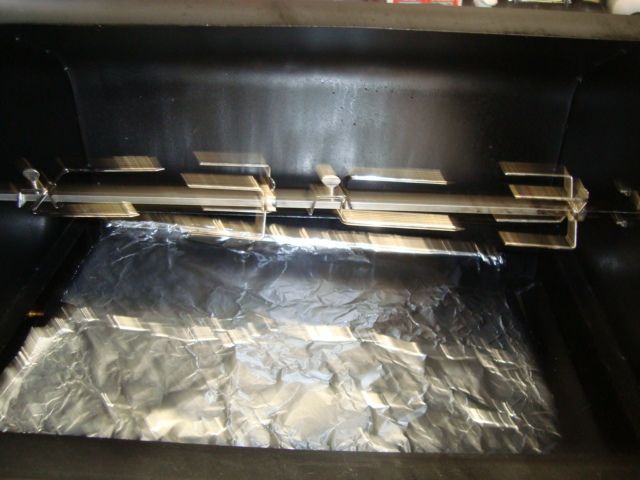
I started by laying two firebricks on each side like you see in the picture. My plan is to use a couple of Brinkmann Stainless Steel heat tents over the firebox and up as high as I can get them in the cooker. These heat tents will protect my firebox and the bottom of the grill from all the grease and juices that might come out of the meat. They will also prevent some of the flame ups and still allow some of the drips to get thru and sizzle on the tents producing some of that great grilled flavor. I want my fire to get plenty of air and as much flame as possible to hit the bottom of the heat tents and spread out under my Grill Grates. Again, the closer I can get to cooking somewhat direct at the “Tip of the Flame” is what I want. 


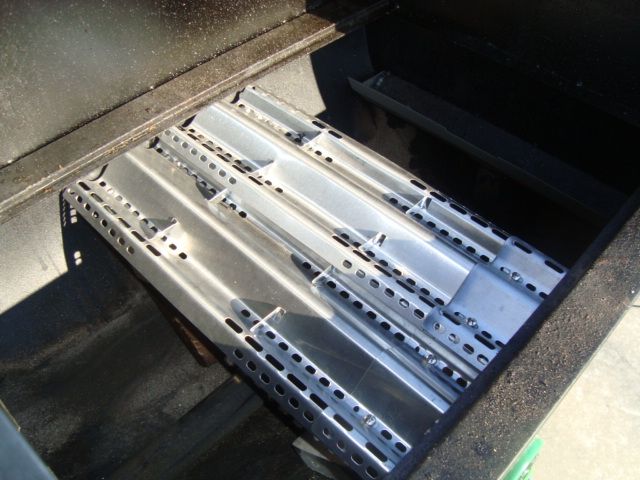
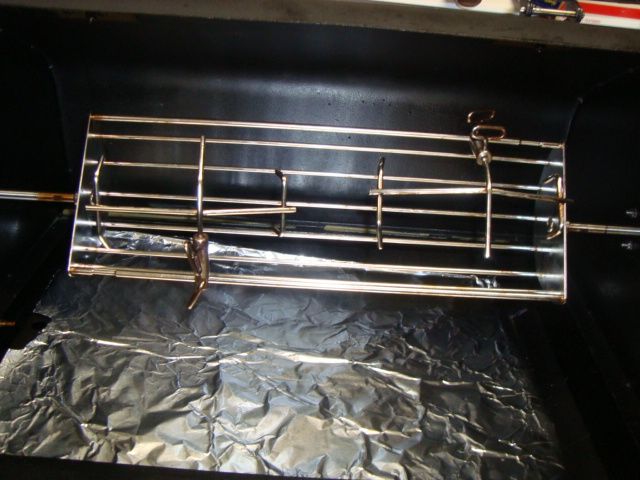
These are my two adjustable Brinkmann Stainless heat tents installed in the cooker. 


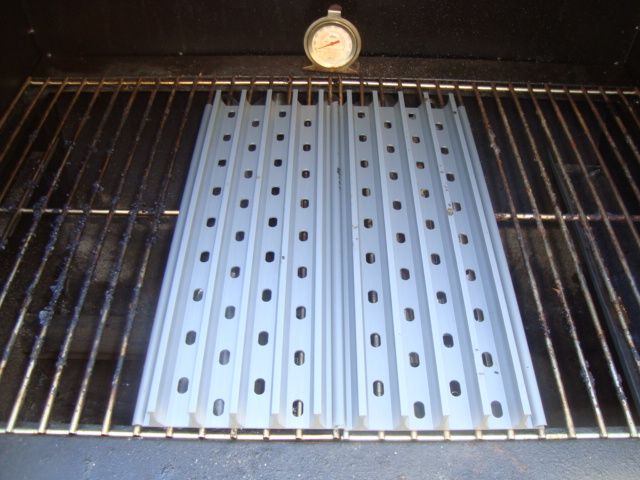
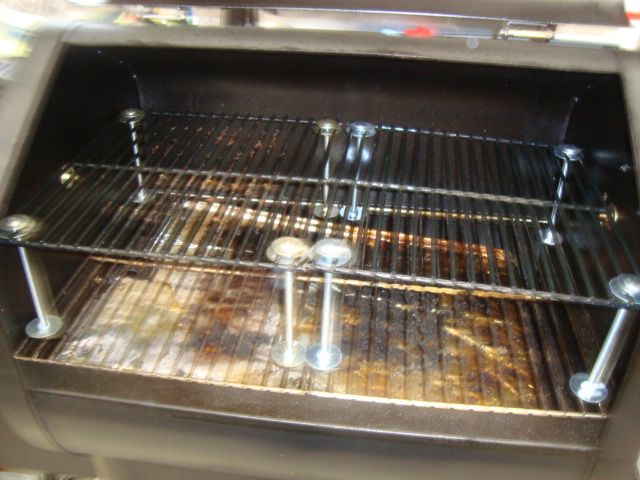
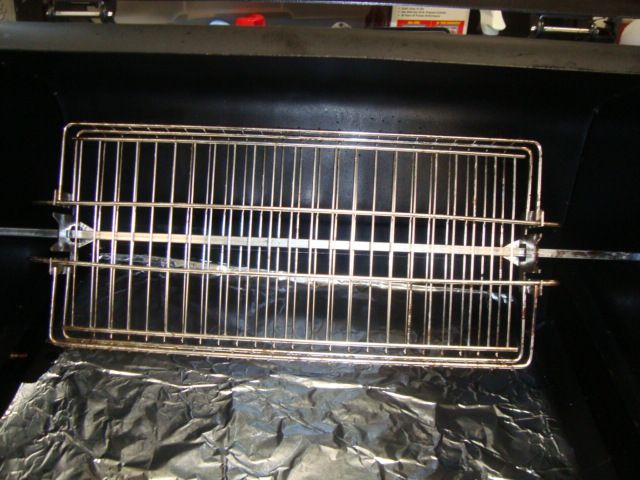
I put the standard grids into the cooker and then added my two Grill Grates which gives me a very high temp cooking surface of about 13-3/4” by 10-1/2 inch total. 


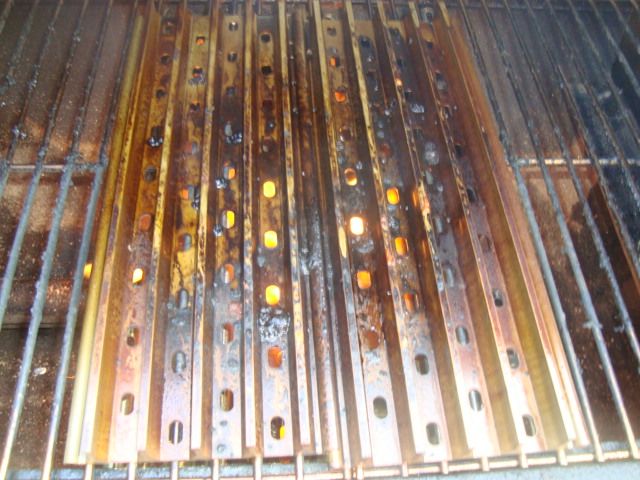
The setup works perfectly in my opinion and the flame or tip of the flame from the fire box is right at the cooking surface of the Grill Grates. At this raised height, the fire does spread out under the heat tents as planned and gives me an even very high heat cooking surface over the total area of the grates. If you look close, I think you can see the flames thru the holes at the grate level.

I was also hoping to be able to cook at under my cookers top temperature range of 500 degrees and still get great results as I felt that it is kinda foolish to have to run at these temps which can lead to warped parts and wasted fuel. I am happy to report that all my cooking is being done at 350 degrees set temp and I am getting great results. 


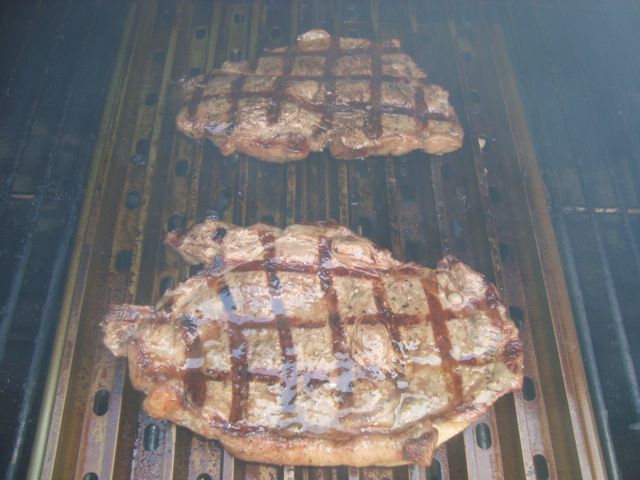
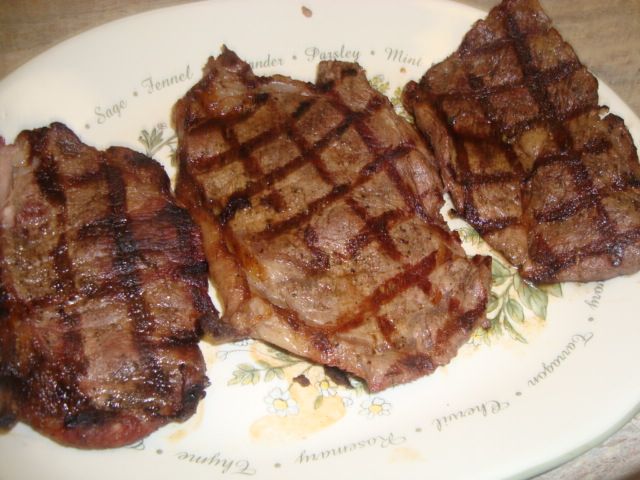
My second round of State Fair steaks were cooked 2 minutes and then turned 90 degrees and then cooked for 2 more minutes and turned again for 2 more minutes and pulled off the grill. This 8 minute total cooking time produced a medium done steak. Still a little too much time as I prefer a more rare steak. 


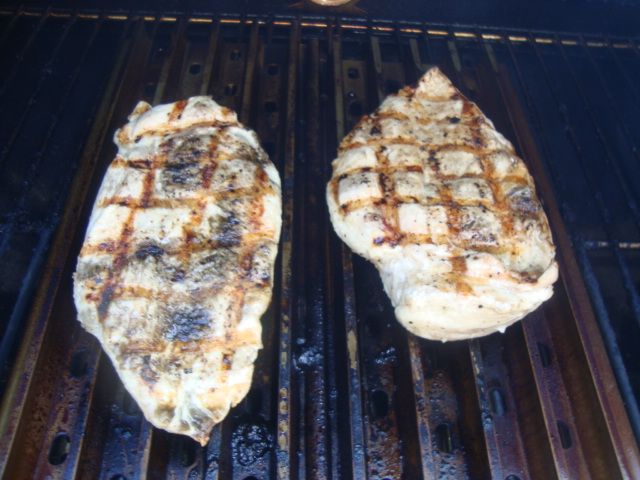
Next up were a couple of boneless chicken breasts and these were cooked for 2-1/2 minutes, turned 90 and cooked 2-1/2 more, then turned over and followed the same on the second side. This 10 minute total cook time produced a final internal temp of 165 degrees.


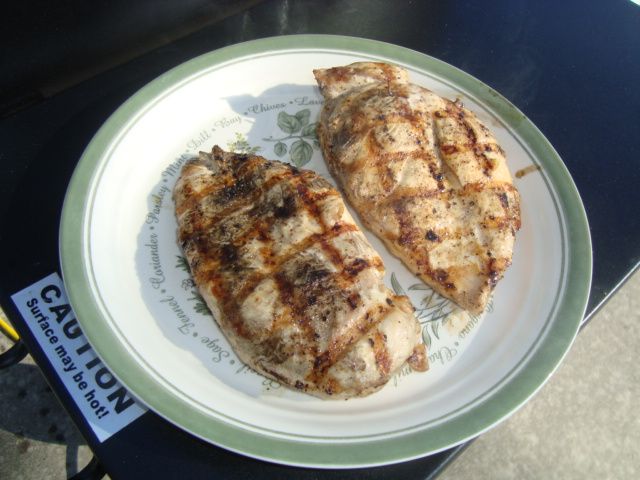
Chicken just off the cooker. 


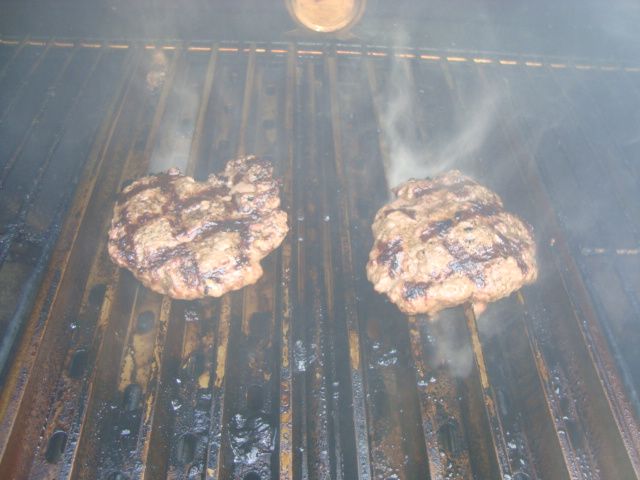
I also cooked three 1/4 pound fat burgers. These were cooked the same total time as the steaks and were just slightly over done.


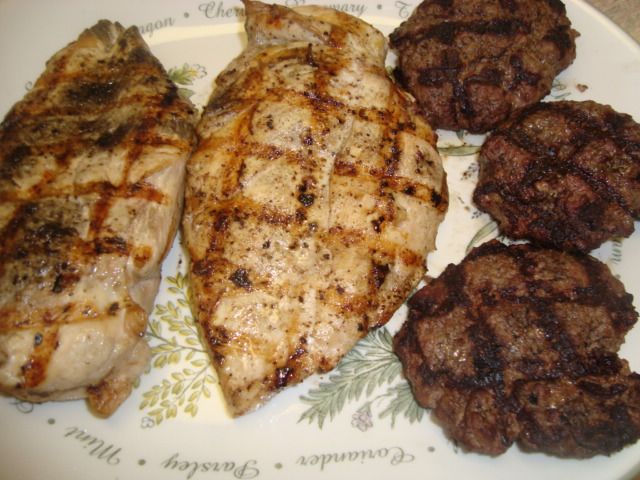
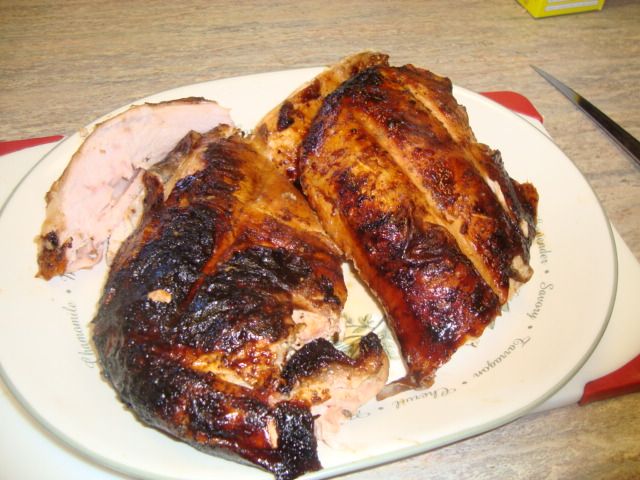
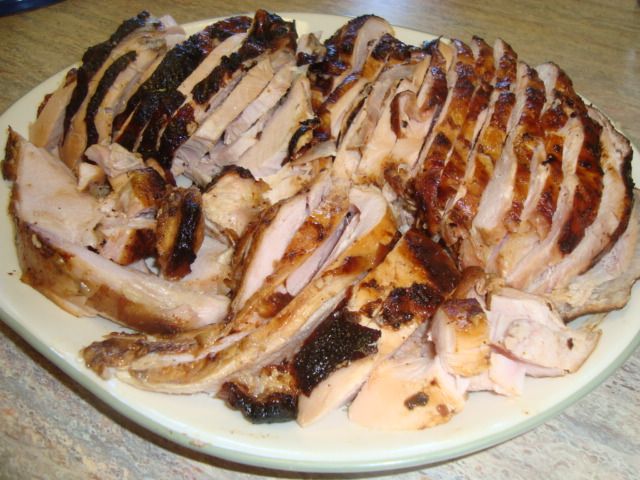
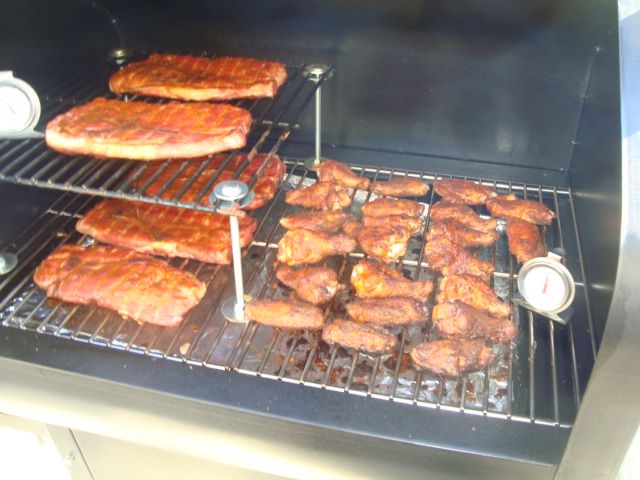
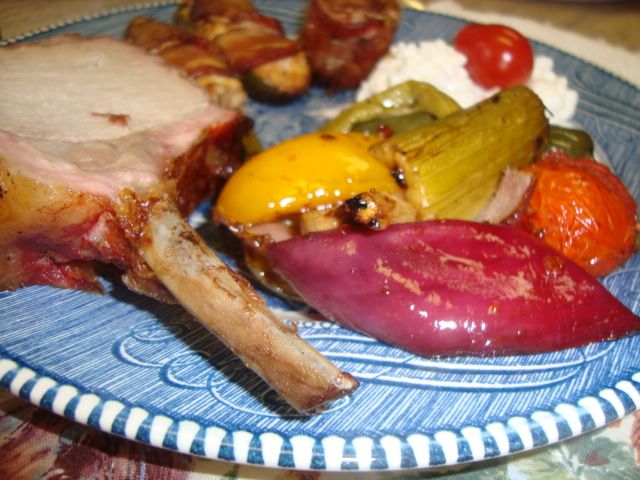
The results off my first high temp cook.


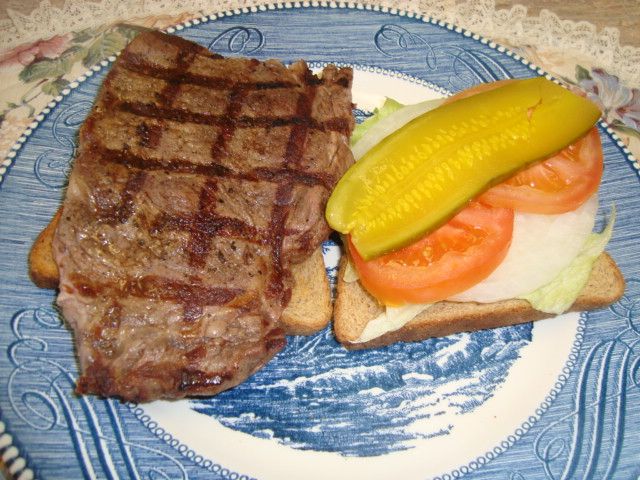
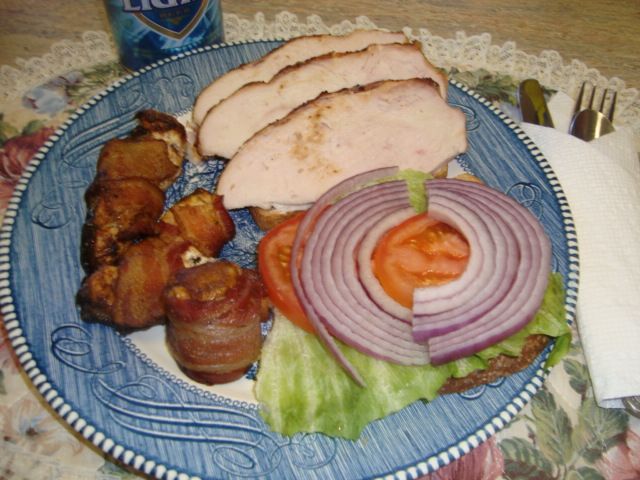
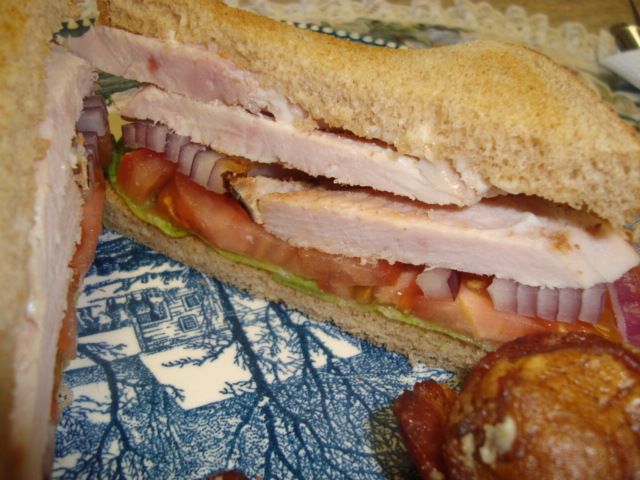
The State Fair ribeye is normally served on a bun but since we low carb, I put them on a couple pieces of toasted low carb bread. I then add some lettuce, a thin slice of onion, tomato, and a slice of pickle. 


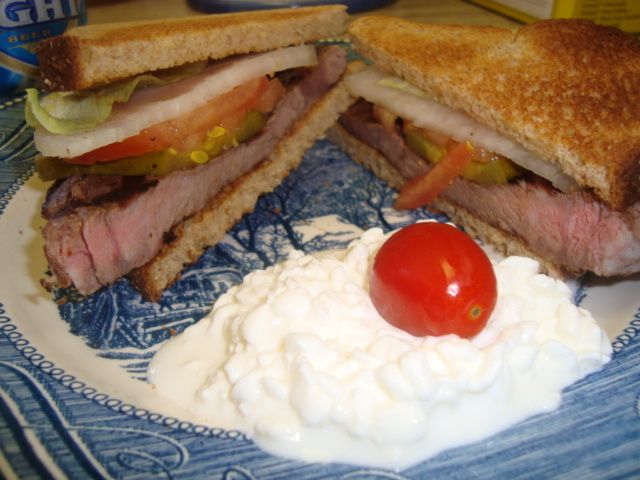
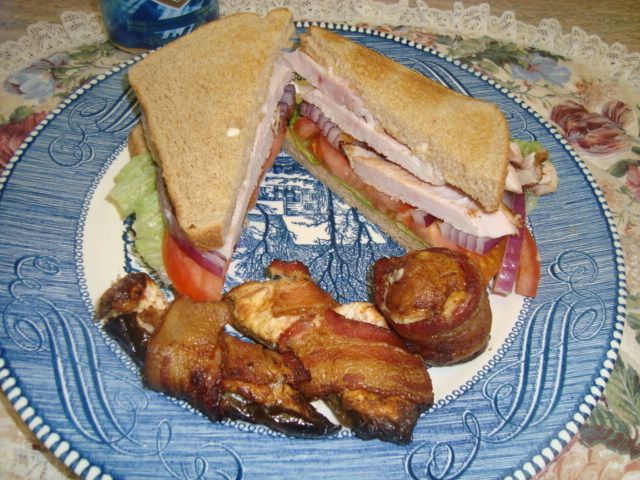
That is one fine sandwich!

I am very pleased with this setup and just need to work on my cooking times.

Spinnin' Turkey Breasts GMG Pellet Cooker

I needed to cook four turkey breasts which weighed a total of 30-3/4 pound and decided to do them in my Ez-Que rotisserie setup on my Green Mountain Pellet Grill. The capacity is two breasts at a time so it will take a couple of cooks. 

Meat Preparation

After I had trimmed up the breasts, I made up 32 ounces of Shake’s Honey Brine and injected each breast with about 4 ounces in each side of the breast. 

Next step was to place each breast into a large 2-1/2 gallon zip-lock bag and pour a bottle of Wishbone Robusto salad dressing over each piece of meat. The 4 bags then went into the fridge overnight for my combined brine and marinade period. I did turn them over a couple of times during this overnight time period. 


On the morning of the cook, I sprinkled on a generous coat of my no-salt and no-sugar rub and mounted two of them into my 8” Ez-Que cradle for the cook.

Cooking


I loaded the grill with hickory pellets and fired it up and then brought the temp up to 175 degrees for my short smoke cycle of about one hour. I installed my rotisserie cradle into the cooker and got it spinning.

After about an hour, I upped the temperature to 325 degrees and started my mopping process. 


I made up some “Roadside Chicken” marinade / sauce and mopped the turkey breasts at each 30 minute interval until they were done at 160 degrees internal temperature. 


The breasts just before they came off the cooker.

Presentation

I unloaded the two breasts from the cradle onto a couple of plates and they sure looked good. 


We planned to use one of the breasts for ourselves and the other three will be given to a neighbor. 


I cut the meat away from the bones on our breast and sliced it for our use. 


I toasted up a couple of slices of low-carb wheat bread and smeared on some mayo on one half. I then added 3 nice slices of my turkey breast. On the other piece of bread, I added some lettuce, tomato, and some sliced red onion. I then added a couple of ABT’s and one Pig Shot to my plate.


Now that’s a serious turkey sandwich!

Another great rotisserie cook on my Green Mountain Grill.


Saturday, February 16, 2013

Green Mountain Pellet Grill Modifications

My newest grill purchase is a Green Mountain pellet grill and the model is the Daniel Boone which is their smallest grill.  This grill has about 425 square inches of cooking space on the standard grid.  The cooking chamber is 13-1/2 inches tall which will make it possible to make several easy modifications to improve and add several new cooking options to this already great little cooker.  This cooker has a great digital controller with a meat probe and will go down to a low of 150 degrees to make it possible to smoke many of the very low temp items like sausage, fish, and jerky etc.. It will go up to 500 degrees on the high side which should be good enough for baking and items like pizza.  It has some other rinky-dink options like a low pellet alarm which may be more problems than it is worth.

The best part of this new cooker is the price at $759 dollars and I got my local dealer to throw in the rain cover and deliver it to my home which is about 60 miles away for a charge of just $8.95 cents.


I selected this cooker on price and features and I have made several modifications to improve the cooker that I will share with you.

This is for the GMG owners and others who may have interest in this fine pellet cooker.

These are some of the modifications I have made to my new GMG Daniel Boone Pellet Cooker and thought maybe some of the other owners out there might have some interest.

I will apologize in advance for the poor lighting for my pictures...they were taken in a dark garage.

Enlarging the food probe hole.


The standard hole in the cooker is about 1/8" and will allow just one probe to go thru so I used a 5/16" drill and opened it up to fit several probes at the same time. 

Raised or second cooking grid.

I purchased an aftermarket Charbroil 8000 series (14-3/4” by 26-5/8”) heavy duty porcelain covered cooking grid and then used a hacksaw to cut it right down the middle of the width to give me two pieces measuring about 14-3/4” by 13-1/8”. This is about the largest two grid setup that will still go into the opening of the cooker. 


I used some carriage bolts, fender washers, lock washers, and some nuts to build my raised grids for the cooker. 


This picture shows a pork steak and hot wing cook using one side of my raised grid. I haven’t tried it yet but I believe a fellow could do a whole case of pork butts using the raised grids. 

Rotisserie Setups

One of the reasons I purchased  this cooker over several others was the extreme height available inside the cooking chamber of the GMG. I figured this height would allow me to modify some of my rotisserie setups to fit without a ton of work. I do love rotisserie setups and put them on most of my smaller cookers.

After carefully laying out and marking where I wanted my spit holes, I used a 3/4” hole cutter to make a hole in each side of the cooker. 


For the motor or chimney side of the cooker, I purchased a MB3B all Stainless Steel inverted 3” rotisserie motor mount from CLA Grills and mounted it on the side of the cooker.


My heavy duty battery operated 3” rotisserie motor in the mount. 


For the pellet hopper side of the cooker, I purchased a 1/2” spit rod bushing from 4 The Grill  and this will fit 5/16” - 3/8” - and 1/2” spit rods. This will allow me to use about any length and outside diameter of the spit rods. I plan to use my Weber Kettle and my Hasty Bake rotisserie setups on my Daniel Boone. 


This picture shows my standard spit rod setup in the cooker. This setup is nice for a couple of whole chickens or maybe a couple of turkey breasts along with many other rotisserie treats. 


This is my favorite basket setup and is used for many veggies, slab potatoes, chicken wings, thighs, legs, and will even hold two whole butterflied chickens. 


This is my Shish Kabob setup and is a treat to use. 


This picture shows my Ez-Que setup on my GMG. I have both the 6” and 8” cradles and have adapted them as well for this cooker. This company is no longer in business but did produce some of the finest rotisserie setups ever for the backyard cookers. This setup will probably get more use than the other setups in my Daniel Boone cooker. 

These modifications have turned this good little cooker into one great cooker and I have just one more modification to do to my cooker. I plan to fabricate a Direct Grill type of insert so I can cook my steaks and chops direct and over the flame from the firebox. I now have all my parts together and will get started soon. 


Selecting a Pellet Cooker


Purchasing a new pellet cooker presents somewhat of a challenge as there are now about 20-25 different manufactures or importers of these units and they come with many features that are desirable and make some of these units very easy to use and clean after each use and they also need to cook a fine product at many different temperatures. Features cost money and these cookers or grills will run from a low of about $300 dollars to a high of about $2800 dollars for a standard backyard size cooker that has most of the desirable features. 

To help with your choice are a couple of pellet cooker forums although one of them is very biased and the other is somewhat biased but does have very good information and is helpful in finding the information on a particular pellet cooker. Finding unbiased reviews on these cookers can be difficult but there are a couple of other places on the web with good information and some reviews.

After a few months of study I will concede that the best of these cookers and there are about four of them are all American made and do have most of the features that are desirable to make the very best backyard pellet cooker. And of course....you will pay for all the features and the quality of a fine cooker / grill as all these American made cookers will run from about $2000 dollars and above depending on size and features. 

Now, just what kind of features will the two grand get you in a new pellet grill??

Longevity...most of the best cookers are made out of all Stainless Steel or at least have their main running gear and most of their parts they are prone to rust made out of Stainless Steel.

Size...while 400 or above square inches of cooking space is nice, the height of the cooking chamber is very important in a pellet cooker. Some of the better cookers have above 13” in height in this cooking chamber and this will allow you to cook items like beer butt chicken or turkey. Might be enough room to add a rotisserie unit to the cooker. In most cases, with the addition of a second raised cooking grate, you might be able to double the square inches of cooking space inside the cooker. You like jerky...the 5 grid high jerky grid setup will fit inside this larger cooking chamber.

Digital Controller...the better cookers do have the better controllers and will maintain   your set temp without big swings in temperatures and may also have features like a jack for a temperature probe for the meat. Some of them may compensate for colder weather and add more fuel during warm up or after loading the cooker. A good controller will have temp swings under 5-8 degrees at most temps. 

Operating Temperatures...a lower operating temperature is great for items like smoking fish, sausage, jerky, and others at a range of say 150 degrees to about 190 degrees. A higher operating temperature of say above 600 degrees is great for steaks and chops. Again, you pay for the lows and highs of the temperature range on the better units. 

Direct Cooking Grid...this is a device that is called by several names but is just an insert of some type that allows you to cook somewhat direct over the flame of the firebox to sear and cook steaks and chops at a very high temperature. This is a great feature as these cookers cook indirect and aren’t very good at high temp searing and grilling. In some units, this device is an option and costs extra.

Insulation...the better cookers are insulated or partially insulated. This is great for cooking in a colder climate as it cuts down on the fuel costs. Some of the lower cost units have thermal blanket covers that work about as well as the insulated cookers and do fit the cookers well. It’s much better than throwing a welding blanket over the cooker!

Warranty, Dealer, Support...read the warranty closely and understand how it works if you have a problem and these cookers do have several problems. Some of the cookers may have local dealers. Might be easier dealing with a local dealer than working thru a mail order place in Timbucktoo. Need a replacement part of some type...a local dealer is by far the best way to deal with any type of problem with these cookers. Check the pellet forums on the web about the warranties of the various cookers and how their problems are solved. Any cooker is only as good as it’s support.

Another Option...”The Best of the Rest”...stepping down in the price range to about $600 to $1000 dollars and you will find the majority of the cookers. Some of these are made in the USA but most are made offshore. There are a few jewels in this group in my opinion that will cook just great and have good support. A few of them have most of the seven above features that I feel make a great pellet cooker. I decided that two grand is just more than I wanted to pay and I selected one of them and will explain about it in another article. 

Friday, February 15, 2013

Pork on a Stick Plus / Green Mountain Grill

Another cook on my new cooker...I guess I will call this one Pork on a Stick Plus as it was the whole meal.


I started with my grilled veggies and cut up some celery, a few green onions, fresh mushrooms, few carrots, plum tomatoes, garlic, red onions, yellow and green bell pepper and a few jalapeno’s. These went into a bag and I poured the marinade over them and into the fridge for a couple of hours. 


Next step was to prep my abt’s with some shredded onions, some pulled pork, and some cream cheese. I then sprinkled on some rub.


Last step was to wrap them with bacon and pin them with a toothpick and they were ready for the grill. 


I sprinkled on some garlic salt and then hit my pork with some fresh cracked black pepper and it as well is ready for the cooker. I also wrapped the bones with tin foil so they wouldn’t char up as after all, this is the handle.

I brought the cooker up to about 170 degrees so I could get more smoke for the first hour of the cook. 


The pork and the abt’s filled up the lower level of the cooker. 


A little later in the cook, I upped the temp to 350 degrees to finish my cook. 


The abt’s looking good just off the cooker.


We had some left over abt stuffing so I used it to make up about 10 pork shooters. These went on the grill next. 


Next on were my marinaded veggies and I used about half of them at a time. 


Next off the grill were my pork shooters or Pig Shots.


These are the grilled veggies just off the cooker and these things are just killer!


I took the pork to about 135-138 degrees measured in the center of the rack and took it off the cooker. I then tented it for about 45 minutes so the juice has some time to redistribute within the meat. 


I turned the meat over to make it easier to cut. 


Looks very good and I was ready to eat. 


All plated up and it turned out to be a pretty good meal for our 48th wedding anniversary.