Showing posts with label Ceramic Cooking Contraption. Show all posts

Thursday, March 26, 2009

Great Turkey + (Turkey Competition Recipe)

This is a great recipe and method for doing a great whole turkey or just cooking a couple of turkey breasts.

You will be brining and marinading at the same time and this will produce a wonderful result.

This recipe will work for both the turkey breasts and the whole turkeys.

Try to find a clean turkey that is not injected with the salt water and if you can't find one that way, try to get one with the least amount of injected salt water. You can probably find them from about 6 to 13% injected salt water so do go with something around 6% for the best results.

The turkey will be prepped about 12-14 hours before the fire so be sure you have the time.

BRINE, and it is injected into the turkey. Be sure the turkey is completely thawed if using a frozen bird.

This is Shake's Injectable Honey Brine with my slight changes and it is a great brine and I use it for all my poultry.

32 oz of water
1/4 cup pickling salt
2 tsp Tenderquick
1/3 cup honey
3 bay leaves
1/4 tsp gound cloves
1/2 tsp pickle spice

Heat this up on the stove to help it dissolve but do not boil or you will ruin it and have to start over. Just get it warmed up. Cool it down before injecting it into the turkey.


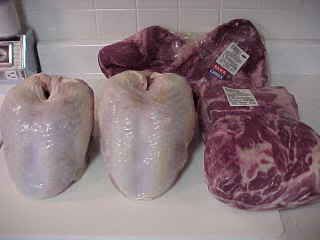
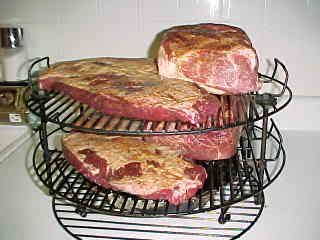
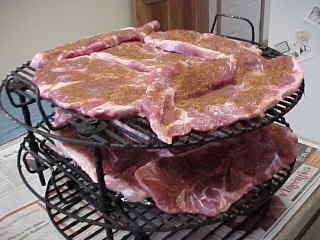
This cook included two turkey breasts that will be prepped with my recipe.


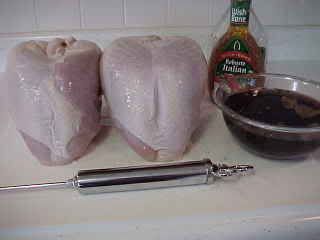
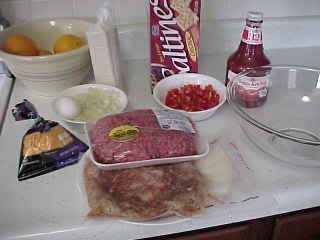
This picture shows the brine ready to be injected and also the marinade I use for this recipe.


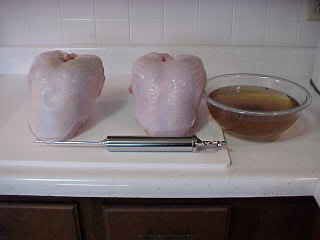
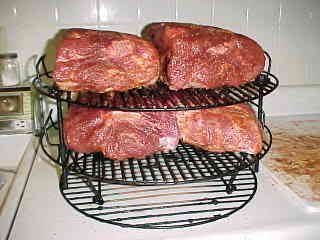
Yet another couple of breasts ready to be injected. We do this recipe about 6-8 times a year for the turkey breasts.

Inject 2oz in each leg, 2oz in each thigh, 4oz in each side of the breast. This is a total of 16 oz per bird or 8oz per whole breast. MORE is NOT better as it will make the turkey toooo salty!!!

MARINADE....I use Wishbone Robusto Italian salad dressing in the 16oz bottle and you need one bottle for each breast and about two bottles for a whole turkey.

You will be brining and marinading at the same time.

Place the brine injected turkey into a food grade small plastic bag and then pour the Wishbone over the bird. Align the turkey so it is longways in the bag and on one side of the bag. Carefully start at the bottom of the bag using both hands and work all the marinade up around the meat getting most of the air out of the bag and then tie off the bag. Better to have some help with this step. Place the bag and turkey on a platter and put it into the fridge for about 12-14 hours. You might turn it a time or two when you get into the fridge for a beer.


RUB...This rub has no sugar and will not brown or burn at any temp. (thanks mr. db)

1 TBl Salt
1 TBL Paprika
2 tsp Onion powder
2 tsp Garlic powder
1 tsp fresh ground black pepper
1 tsp White pepper

You will also use a light sprinkle of cayenne pepper directly on the turkey.

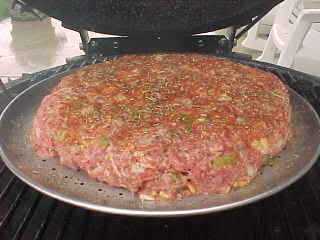
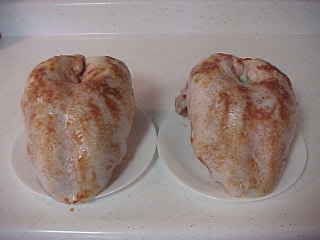
On cooking day, take the turkey out of the fridge and then out of the bag and set it on a counter top and let it warm up for about 30 minutes. Then sprinkle on a light coat of the rub and then sprinkle on a light coat of the cayenne pepper. Again, more is not better and it is very easy to over season your poultry.


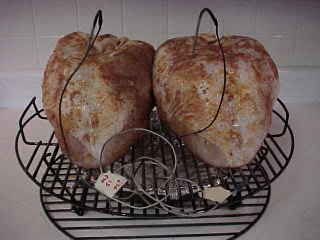
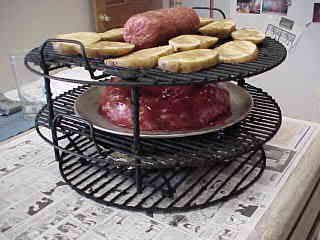
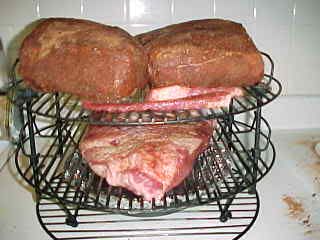
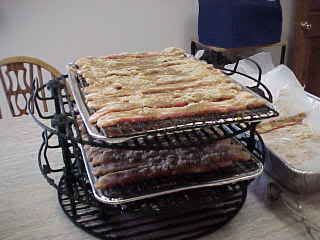
These two turkey breasts are in my contraption all ready to be carried out and dropped into my ceramic cooker as soon as the cooker gets on temp. I like to do the whole turkeys and also the turkey breasts at about 350 degrees indirect on the cookers if possible. It gets the skin better and cooks much quicker and I feel that I get a much better product at this temp.


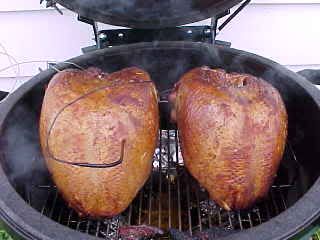
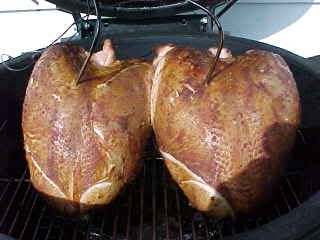
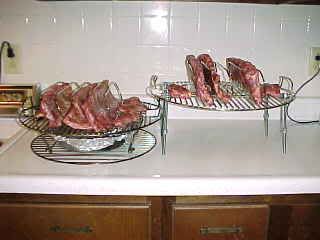
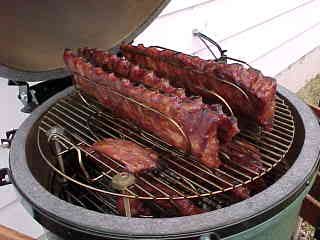
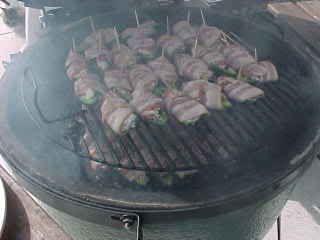
These are some turkey breasts on my large Egg.

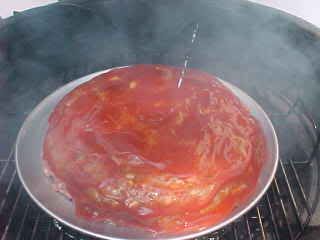
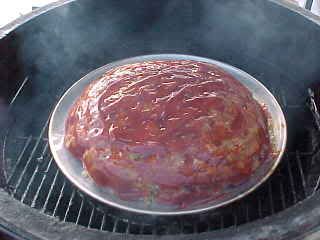
Again, cook the turkey at about 350 degrees using just a very small amount of mild smoke wood untill the internal measured in the thigh is about 170 degrees. Poultry really sucks smoke so do not use much for the best results. It can also be cooked at a lower temp but will take longer and the skin may not get as done or crispy as you like.


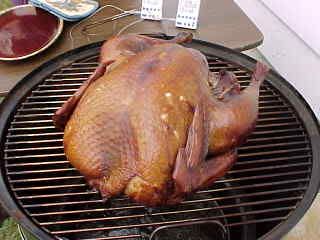
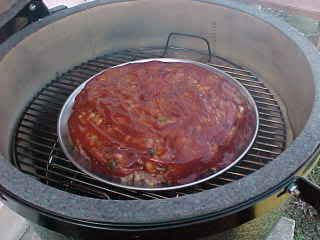
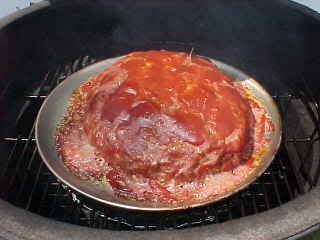
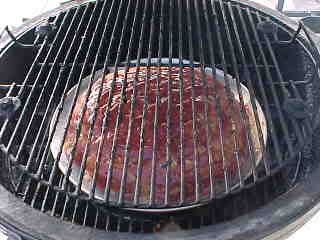
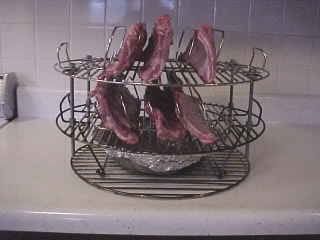
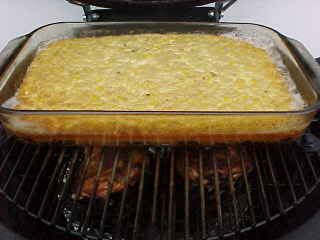
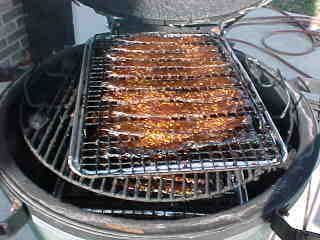
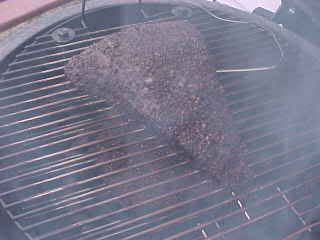
This is a whole turkey about half done on my WSM. To do them on this cooker, I run the water pan dry and use lump charcoal and just turn the cooker loose and let it rip. Always get great results.


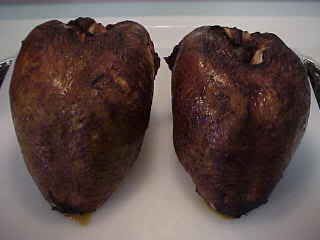
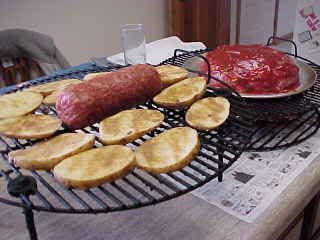
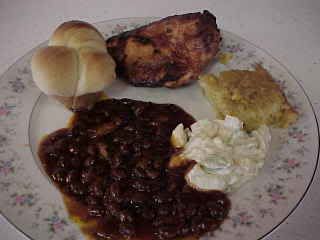
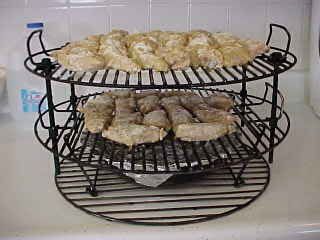
A couple of breasts just off the cooker.

Now for the contest cookers, I do like to do two breasts along with two of the smallest turkey legs I can find for my contest presentation. Be sure that you do the two legs exactly like the breast as there will be a judge that will select that piece out of the box instead of the breast meat.

Contest Presentation....There are several ways to present the bird in a contest. I like to use a presentation piece like one of the legs in the box at an angle and then fan sliced breast around it and then garnish to look good. Another way that has done well for me is to slice a very thick piece off of one side of the breast and then place it meat side down to where the skin side of the breast shows in the box and then fan the thinly sliced breast meat around it. Just before you close up the box, very carefully spray lightly all the meat in the box out of your pump sprayer with HOT strained low salt chicken broth.

Enjoy...

Friday, March 20, 2009

High Temp Brisket / Direct Cooked

This is my method of cooking a brisket direct at a higher temp that will result in the meat tasting just like a good "steak" and cut the cooking time to less than 5 hours. It will also give you a very tasty, tender, and juicy finished product.

It is best done on a cooker where you can place the meat above the open coals at enough distance above the hot coals so the drippings don't flame up and sear the bottom of the meat.

This cook MUST be done direct with the meat straight above the open fire as the drippings must go into the fire. This will give you a completely different and wonderful flavor of the finished meat. Steak, I tell ya!

The meat needs to be on some type of raised grid in a ceramic cooker as you need to get the meat as far above the fire in the cooker as possible to prevent flame ups from the fat burning the bottom of the meat.

Let's get started...


I like to use a big brisket flat and my Sam's club has the real nice choice flats that usually weigh above 7 pounds and do have some fat left on them. They also sometimes leave about half the point on the brisket like the one in this picture. I do trim up the fat to about 1/8" thick on the fat or cap side of the brisket.


Now, this isn't bbq...keep all your rubs in the pantry and just get out some garlic salt and some black peppercorns. Grind on a fairly heavy layer of black pepper on both sides of the meat. On top of this, sprinkle on a layer of the garlic salt on both sides.

Get the cooker up to a temp of about 350 degrees and then put on your smoke wood and do use a large amount as it doesn't last long at this raised temp. I used cherry for my cook yesterday and about 7-8 chunks.


Place the meat on your raised grid in the ceramic smoker fat side down.


With the fat dripping on the fire, you will get a lot of smoke but this is normal for a direct cook.

My cooker wanted to run at about 365 degrees yesterday so I just let it and I cooked the meat to about 175 internal and this took exactly 2-1/2 hours and then I foiled the meat.


Sure did look good just before it went into the foil.


For my Au Jus, I mix up about 2-1/2 oz of beef broth and about 1-1/2 oz of worchestershire sauce and pour it into my foil boat.


Place the brisket in my double layer foil boat and wrap it up.


Cook the brisket until the internal is around 210 degrees and I know this is hotter than normal but it does take this finish temp to get this meat to where it is tender at this higher temp. Be very careful when checking the brisket with your Thermopen and don't stick it all the way thru the meat and poke a hole in the bottom layer of the foil and let all the juice out. The total time in the foil yesterday was one hour to get to my finish temp.

The total cooking time for this wonderful treat was just 3-1/2 hours.

I will usually let the meat rest in the foil for at least an hour before I cut it up. This is enough time for the juice to redistribute inside the meat.

I carefully take the meat out of the foil over a bowl as I don't want to loose any of the Au-Jus. I put this juice into a plastic squirt bottle for serving at the table.


I then cut the meat to the thickness I want and as you can see, it is very juicy and tender.


Take a real fresh onion bun and cut in half, grill or toast it, put a ribbon or two of horsey sauce on the bun, lay a couple layers of this steak brisket on the bun, and then squirt some of the Au-Jus over the top and enjoy.

Wednesday, February 25, 2009

Meatloaf on a Smoker/Cooker

Meatloaf is wonderful cooked on an outside cooker/smoker with just that light hint of smoke flavor. It is very easy to oversmoke this treat so I usually don't use much smoke wood for my cooking. It is also a great treat for the low-carbers if you use the Heinz One Carb reduced sugar ketchup over the top of the meat and leave out any of the fillers that would have carbs.

Meatloaf can be made with many different ingredients and I prefer to use some of the following for my loaves. This would make up about a 2-1/2 pound loaf.

1 lb Italian or a tube of hot sausage.
1 lb 70% lean hamburger
Sharp cheddar cheese
Egg
Onions
Bell peppers
Roasted red peppers
Italian spice
Salt
Pepper
Mushrooms
Black olives
Filler--either oats, crackers, or bread crumbs


The above picture show a 1-1/2 pound package of my homemade super spicy Italian sausage and about 1-1/2 pound of fatburger for the meat in this loaf. I like to keep the meat about 50/50 hamburger and sausage for my regular loaves.


I like to cook my meatloaves on perforated pizza pans as I don't like the meat cooked in its own grease. The grease will drip thru the holes in the pan and this makes for a better result. I use the handle end of a wooden spoon to make some indentations in the top of the loaf for the ketchup and then pour some over the top of the meat just before it goes on the fire.


This is the meatloaf about done in the ceramic cooker. I usually use a temp of about 350 degrees for this treat and take it off the cooker when the meat reaches about 165 degrees internal. I usually don't use any smoke wood as the lump charcoal will give the meat enough smoke flavor.


Another loaf going on the cooker.


Meatloaf done.


More meatloaf going on the ceramic cooker.


About done on the cooker.


This is my Cajun meatloaf and it has some Cajun spices and some crawfish tails in this loaf along with my regular ingredients.


This is a mixed cook with the meatloaf on the lower grid in the ceramic cooker.


I then added my upper grid.


Placed a pan of rolls above the meatlaof.


Rolls done and ready to come off the cooker.


This is another mixed cook that I am getting ready in my contraption for the ceramic cooker. This cook is a meatloaf, some slab potatoes, and a sausage fattie.


It is now ready to be carried out and placed on my ceramic cooker when it's on temp.

Meatloaf is a great treat and very easy to do on about any type of outside cooker.

Sunday, January 25, 2009

Ceramic Cooking Contraption

Shortly after my purchase of my first Big Green Egg in the Fall of 1999, I decided to see if I could increase the capacity of this great little cooker. At this time, there were a few cooks using fire bricks and beer cans on top of the standard grid to add a second grid to increase the cooking space. While this setup did indeed seem to work, it was a really poor method for the cooker.

I had a few things in mind for my first proto-type "contraption" and just purchased all the parts and put together the first unit. Planned to use it for a few cooks and then make any improvements necessary to make it work better.


The contraption is built out of two 18-1/2" Weber replacement grids with handles and you must have the handles. These grids only measure about 17-1/2 inch across the od but are called 18-1/2 because they fit two of the Weber 18-1/2 inch cookers. The lower grid is the BGE Grid Extender which can be purchased from BGE. Then you need a 3 foot section of 5/16" threaded rod which can be found at any hardware store. Next is eight 5/16 inch fender washers, four 5/16" lockwashers, and sixteen 5/16" nuts. The drip pan should be a deep dish pie pan that should be about 11 inches (no more) in diameter and this can be found about anywhere. A fellow with just a hacksaw and a file or grinder can put this together in about an hour.
If a fellow didn't have any of the parts and had to buy it all new, would cost about 50 dollars which is money well spent as there is nothing better for the large Egg.

The capacity with this setup is about 10 slabs of ribs in rib racks, 4 large or 6 small pork butts, 2 meatloaves of about 16 pound total, 3-4 brisket flats although you may need to cut one in half if they are large, 10-12 pounds of jerky, 4 butterflied whole chickens, 4 whole turkey breasts, and several other large cooks.

I will list some of the features with my contraption setup. This first proto-type has over 4000 recorded cooking hours of use in the last 9 years and is still going strong.

1. The top grate is adjustable in height although I keep it at about 4-1/2 inch above the lower grate for everything except 4 turkey breasts.

2. The top grate just lifts off to service the meat on the lower levels in the cooker. I like to baste my meat and also put a glaze on the meat about 30-45 minutes before it comes off the cooker. I keep a small table beside the cooker and when I want to baste, I just open the dome, reach down and pull the upper grid off the cooker and set it on the table, spray or mop the meat on the lower level, place the upper grid with the meat back in the cooker, spray or mop this level and I am on my way again. I do the same thing with my glaze near the end of the cook. I also have to add charcoal at about the 8-9 hour mark into the cook with my heavy loads so I just reach down and get the handles of the lower grid and pull the whole setup with the meat out of the cooker and set it on my table. I then stir the remaining charcoal down and add more and replace the setup back into the cooker and I am on my way again. Takes about 90 seconds.

3. All setup work can be done on the kitchen counter top. I just get each cook ready in the kitchen and then fire up the cooker and when it gets on temp, I just carry the setup with the meat out and drop it into my cooker. This is really nice in the rain, cold, snow, and whatever as I don't really like to spend a ton of time out in the nasty weather if I can prevent it.

4. This setup will double the capacity in the cooker.

5. The lower section minus the top grid is used in all my smaller cooks and again, it can be all setup in the kitchen and then dropped into the cooker when the temp is right.

6. You can cook both indirect or direct by the use of my drip pan. You can also use the top grid only if you need to cook something on just a raised grid.

Ok, we'll do some pictures...


I am setting up a 6 slab rib cook in the kitchen.


Ready to be carried out and dropped into my hot cooker.


Ribs about done in the cooker. I never have to reverse the grids or move anything around as this setup work great.


This is two pork butts over a packer brisket ready to go on the cooker.


Prepping a 34 pound pork butt cook.


Two butts and three flats about ready to go on the cooker.


Prepping 10 large pork steaks.


Ready for the cooker.


This is a two part cook and this is the first part and it is drbbq's corn casserole over 4 chicken breasts ready to be carried out and placed on the cooker.


The cook about done.


Just as soon as the first part of the cook was done, I raised the temp to 375 degrees for my rolls and beans and placed them on the cooker. You can't see the lower grid in the picture but it had the baked beans in a glass bread pan.


The results of this one cook. All but the potato salad wad done in this cook.


A couple layers of abt's just going on the cooker.


Prepping two layers of pig candy.


About done on cooker.


Prepping wings.


Wings on two layers about done on the cooker.


Four pork butts about done on cooker.


Two turkey breasts about ready for the cooker using only the lower section of my contraption.


A two layer smoke of my pastraimed beef about done on cooker.


Four more pork butts on cooker.


This is a meatloaf and Cresent roll cook. I set this one up on the cooker. I like to cook all my meatloaves on a preforated pizza pan so the meat doesn't cook in it's own grease.


Placed my upper grid on the cooker.


Added the pan rolls.

I did call this contraption a proto-type but it just works so great that I never did figure out any way to improve it!!