Showing posts with label Hasty Bake / Classic Cooker. Show all posts

Wednesday, May 2, 2018

Smoking Cheese on my Hasty-Bake Gourmet

I smoked a little over 28 pounds of cheese on my Hasty-Bake Gourmet and it came out great. 

 photo IMG_1441.jpg

This is the cheese I started with for this smoke. I had some Cheddar, Sharp Cheddar, Swiss, Colby Jack, Gouda, Farmers Cheese, Dubliner, and my favorite which is the "Three Alarm" Cheese.

 photo IMG_1442.jpg

Prepping the cheese for smoking.

 photo IMG_1444.jpg

This 28.37 pounds is about all I can fit in the cooker.

 photo IMG_1445.jpg

I have a pan of ice under my cheese to help hold the temperature that I want to run in the cooker for this treat. Never over 80 degrees in the cooker for the best results.

 photo IMG_1446.jpg

My fire was 5 all hardwood briquets with a piece of hickory over it for my smoke.

 photo IMG_1448.jpg

My Gourmet just doing it's thing on this cool morning.

 photo IMG_1449.jpg

Just out of my Hasty-Bake Gourmet and ready to be run thru the vacuum pack machine.

I smoked this batch of cheese for 115 minutes.

 photo IMG_1450.jpg

Vacuum packing the cheese.

 photo IMG_1451.jpg

My 28 pounds of smoked cheese vacuumed packed and ready for the fridge.


Thursday, October 12, 2017

Smoking Cheese in the Hasty-Bake Gourmet

I have been waiting patiently for some cooler weather as we are completely out of smoked cheese. I need a day or morning at about 50 degrees or under. 

 photo IMG_0957.jpg

This smoke was about 10 pounds of cheese including the following:

2 pound pepper jack
2 pound sharp cheddar
2.28 pound 4 year aged cheddar
1.14 pound Swiss
8oz monterey jack
8 oz mild cheddar
8 oz sharp cheddar
1.67 pound three alarm colby jack

 photo IMG_0958.jpg

I started the smoke early in the morning as I wanted the coolest temperatures of the day.

 photo IMG_0959.jpg

I used a half hotel pan full of ice to help hold down the temperature inside the cooker.

 photo IMG_0960.jpg

I used 5 all hardwood briquets for my fire and a couple of chunks of hickory for my smoke wood for this cook.

 photo IMG_0962.jpg

Was a nice morning with a cooler temperature of about 50 degrees. The cheese took 90 minutes to get done. I was able to keep the temperature inside the cooker at under 70 degrees which is great for smoking cheese.

 photo IMG_0967.jpg

The results of my smoke ready for the vacuum pack machine.

 photo IMG_0968.jpg

Bagged and ready for the fridge.

 photo IMG_0971.jpg

This should hold us for a few months.

 photo IMG_0973.jpg

Gotta love smoked cheese off of a Hasty Bake. And for any folks that have not tried real smoked cheese, you are missing out on a great treat. Most all smoked cheese available in outlets hasn’t been even close to a smoker... it is done with chemicals. 


Sunday, June 4, 2017

Hasty-Bake Gourmet / Rib-O-Lator Rotisserie

I use the Rib-O-Lator in both my Weber Performer and my Green Mountain Daniel Boone grill but had not tried to set it up in my Hasty-Bake until yesterday. I did have to make a few adjustments to get it to work like I wanted and here is my first cook. 

I decided to cook a couple of slabs of pork loin back ribs, three pork steaks cut about 1/2” thick, and a big pork chop that I had left in the freezer. 

 photo IMG_0399.jpg

I trimmed the meat, and then added my rub, and when it got to the sweat stage, I put it on the Rib-O-Lator which was spinning on my all Stainless Steel Model 257 Gourmet Hasty-Bake cooker. 

 photo IMG_0410.jpg

I had figured that I would need about four hours in the cooker so I had loaded up enough fuel for that length of time and added a couple chunks of hickory for smoke. Everything looked good at the start of my first cook.

 photo IMG_0411.jpg

About 90 minutes into the cook, my pork steak and pork chop was nearing my finish temperature so I applied my glaze and let it cook an additional 15 minute and pulled them off of the cooker. 

 photo IMG_0413_1.jpg

When I pulled my steaks and chop, I also wrapped my ribs with some goodies. After an additional 45 minutes, the ribs were at 204-207 degrees internal which is my finish temp for this meat so at this point, they were unwrapped and placed bock on the cooker for my glaze. 

 photo IMG_0414.jpg

I let them glaze for about 15 more minutes and pulled them off the cooker. 

 photo IMG_0418.jpg

 photo IMG_0419.jpg

I had one of the pork steaks and a couple of ribs and some mashed potatoes with some  good ole white gravy made with bacon fat, and Mommy made up some cole slaw for my salad. Was way too much but the part I got eaten was sure good. 


The Rib-O-Lator worked fine in this cooker so I am sure it will see some more use in the future. 

Sunday, April 16, 2017

Hasty-Bake Ranger Mini Review and 1st Cook

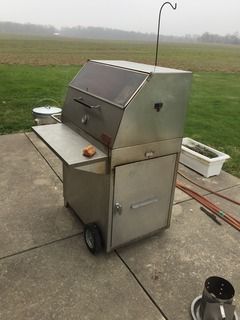
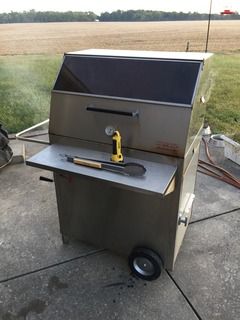
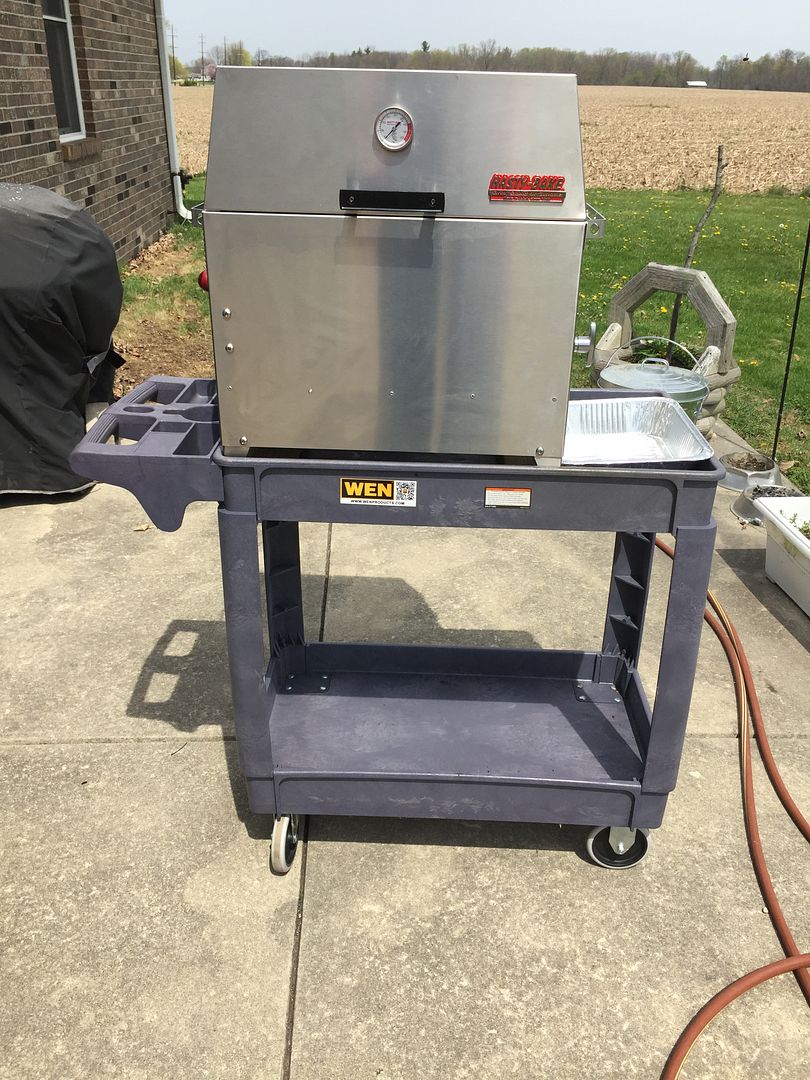
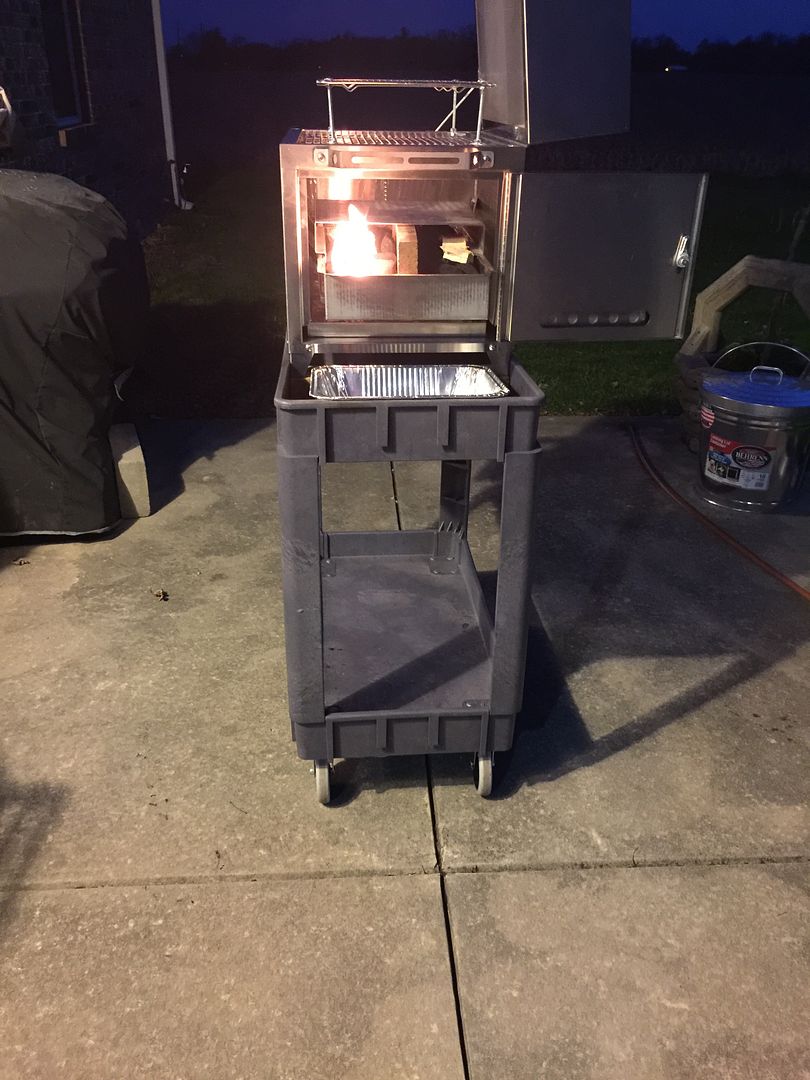
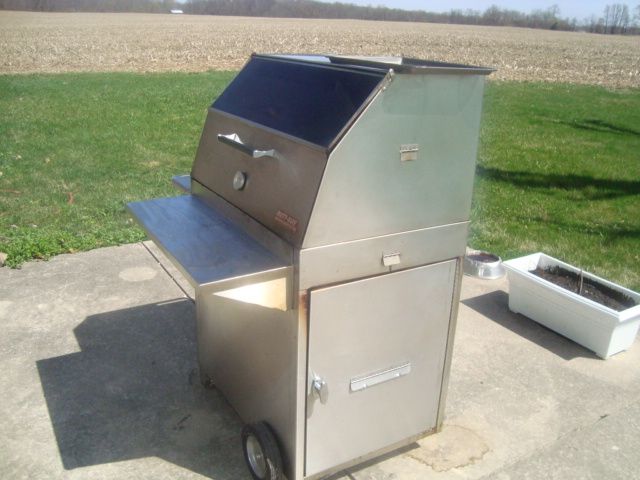
I have finely got around to setting up my new Hasty Bake Ranger 380SS to suit me and then doing my first cook on it.

 photo IMG_0363.jpg

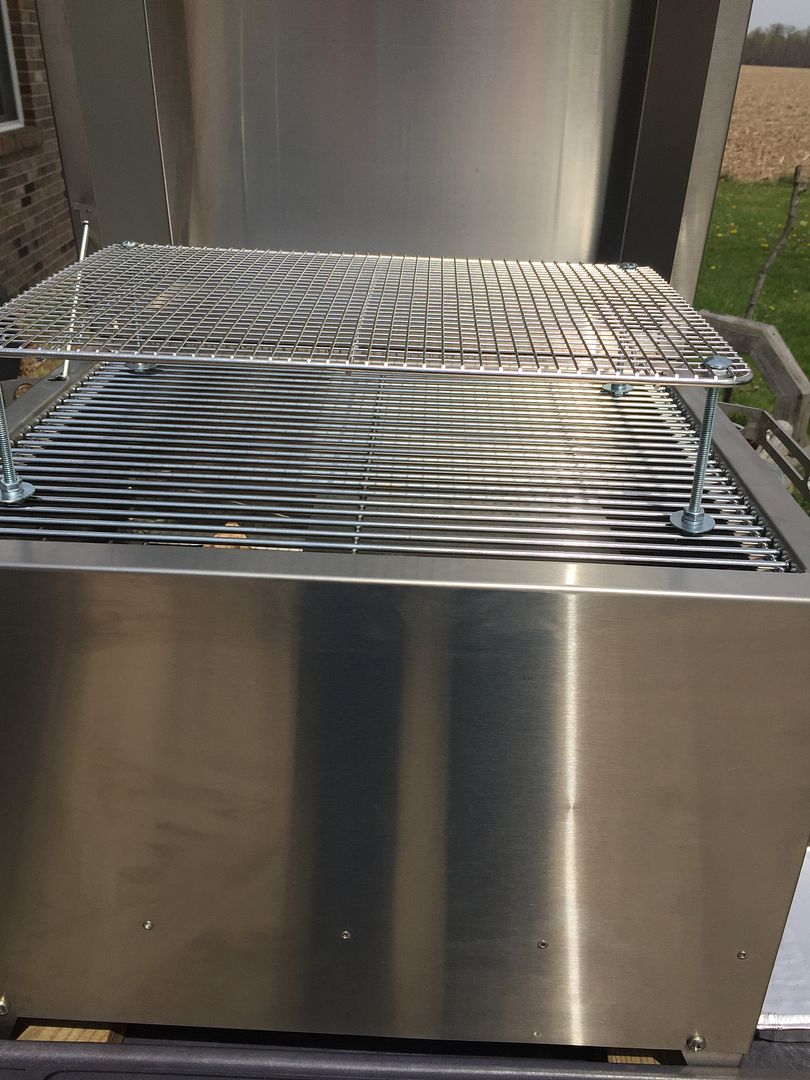
I have it sitting on one of my service carts to make it much easier to use.

 photo IMG_0364.jpg

Built a Stainless Steel second cooking grate for the cooker. 

 photo IMG_0366.jpg

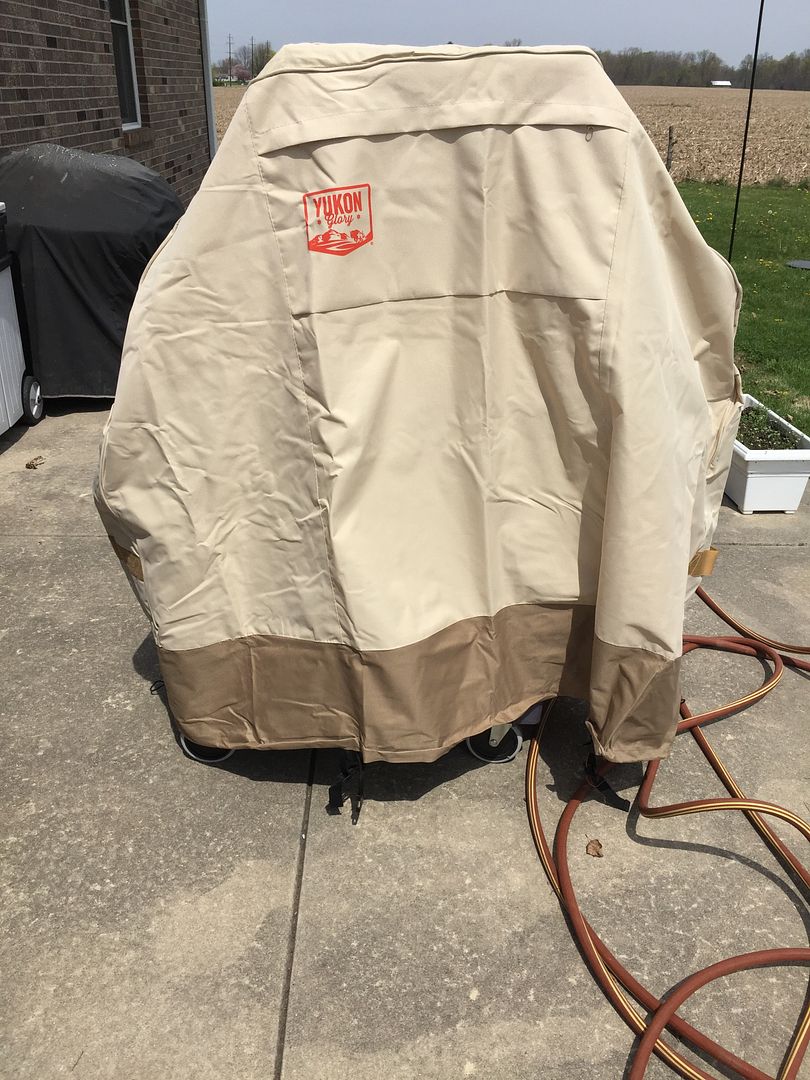
I also found a nice cover to fit this setup.

 photo IMG_0362.jpg

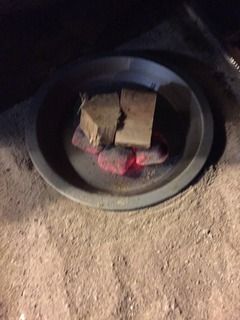
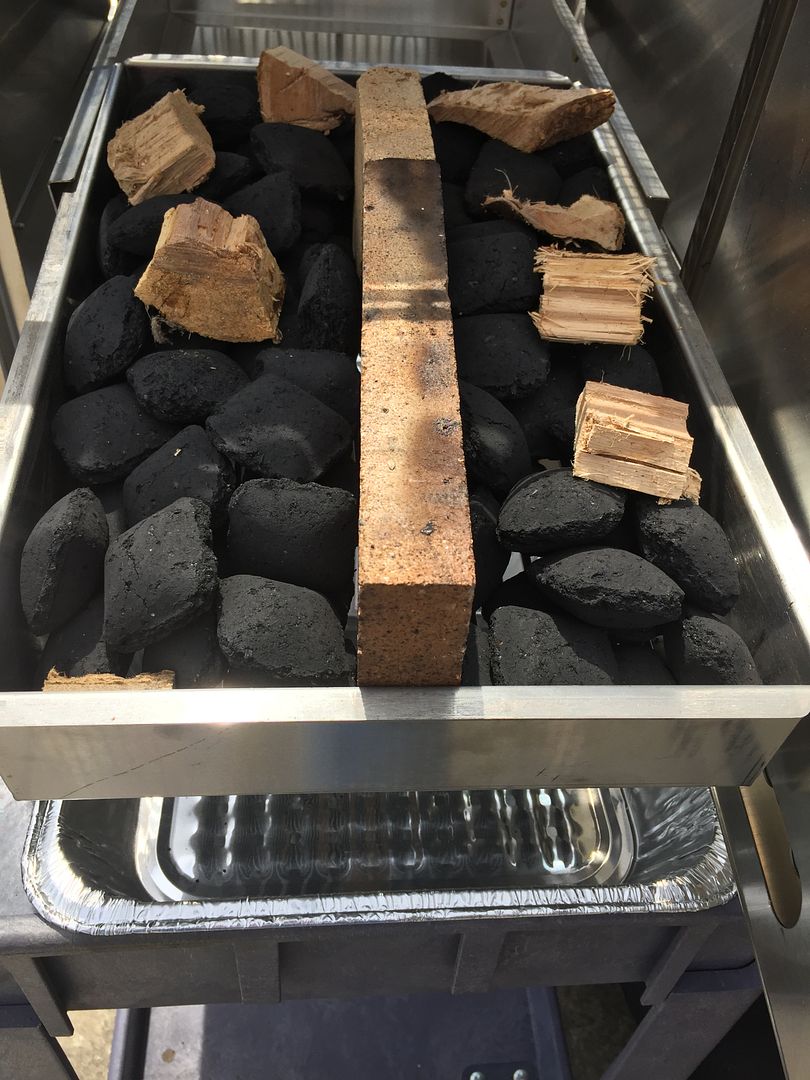
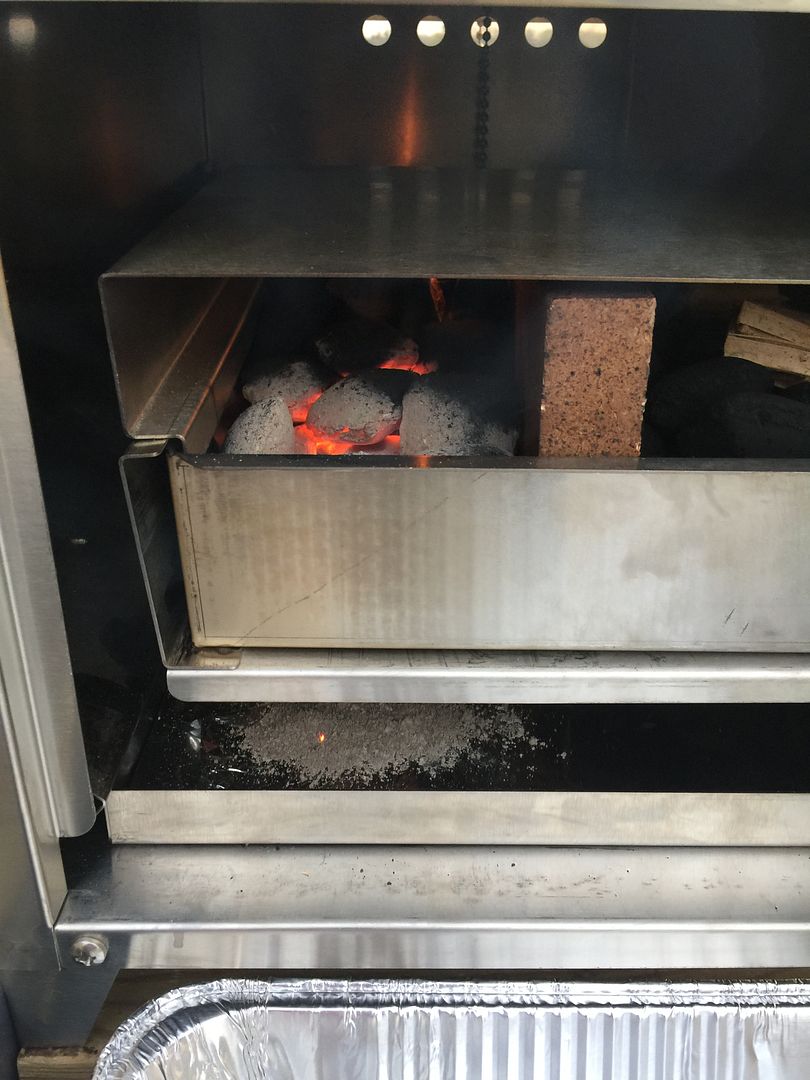
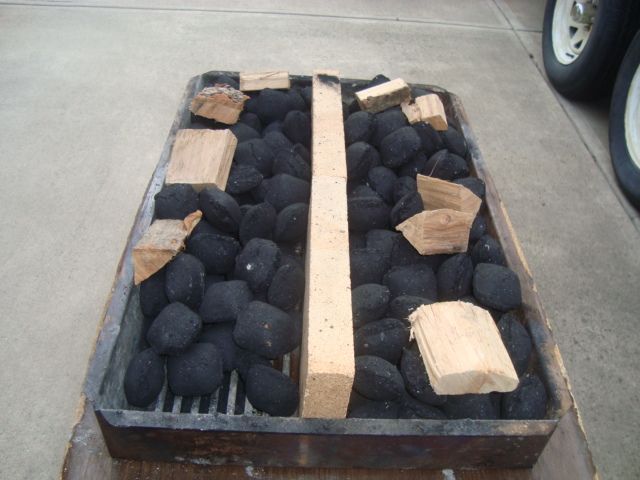
Next step was to cut a firebrick in half and then adding one whole firebrick to make my divider in the firebox for my fuse burns which is the method I use for my longer cooks in my Hasty-Bake cookers. 

I figured my first cook could probably take up to 5-6 hours so I loaded the charcoal pan about 80% full of the Stubb’s charcoal and added a few hickory chunks for smoke.

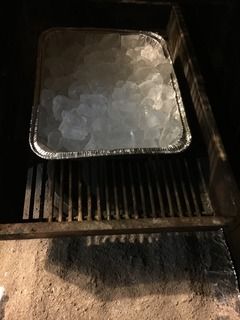
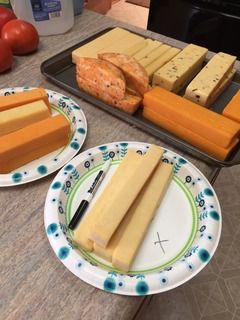
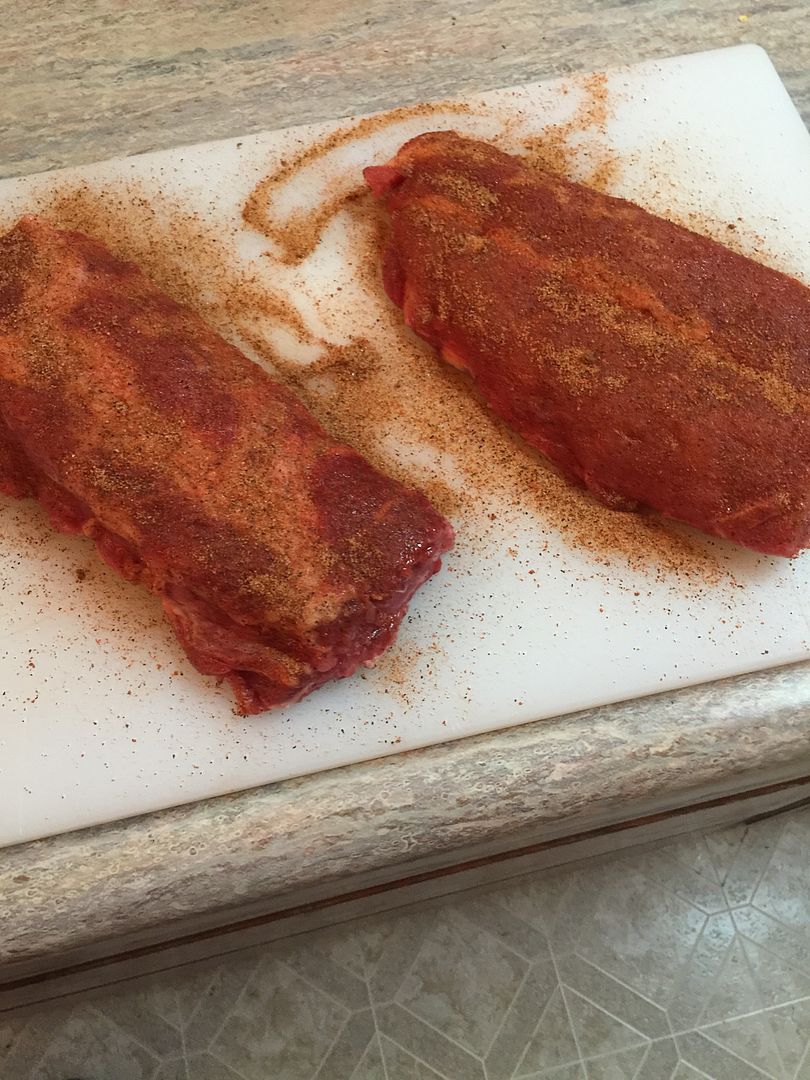
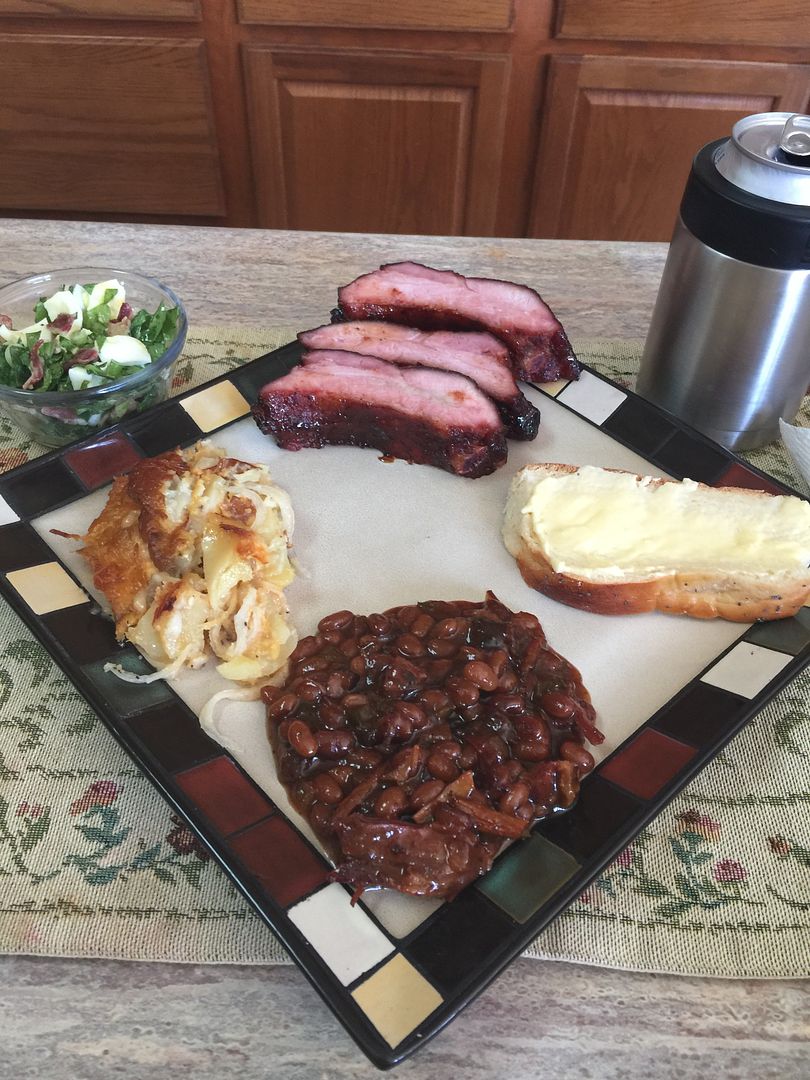
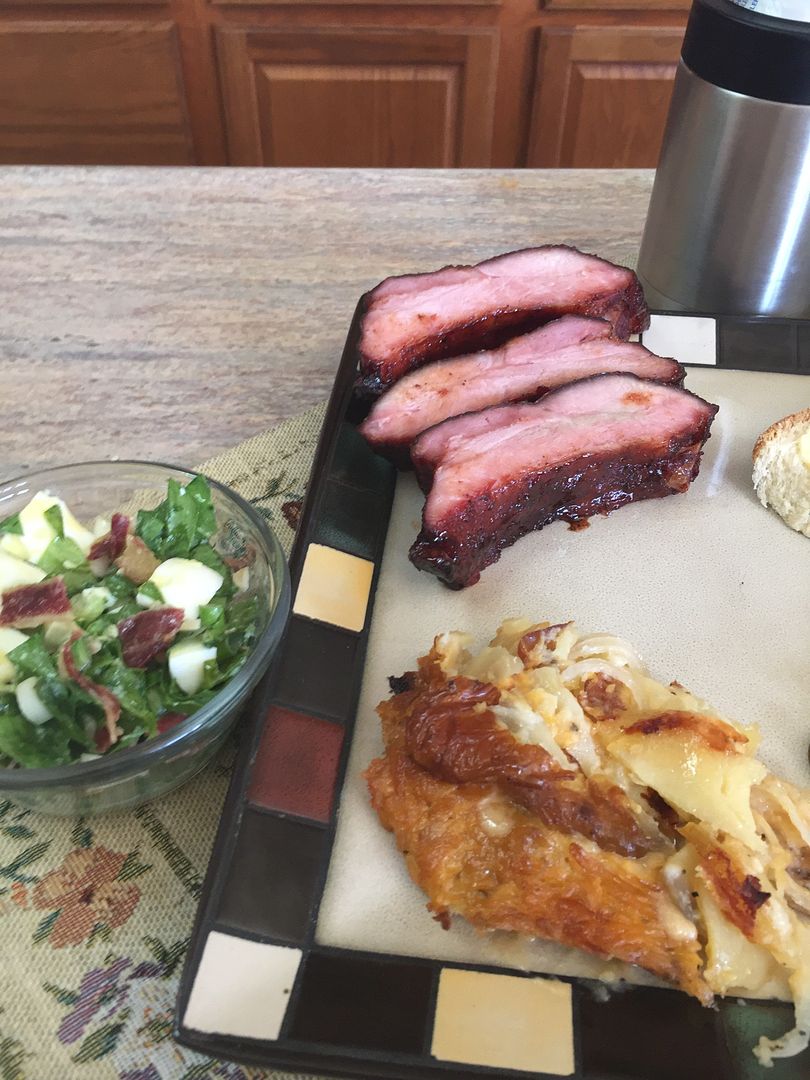
My first cook was to be a Slab of Ribs cooked over a half pan of BBQ  Pit Beans so the drippings would go into the pan to give the beans some additional flavor, and a pan of Au Gratin Potatoes. Wife made up a Wilted Baby Spinach Salad to go with this meal. 

 photo IMG_0367.jpg

 photo IMG_0368.jpg

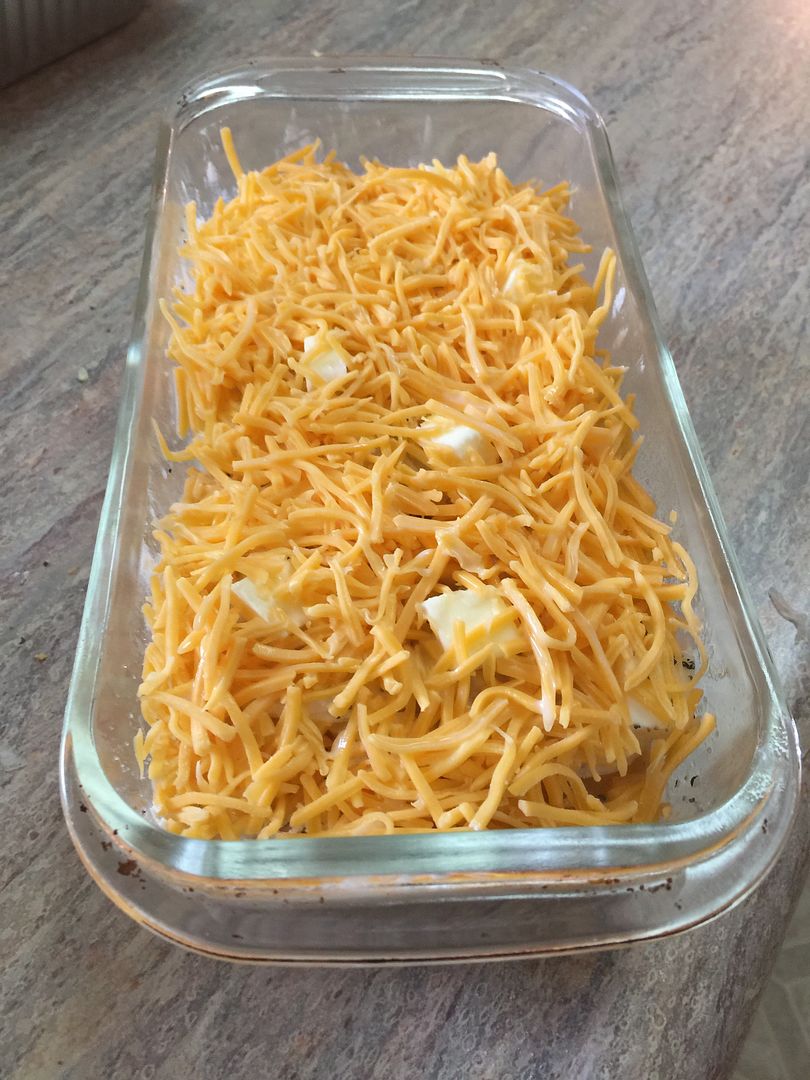
Made up the pan of Au Gratin potatoes the evening before the cook and then did the same for my BBQ Pit Beans and put both into the fridge. 

 photo IMG_0369.jpg

Started my fuse burn the next morning just before daylight and it took about 45 minutes to get the cooker warmed up and on temperature for my cook.

 photo IMG_0370.jpg

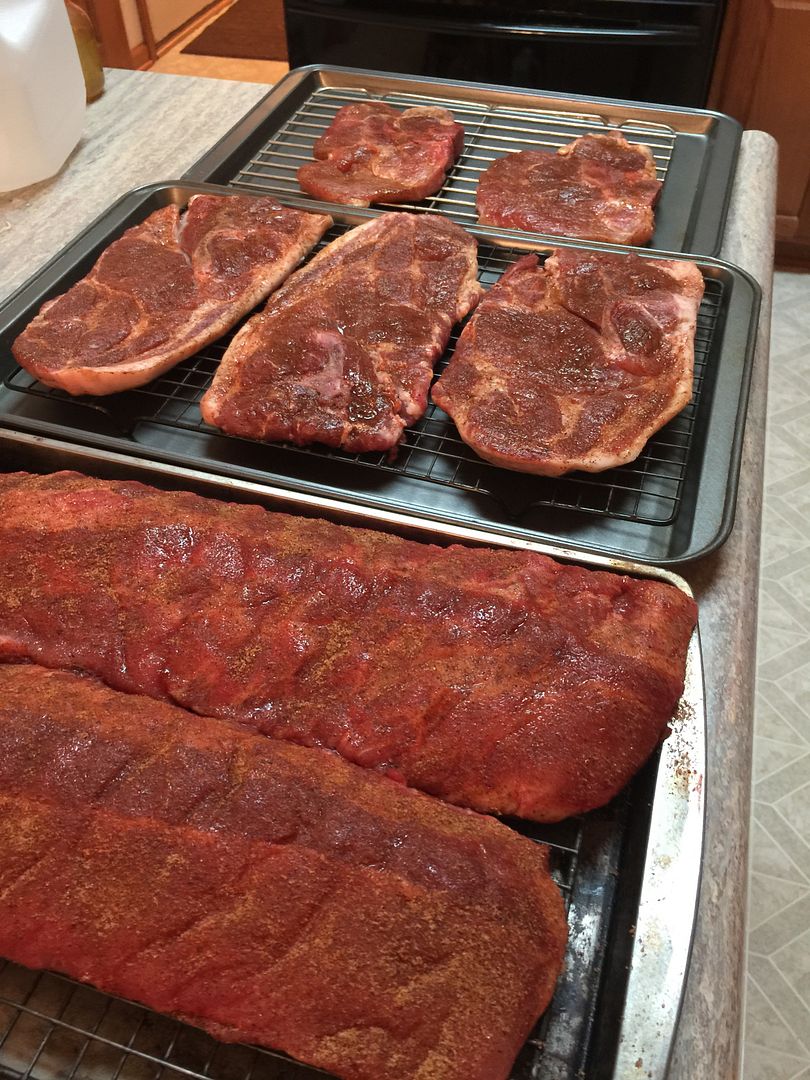
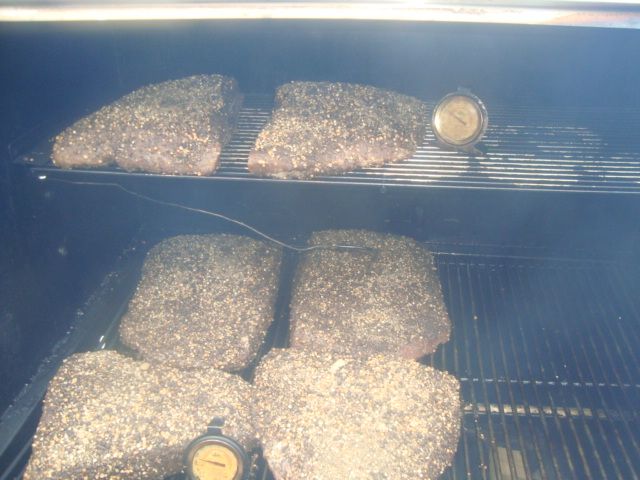
While the cooker was coming up to temp, I prepped the ribs and then cut the slab into two pieces so they would fit over my pan of beans. At this time, I also added my brown sugar to the top of my bean pan. When the ribs reached the sweat stage, I started my cook. 

 photo IMG_0371.jpg

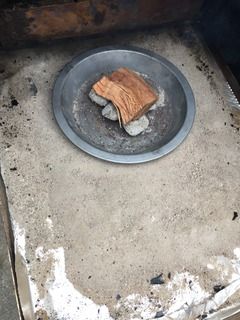
The fire in the charcoal pan just before I loaded the cooker...cooker temp was at 180 degrees and climbing slowly. 

 photo IMG_0372.jpg

This is about an hour into the cook and after I got the cooker vents adjusted for a nice steady burn.

 photo IMG_0373.jpg

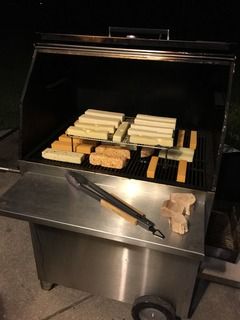
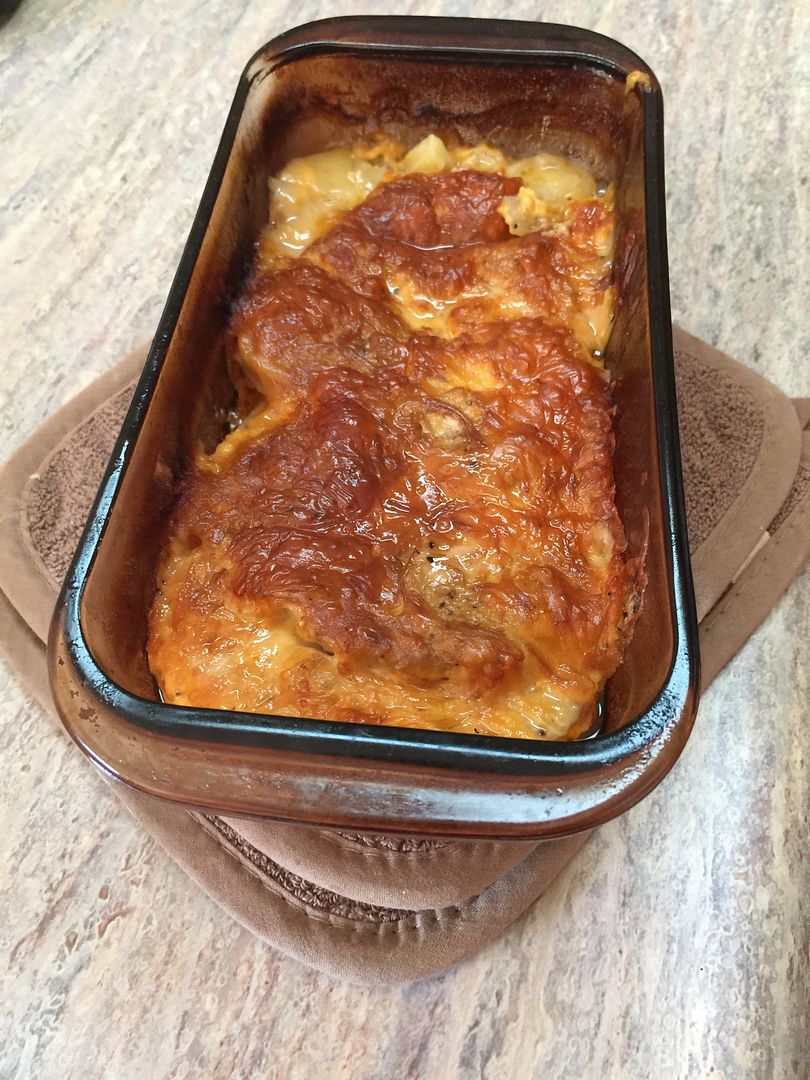
The first item done were the potatoes.

 photo IMG_0374.jpg

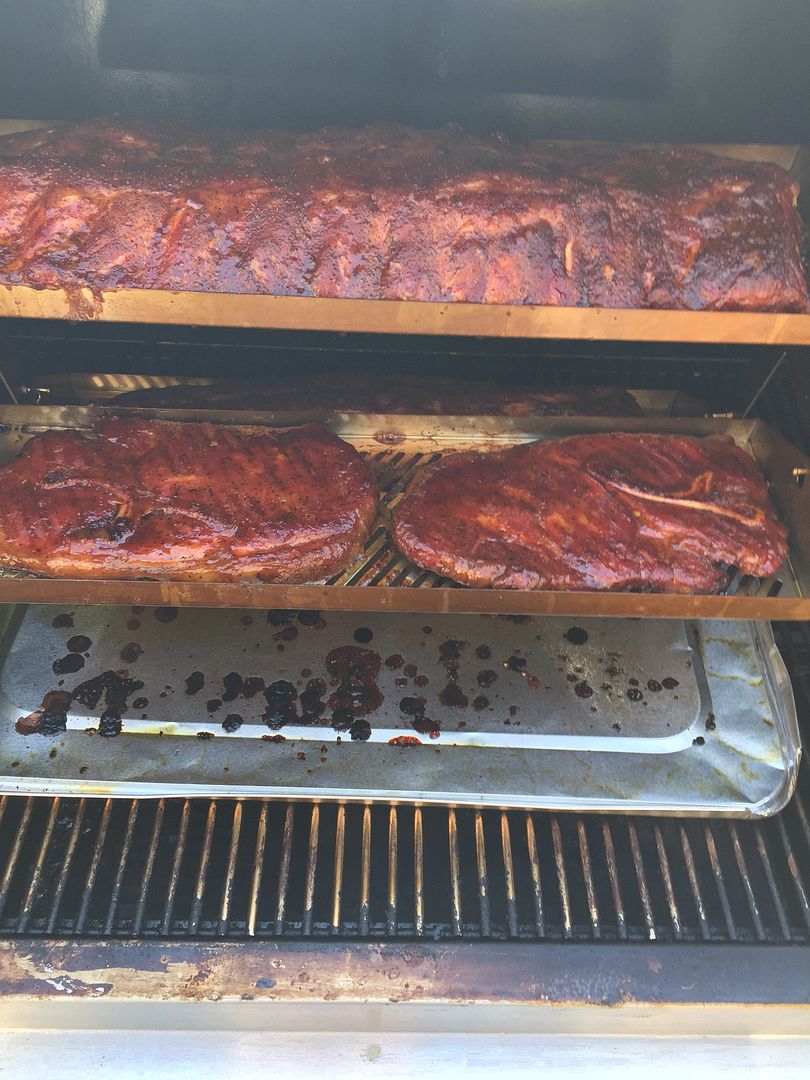
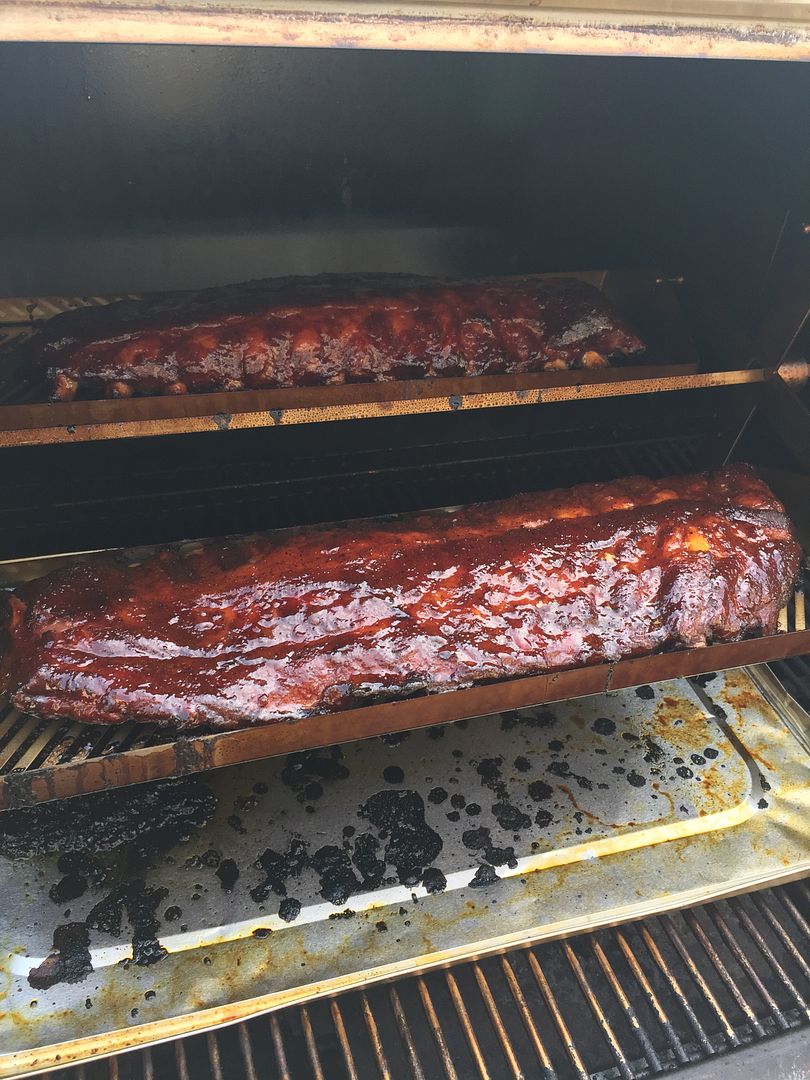
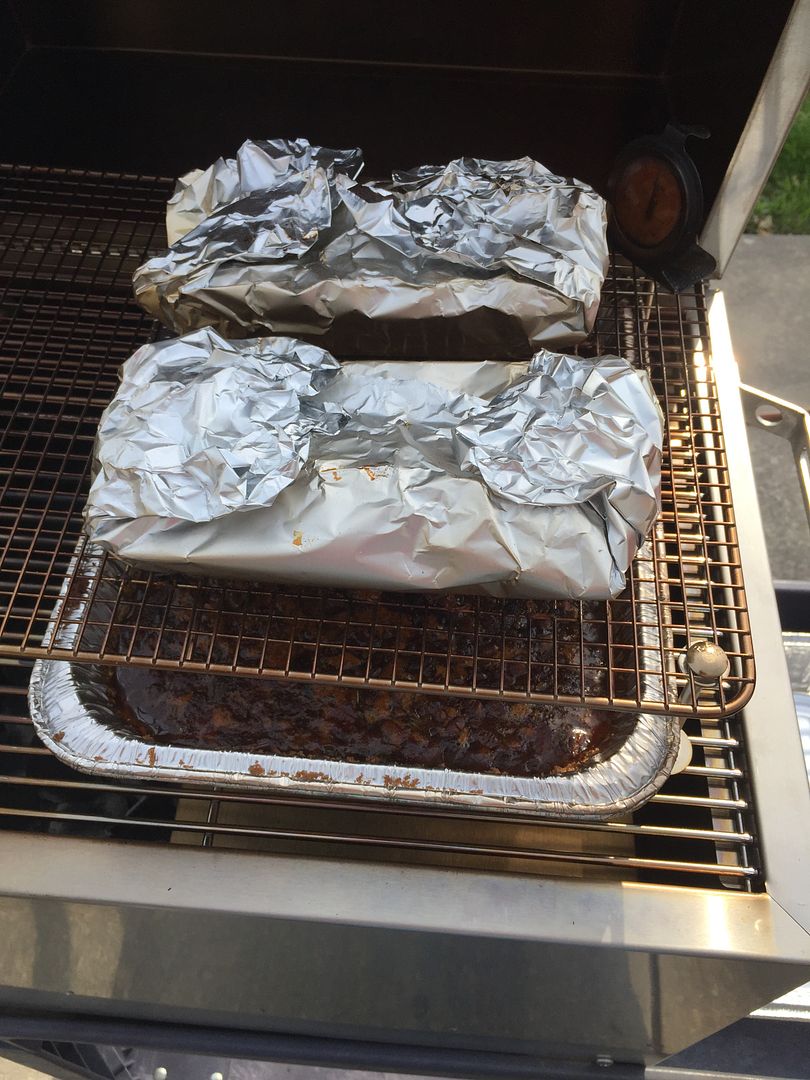
Ribs were wrapped with some goodies about 2-3/4 hour into the cook.

 photo IMG_0375.jpg

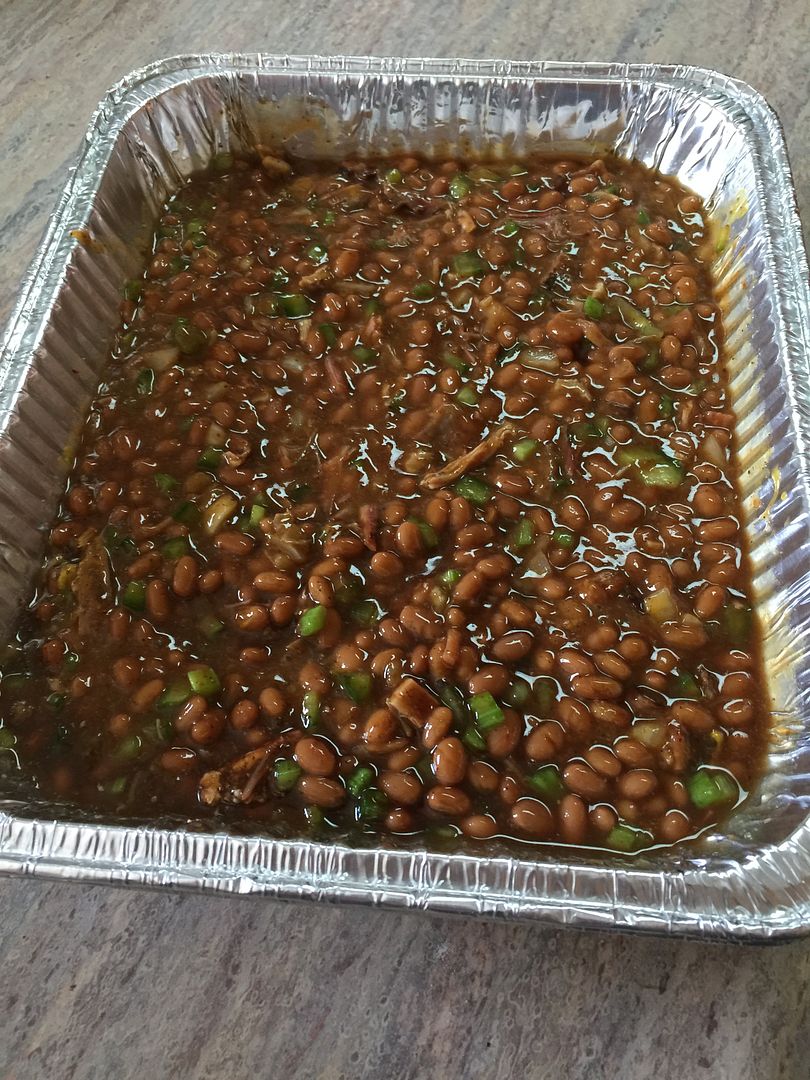
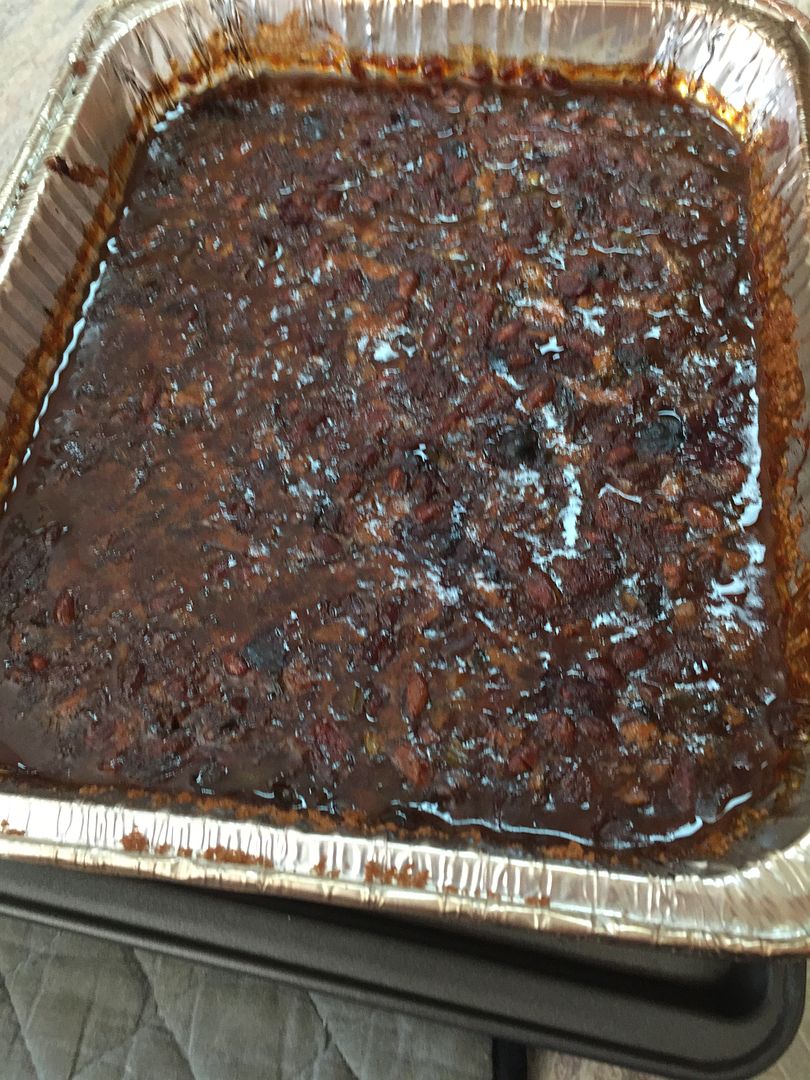
The beans were the next item to get done and I hadn’t stirred in all the drippings and smoke skum when this picture was taken. 

 photo IMG_0376.jpg

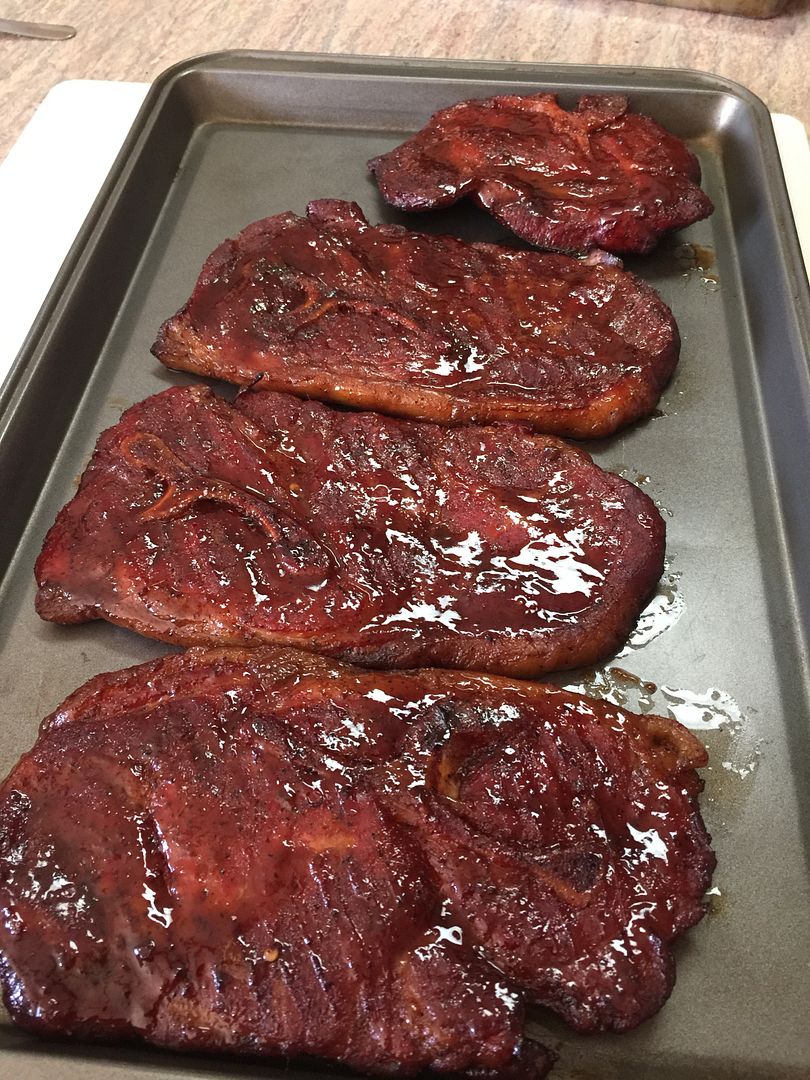
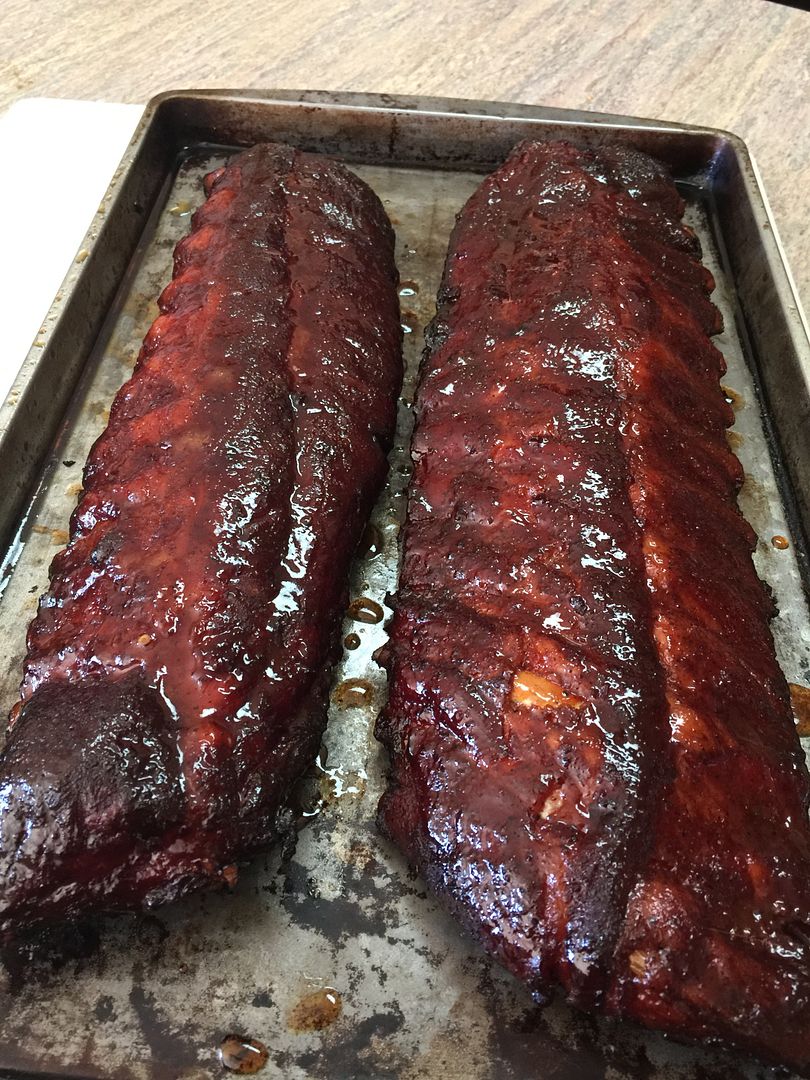
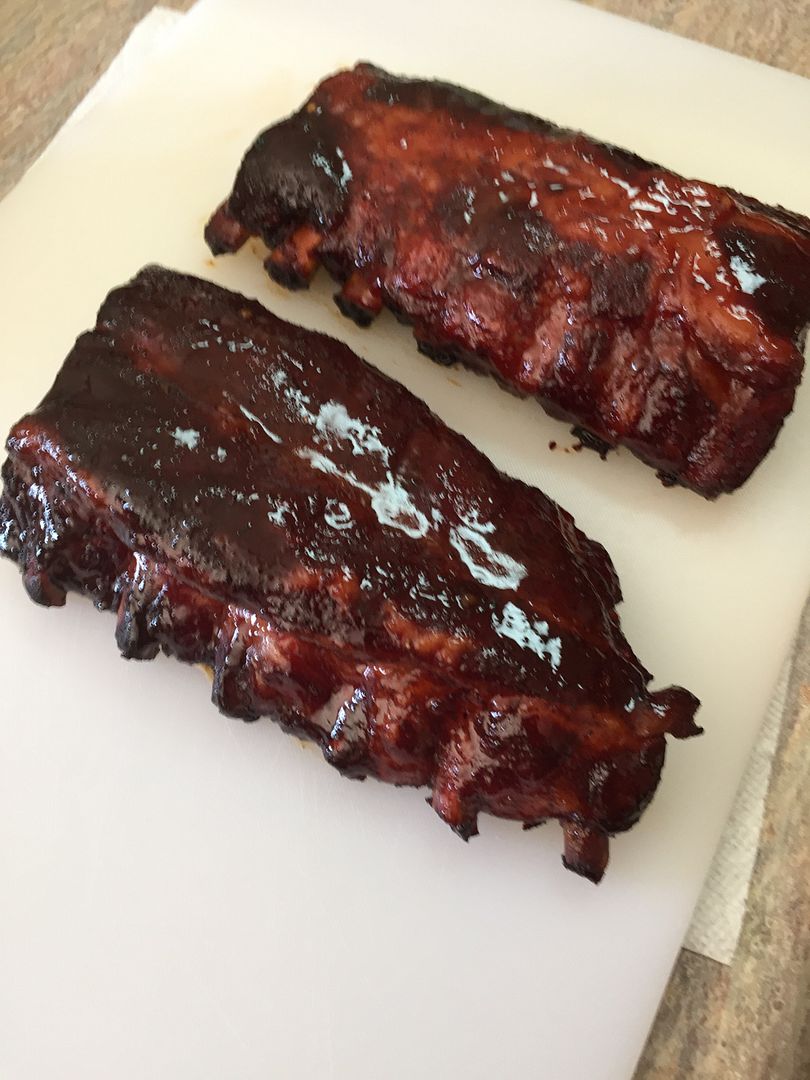
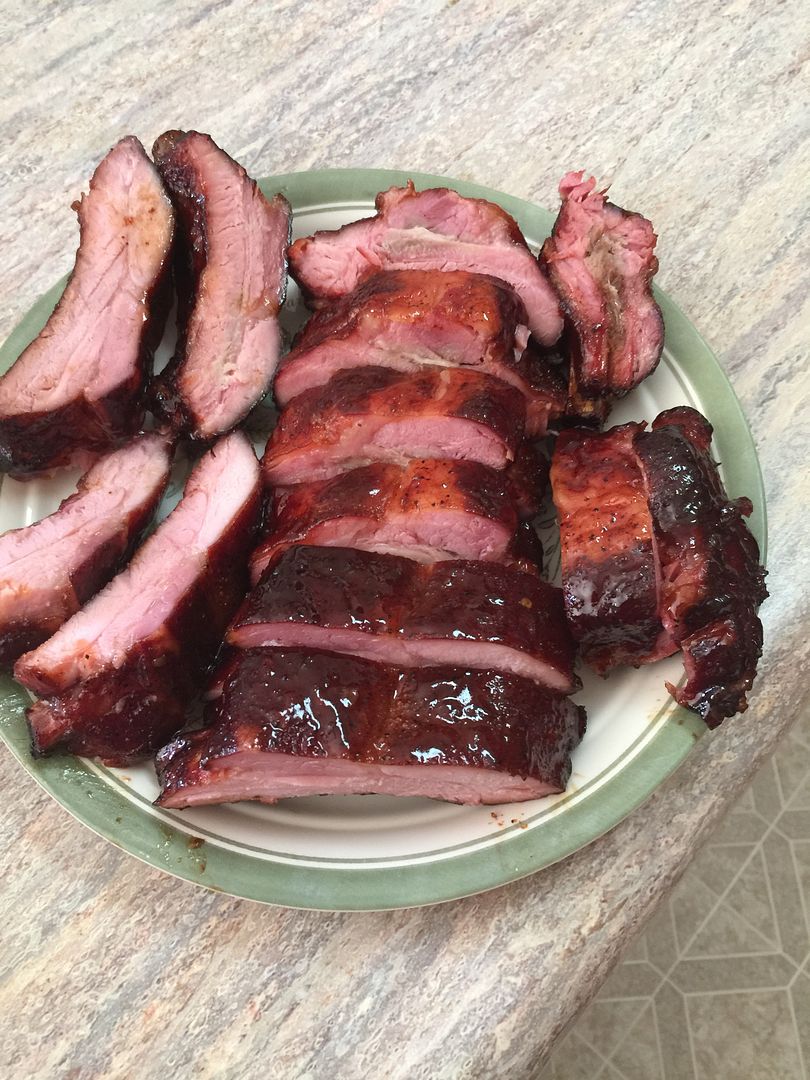
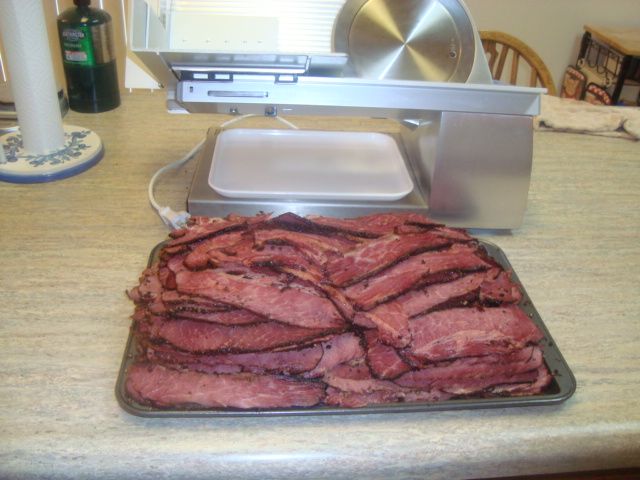
The ribs were unwrapped and then glazed and this is my results for this treat. 

 photo IMG_0377.jpg

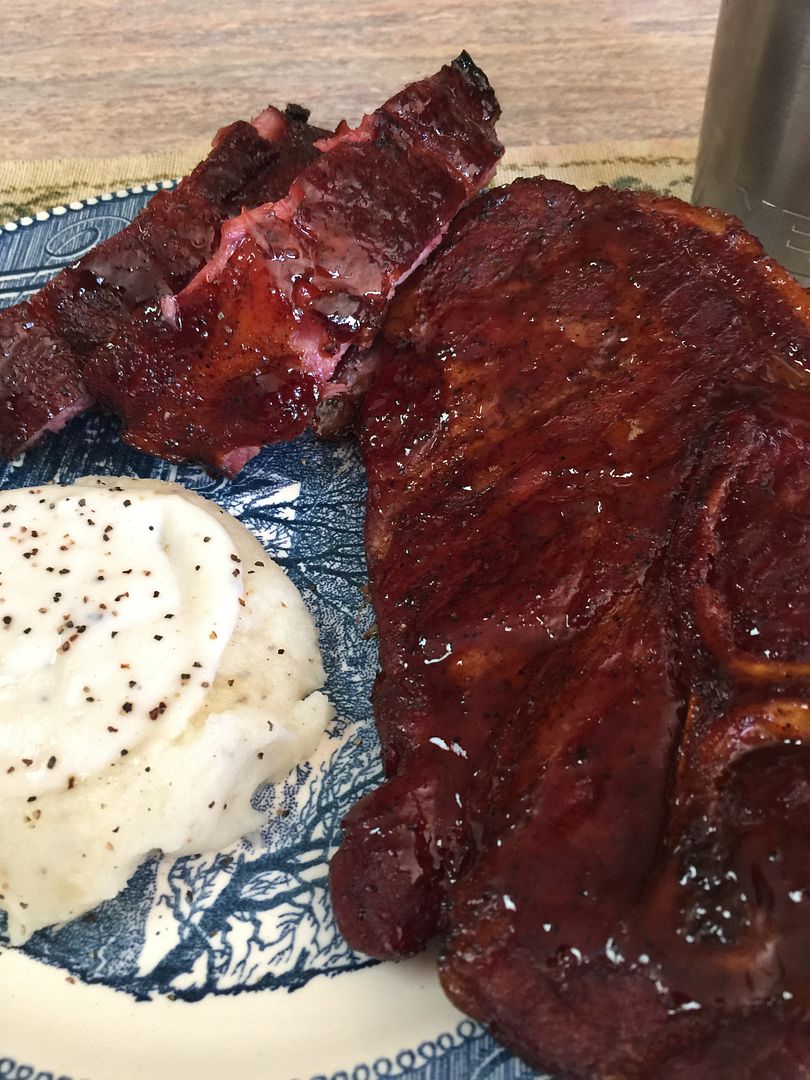
Ribs cut for serving. 

 photo IMG_0379.jpg

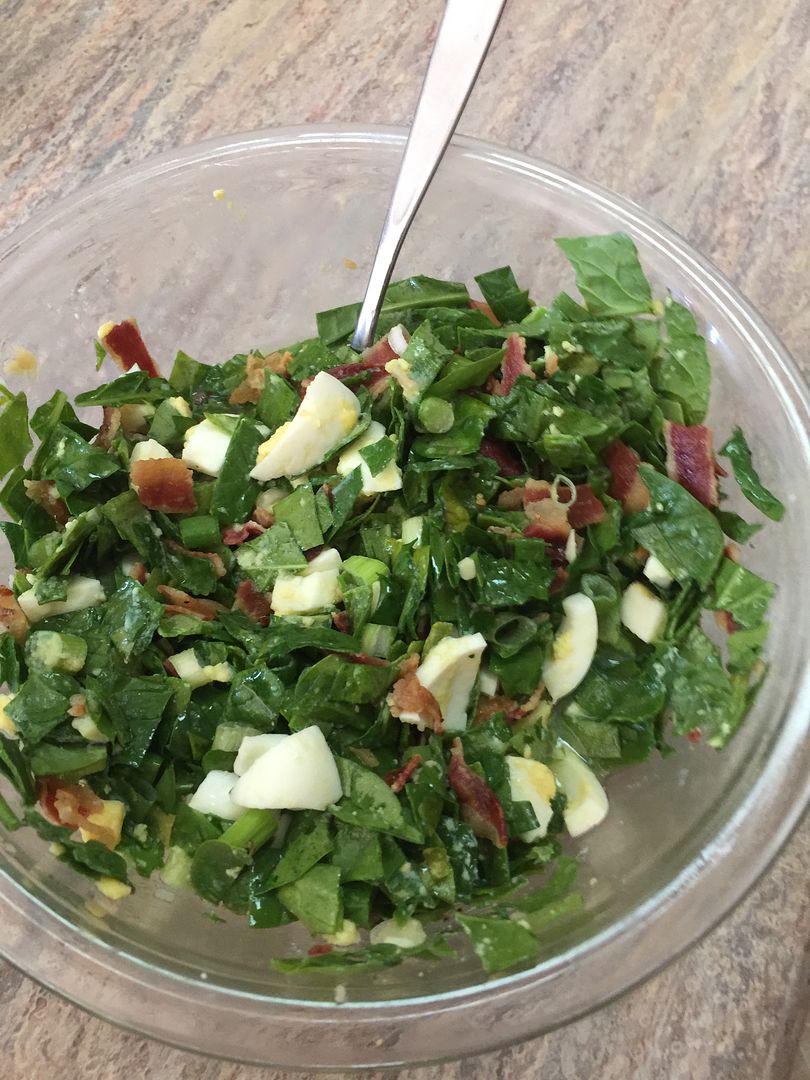
Wife’s Wilted Baby Spinach Salad to be served with this meal. 

 photo IMG_0380.jpg

 photo IMG_0382.jpg

Everything came out great and it sure was a wonderful lunch.

And for the Hasty-Bakers that are following my progress with this new Ranger and my method with the fuse burn to operate it, here is some additional information.

This cook took about 4-1/2 hours which is quicker than I expected and only used the first row or half of the loaded charcoal. This would calculate out to about 8-9 hours total cooking time with my 80% full load of charcoal if I would have needed it. And I think with a full load of charcoal, a fellow could get up to 10-11 hours total cooking time with this method. 

Cooker control was about what I expected and about the same as it is with my larger Hasty-Bakes. My planned cooking range for this cook was about 220-275 degrees measured on the surface of the cooking grid and I had both the intake and exhaust vents all the way open at the start of the cook. I shut the intake vent down to about half open about 1-1/2 hours into the cook. After the 2-1/2 hour mark, I closed the intake vent all the way. The last vent setting I had to make was to close the exhaust vent down to about half open and this just locked in the temperature to where I wanted it and I think it would have run for several more hours if I would have needed it. It’s almost a “set and forget” method of cooking on this smaller Hasty Bake Ranger (tailgater size) cooker. 

The food was great, the cooker operation was great, and I am very satisfied with my new cooker. 

Update: There is not as much room between the firebox and the ash pan so I had to cut down my normal 4" clearance to 2" between the firebox and the ash pan for this fuse burn. Worked fine at this distance. 

Sunday, April 19, 2015

Corned and Pastramied Beef Brisket

We like to keep this meat on hand and did use up the last of what we had frozen a few week ago so it was time to do up another few pounds. 

 photo DSC02845.jpg

I started with 3 choice brisket flats that weighed slightly over 21 pounds total. I also made up my first round of spices and seasonings. I also got about 150 cloves of garlic ready for my treat. I made up the curing brine that will be injected into the meat.

 photo DSC02846.jpg

 photo DSC02847.jpg

I trimmed up each brisket flat and then cut each one in half.

 photo DSC02848.jpg

I injected the brine into each piece of meat.

 photo DSC02851.jpg

I put the garlic thru my Suzy and packed a generous amount on each piece of meat. 

 photo DSC02850.jpg

 photo DSC02852.jpg

I packed on the spices and herbs and placed each piece of meat into a Zip-Lock bag. The meat went into the fridge for 4 days and was turned over about two times a day during this curing period. 

 photo DSC02857.jpg

 photo DSC02859.jpg

I took the meat out of the fridge and washed all the spices and seasonings off under running water at the sink and placed the meat into a pan of water for about an hour.  I then toweled the meat off and let it air dry for about 30 minutes.

 photo DSC02853.jpg

Made up the second round of spices for the smoking process and packed them onto the brisket pieces and they were ready for the smoker.

Decided to use the Hasty-Bake for this smoke and rolled it around to my cooking patio.

 photo DSC01982.jpg

I figured I would need about an seven hour smoke time so I setup a fuse burn for about an eight hour cook to be sure I had enough to finish my treat. I placed a couple of firebricks in the charcoal pan and then added 13 pounds of Wicked Good charcoal  briquettes. I then added some hickory chunks for my smoke. 

 photo DSC02860.jpg

I fired the cooker up and brought it up to temp and loaded my 6 pieces of meat. 

 photo DSC02863.jpg

A beautiful morning but a little chilly at 41 degrees and windy.

 photo DSC02862.jpg

The meat got done a little quicker than I expected and I got the first piece off at about 4 hours and the last piece off at about 5-1/2 hours into the smoke. The meat was smoked to an internal of about 185 degrees.

 photo DSC02864.jpg

 photo DSC02865.jpg

Put the meat thru the slicer and it sure looked great. It will be packed into one pound vacuum bags and frozen for future use or....

 photo DSC02133.jpg

 photo DSC02134.jpg

 photo DSC02135.jpg

A fellow might take about 1/2 pound of this meat and put it on some big slices rye bread and then slop on a few dollops of horsey sauce. He might add 3-4 slices of Swiss cheese and fold this sandwich up and serve it with a dill pickle. OH MY!!  It just don’t get any better than this.