Showing posts with label Recipe. Show all posts

Monday, May 21, 2018

Porkburgers

This cook was done on my Cobb Premier Grill and is probably the best burger that I have ever tasted. You’ll want to throw rocks at a standard hamburger after trying this one. 

 photo IMG_1527.jpg

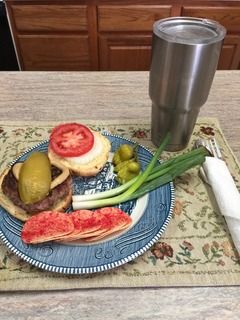
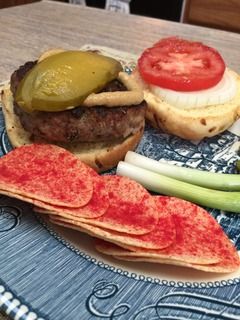
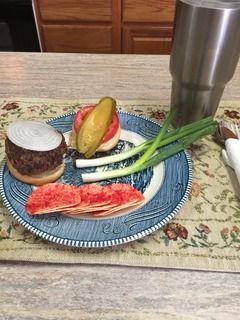
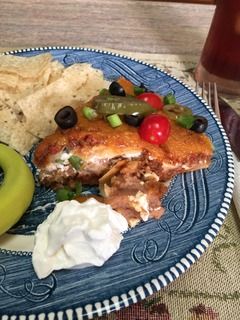
I like my pork burger on an onion bun and then dressed with a slice of onion, a tomato slice, a pickle slice, and some deli mustard.

 photo IMG_1528.jpg

I don’t like to cut back much on the meat so I made my pork burgers into 6 oz. patties for this treat. Makes a fine sandwich with this much meat.

 photo IMG_1510.jpg

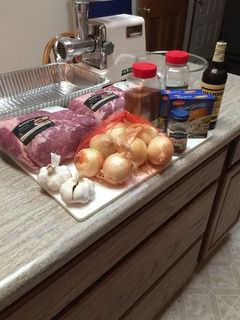
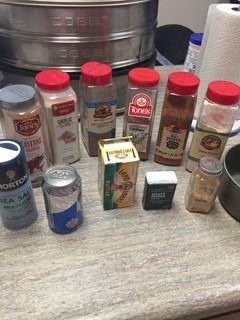
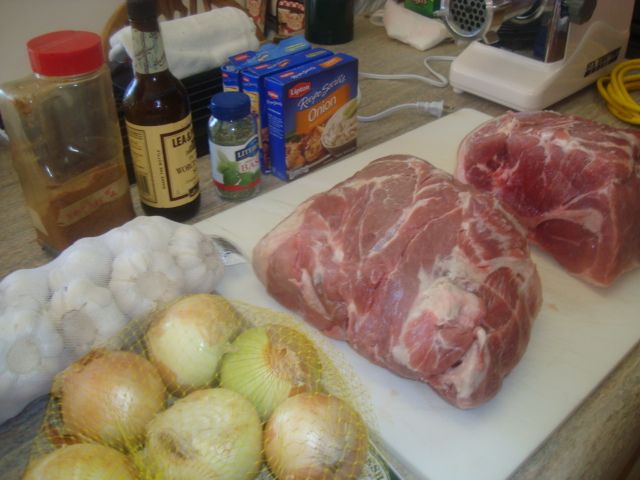
The Ingredients for my Porkburgers:

2 pork butts weighing about 16-1/4 pound total
4 pkgs of Lipton dry onion soup
2 cups of finely chopped onions
10 cloves of garlic thru my Suzy
4 TBL dried basil
3 TBL pork rub
2 TBL butcher cut black pepper
3/4 cup Worcestershire sauce
2 tsp ground cayenne pepper (optional)

 photo IMG_1511.jpg

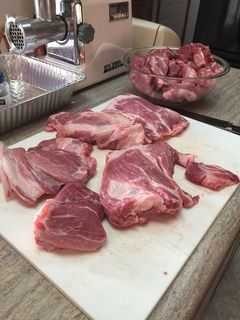
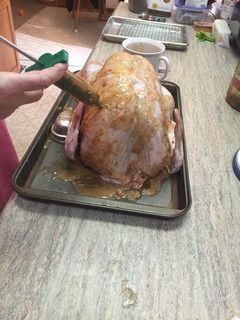
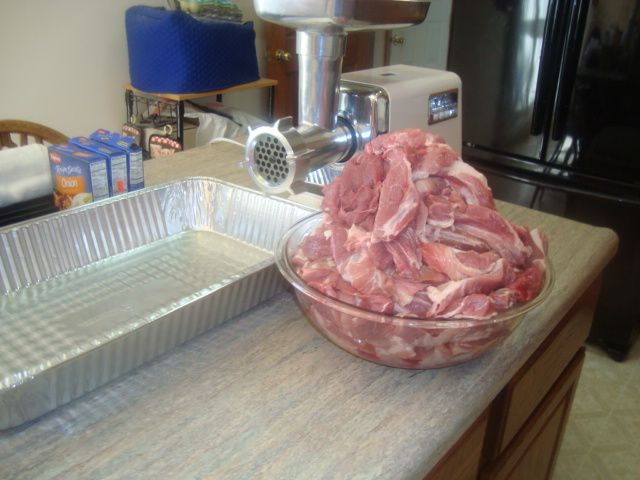
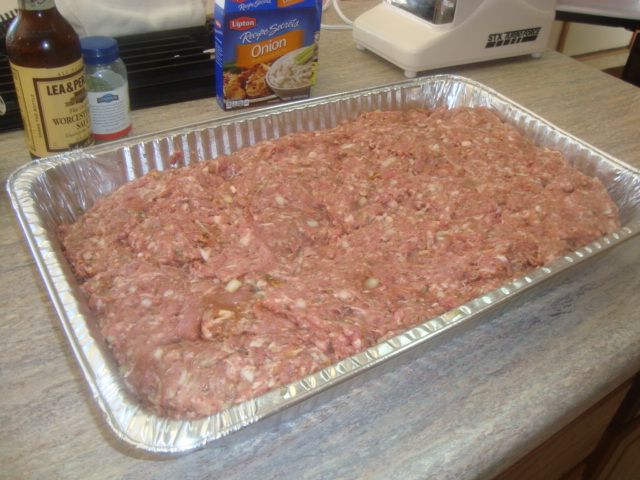
I cut the fat cap off of my butts and deboned them and then sliced them up into pieces that will fit my grinder.

 photo IMG_1513.jpg

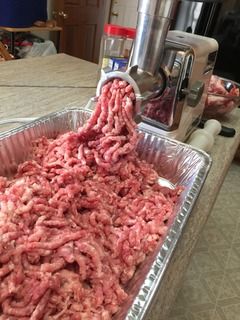
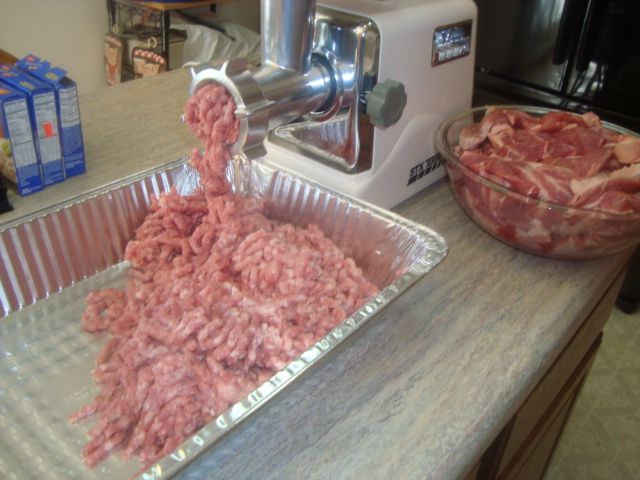
Put the meat thru the grinder.

 photo IMG_1515.jpg

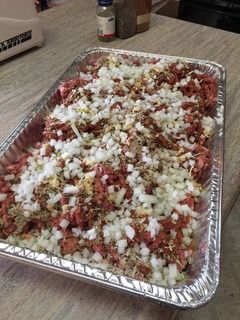
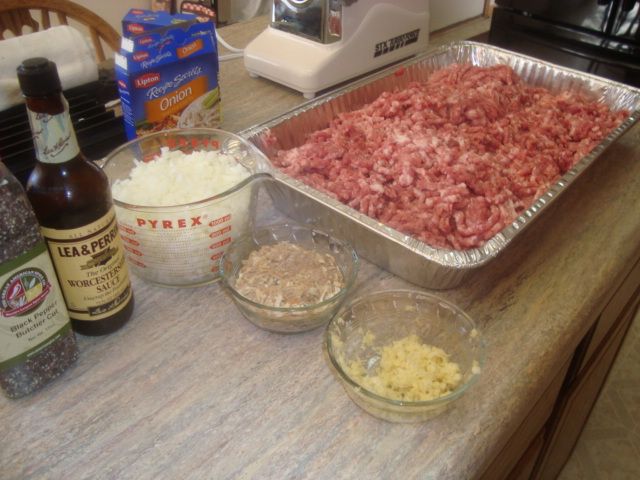
Added all my spices and veggies and then mixed it all up and covered it and placed it into the fridge for about 24 hours so my burger would have some time to meld together before I cooked or processed it.

 photo IMG_1517.jpg

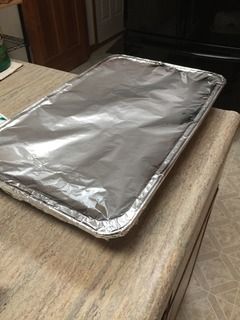
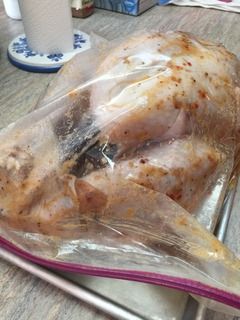
Coming out of the fridge on cooking day.

 photo IMG_1520.jpg

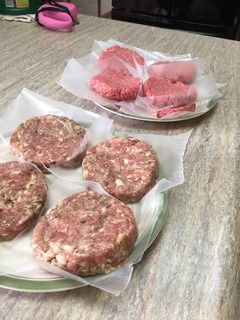
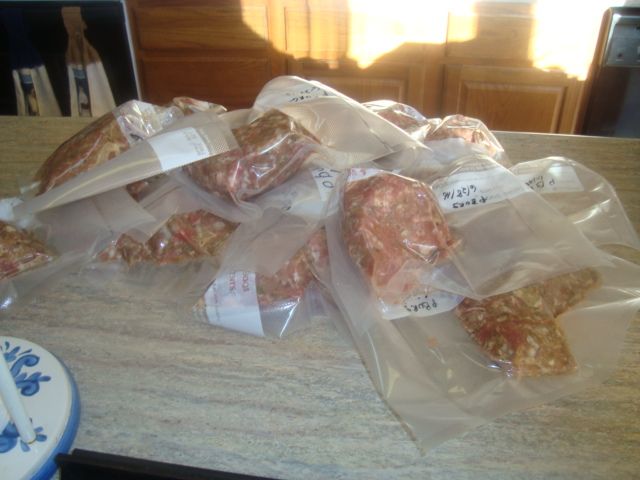
I made up four 6 oz pork patties along with eight 1/4 pound beef burgers for this cook.

 photo IMG_1521.jpg

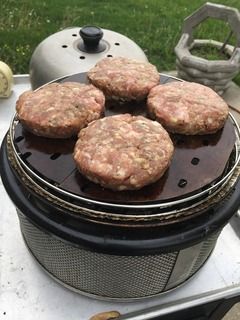
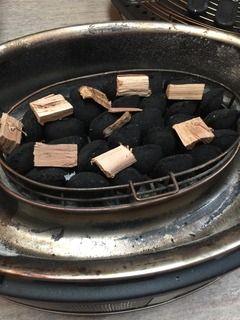
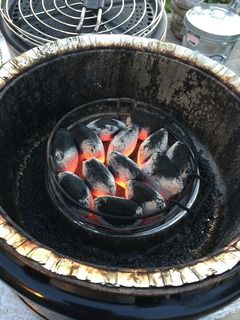
I used the larger charcoal basket out of the Cobb BBQ Kit and filled it with 19 hot all hardwood briquets out of a charcoal chimney for this cook. I needed enough time and heat for 3 rounds of burger cooking. 

 photo IMG_1522.jpg

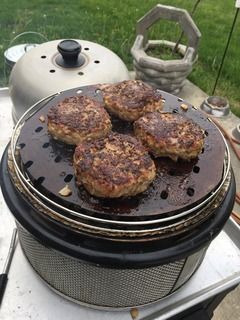
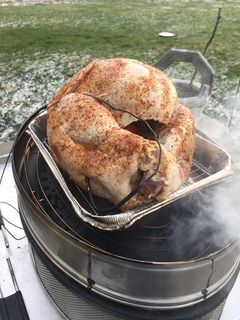
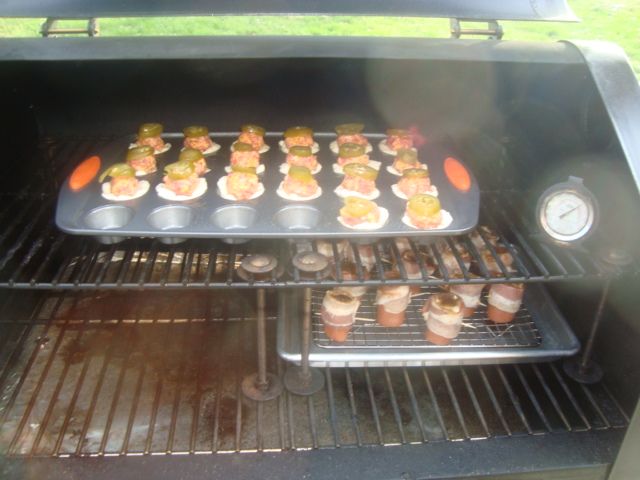
I cooked the porkburgers on the back side of my Grill Grates and used a temperature of about 550F degrees measured on the surface of the Grill Grates. These big 6 oz burgers took about 12 minutes to cook.

 photo IMG_1523.jpg

 photo IMG_1522.jpg

Along with the Porkburgers, I did some 1/4 pound beef slider burgers on this cook. 

 photo IMG_1525.jpg

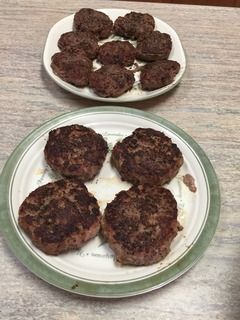
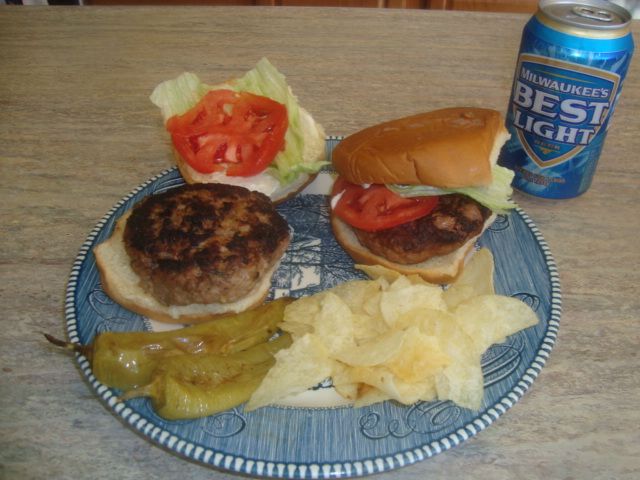
Both of the finished burgers just off of the Cobb Premier grill.

 photo IMG_1529.jpg

 photo IMG_1530.jpg


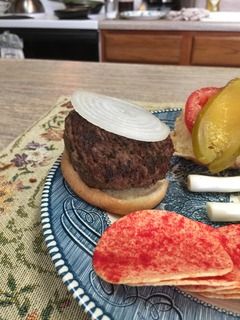
This big one inch thick 1/4 pound slider is a great sandwich but just doesn’t compare to the porkburger. 

Wednesday, May 2, 2018

13 Pound Creole Butter Injected Whole Turkey

I did another cook on my larger Cobb Supreme using one of my new Dome Extensions that I had made by the good folks at the Cobb Company and it came out quite well. The Dome Extensions allow me about 2-1/2 more height inches of usable cooking space which is needed for the many items that I wish to cook on this grill and this whole turkey being one of them. 

 photo IMG_1407.jpg

I served my Creole Butter injected turkey with some stuffing, mashed potatoes and gravy, a tossed salad, and a slice of skillet cornbread.

 photo IMG_1391.jpg

Scottie's Creole Butter Injection

1 can beer of choice
1 pound butter
1 tablespoon Big Time BBQ Rub (or your favorite rub)
1 tablespoon paprika
1 tablespoon freshly ground white pepper
1 tablespoon sea salt
1 tablespoon garlic powder
1 tablespoon onion powder
1 tablespoon dry mustard
1 tablespoon freshly and finely ground black pepper
1 teaspoon cayenne
Melt the butter in saucepan and add the beer and spices. Mix well. Let cool, then inject.

Yield: About 2 1/2 cupsHeat Scale: Medium

 photo IMG_1392.jpg

We injected about two cups into this 13 pound turkey.

 photo IMG_1394.jpg

The injected turkey was placed into a 2-1/2 gallon freezer bag and I poured a full bottle of Wishbone Robusto salad dressing over the top. Then it went into the fridge for an overnight stay to marry up all the flavors.

 photo IMG_1395.jpg

I turned the bag over a few times during this overnight stay and pulled it out of the fridge early this morning for my cook.

 photo IMG_1396.jpg

I maxed out the Supreme's charcoal basket with about 25 all hardwood charcoal briquets, and then added some hickory chunks for this cook.

 photo IMG_1398.jpg

I rubbed the chicken with my favorite poultry rub and placed the turkey on the Cobb Supreme using one of my proto-type dome extensions. This gave me enough clearance for this big piece of meat.
Cold morning at about 26F degrees and some light snow and a lot of wind.

 photo IMG_1404.jpg

Later into the cook and just before I mopped it with my Roadside Chicken Sauce.

Total cook time was a little under 5 hours and I did add charcoal three times as it was cold and windy. 

I ran a temperature of about 235-270F degrees during the cook.

 photo IMG_1400.jpg

First mop with the Roadside Sauce.

If you like the chicken from the roadside chicken stands then you'll like this. I've been making this for about 15 years now and it's pretty darn good. 
ROADSIDE CHICKEN
1 cup white vinegar 
1/2 cup veg oil 
1/4 cup worcestershire sauce 
1 TBS Sea or Kosher salt 
1 TBS white sugar 
1 tsp garlic powder 
1 tsp onion powder 
1 tsp white pepper 
1/2 tsp celery salt 
Mix/shake till well dissolved. I put mine in a old worcestershire bottle with the shaker top. You can marinate the chicken in the sauce for up to 2-8 hrs before cooking. If so discard marinade and make fresh for the cooking sauce. I apply the sauce every 5 min to both sides and turn every 5-10 min. Apply one final coating 5 min before removing from the grill. You can't put too much sauce on while grilling. It will build up a nice layer of flavors. I use the kettle but i think it would do well on the WSM (Larry used it) with no water pan and a high heat cook. I usally add one small piece of apple wood while grilling also. Hope you like it. Enjoy
EDIT: If you are going to marinate the chicken first, then leave the oil out for the marinade process. Make up a fresh batch for basting the chicken with the oil in the sauce.

 photo IMG_1406.jpg

Cooling down on the counter.

 photo IMG_1408.jpg

I had to put on a “bib” to eat that juicy breast meat! 

Real happy with the cook as everything came out great.


Sunday, September 17, 2017

Tijuana Surprise on the Cobb Grill

 photo IMG_0560.jpg

This is an easy treat to do on the Cobb grill and it is very good. I like to serve it with some chips and salsa.

 photo IMG_0546.jpg

For the meat, I used about a pound of burger, a small onion chopped, a packet of taco seasoning mix, 2/3 cup water, and about 10 oz of taco sauce. 
9-12 six inch flour tortillas
about 2- 3 cups cheddar cheese
16oz can refried beans
1-1/2 cup sour cream
1 cup green onions
can sliced black olives
ground cayenne pepper

 photo IMG_0547.jpg

Started with about 6 tortillas and then added half of my burger mix.

 photo IMG_0549.jpg

Added about a cup of cheese and then three more tortillas.

 photo IMG_0550.jpg]

I then spread on about 3/4th of the can of refried beans and then spread on the sour cream.

 photo IMG_0551.jpg

Added the green onions and black olives.

 photo IMG_0552.jpg

Added three more tortillas and then the balance of the meat.

 photo IMG_0553.jpg

Last was about 2 cups of cheddar cheese.

 photo IMG_0554.jpg

Ready for the fire.

 photo IMG_0555.jpg

I used 13 all hardwood briquets for this bake and also used the dome extension to get my treat up a little farther from the fire.

 photo IMG_0556.jpg

The start of the bake.

 photo IMG_0557.jpg

Done on the grill. Took about 55 minutes to get it done and I was running about 250F degrees.

 photo IMG_0558.jpg

First slice just cut out of my Mexican treat.

 photo IMG_0561.jpg


Made a fine lunch.

Sunday, August 14, 2016

Making State Fair Pork-Burgers

I don’t usually measure very close for this great treat as I don’t think you can screw it up. However, I did measure a little closer on this last batch so I could post my recipe.

 photo DSC03600.jpg

Ingredients:

2 pork butts ( The two I did yesterday weighed 15.85 pounds)
4 packages of dry Lipton Onion Soup
10 cloves of garlic
3 cups of finely chopped onion
4 TBL dried basil
3 TBL your favorite pork rub
2 TBL butcher cut black pepper or other black pepper
3/4 cup Worcestershire Sauce

 photo DSC03601.jpg

First step is to cut the meat off of the bones into pieces that will fit your grinder.
Many stores that sell pork butts with do this for you to save you some work and the cost of a grinder.

 photo DSC03602.jpg

Next step is to run it thru your grinder.

 photo DSC03603.jpg

Sprinkle the balance of the ingredients into the pan or bowl and with your hands, mix it up well to be sure the ingredients are well blended.

 photo DSC03604.jpg

Cover the pan of pork and place it into the fridge for at least overnight to give it time for the flavors to meld into the treat.

 photo DSC03608.jpg

I like to put it up into one pound packages for the freezer.

 photo DSC03617.jpg

Get ready to throw rocks at all the burgers you have ever tasted as this burger is about as good as it gets. Cook only to about 160 degrees internal for the best results.

Friday, March 11, 2016

Cheesy Sausage Biscuit Bites & Pig Shots

This cook (bake) was done on my Green Mountain Daniel Boone pellet grill running at about 400 degrees. This appetizer bake consisted of forty of the biscuit bites and about sixteen of the pig shots.

 photo DSC03320.jpg

Preparation of the Easy Cheesy Biscuit Bites:

Ingredients

2 )10 count) cans of flaky biscuits (Grands Jr)
1 lb sausage (I used the hot sausage)
2 cups shredded cheddar cheese
jalapeno slices

Preheat cooker to about 400 degrees
Mix uncooked sausage and cheese gently until well blended. Shape into 40 balls of equal size.
Remove biscuits from cans and separate each biscuit into two layers, making 40 total biscuit layers. Pam your mini-cupcake pan and press one layer of the biscuit into each hole. Repeat with the remaining dough or biscuit layers.
Place sausage-cheese ball into each biscuit cup and add a jalapeno slice. Bake for 8-10 minutes or until biscuits are browned and sausage balls are bubbly.

The pig shots are just a piece of rope sausage with a piece of bacon wrapped around them leaving about half the bacon on the sausage piece and the other half forming a pocket for the goodies. Use a toothpick to hold the bacon in place. Stuff the cavities with cream cheese and sprinkle on a light rub and then fill the remaining space in the cavity with brown sugar. Bake these until the bacon is done.

 photo DSC03321.jpg

Loaded into the Daniel Boone cooker running around 400 degrees.

 photo DSC03323.jpg

I had only one of the mini-muffin tins so I had to do these in two rounds. After I got the first round of the biscuits off the cooker, the pig shots were done shortly thereafter.

 photo DSC03324.jpg

Second round of the biscuit bites going on the cooker.

 photo DSC03325.jpg

 photo DSC03326.jpg

 photo DSC03327.jpg

My completed appetizers.