Showing posts with label Pizza. Show all posts

Wednesday, February 28, 2018

Green Mountain High Temp Pizza Oven Accessory

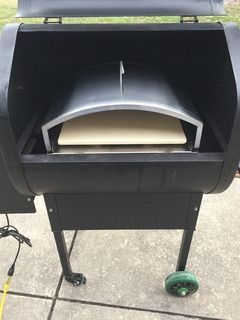
I purchased this Green Mountain wood fired pizza oven a few weeks ago when they were on sale and finally got it installed in my Daniel Boone to try it out. WOW, it is one great accessory. Pizza as high as 850-875 degrees is what it is designed to do. Imagine, a 2 minute pizza!

 photo IMG_1124.jpg

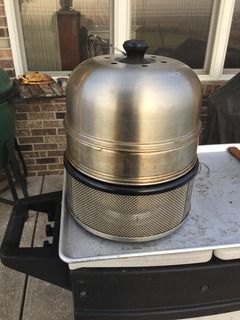
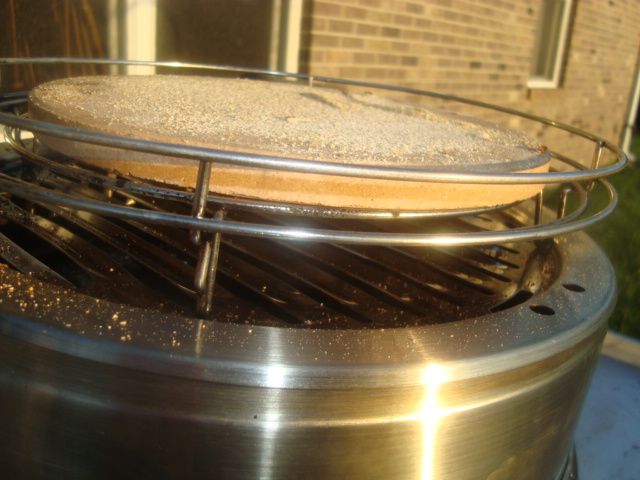
This accessory is all Stainless steel except for the hearth stone and it sure looks like a quality unit. To install it, I just took the grids and drip pans out of the cooker and just dropped it into the Daniel Boone. The unit fits over the fire box in the cooker so all the heat is directed up into the unit. 

 photo IMG_1125.jpg

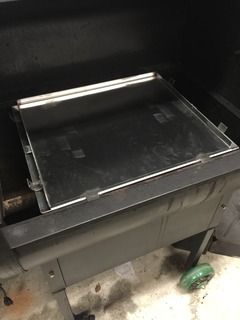
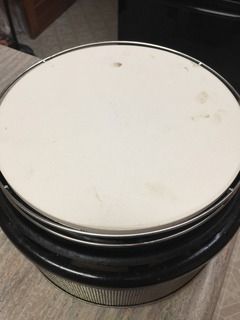
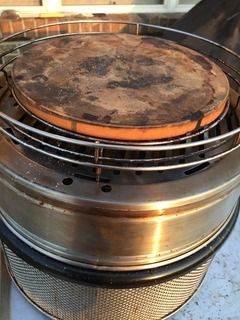
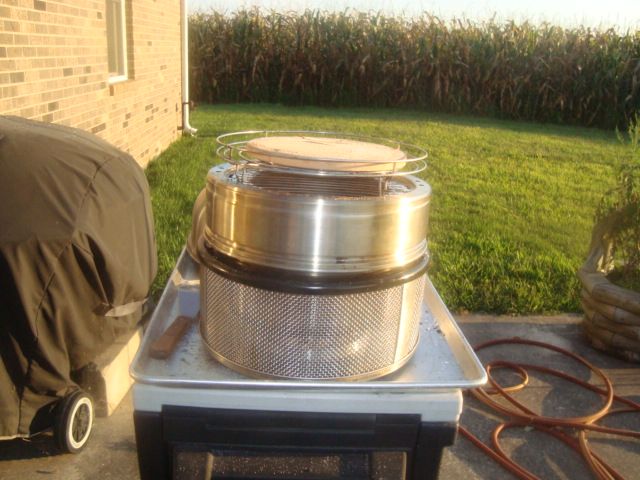
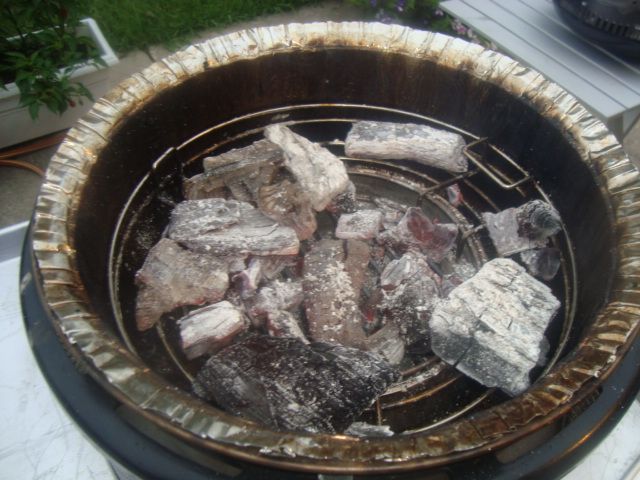
The base of the unit installed in the cooker. 

 photo IMG_1127.jpg

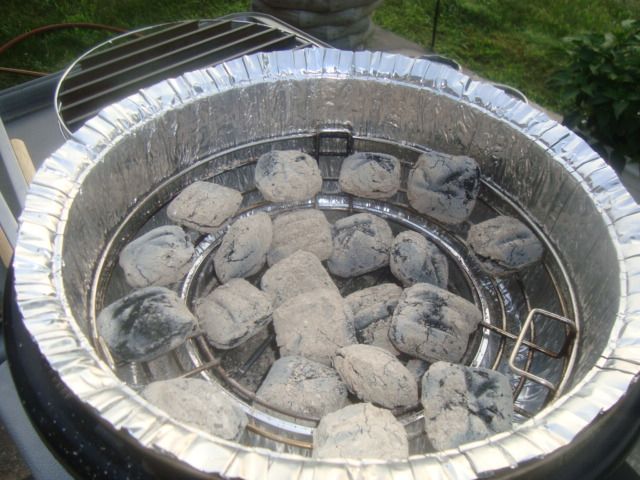
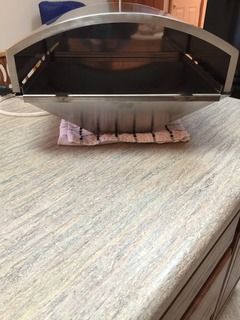
Ready to go in the cooker. The top part just lifts up and off of the unit if needed (for rookies that can’t handle a pizza peel) but I found that it wasn’t needed for my pizzas. I had plenty of room for using both a wood and metal peel.

 photo IMG_1126.jpg

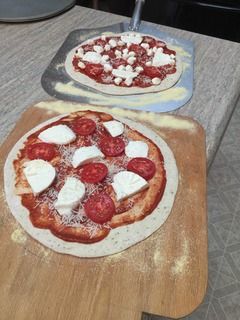
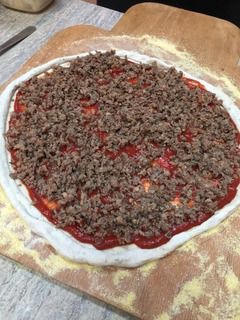
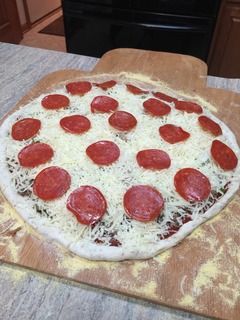
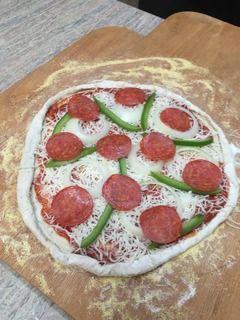
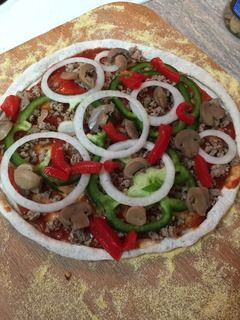
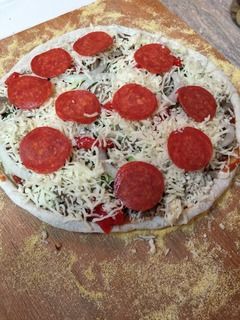
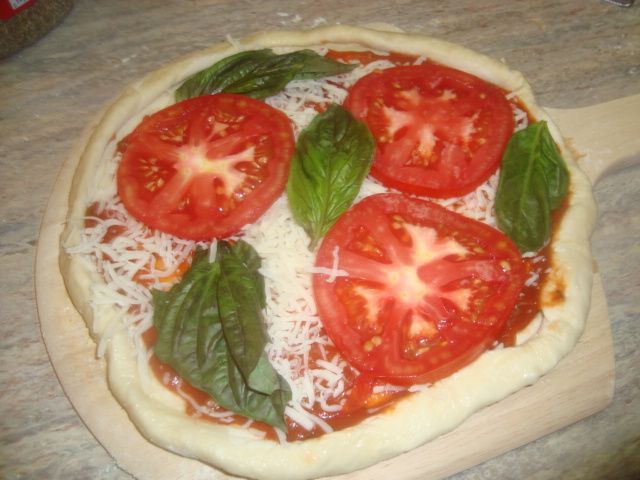
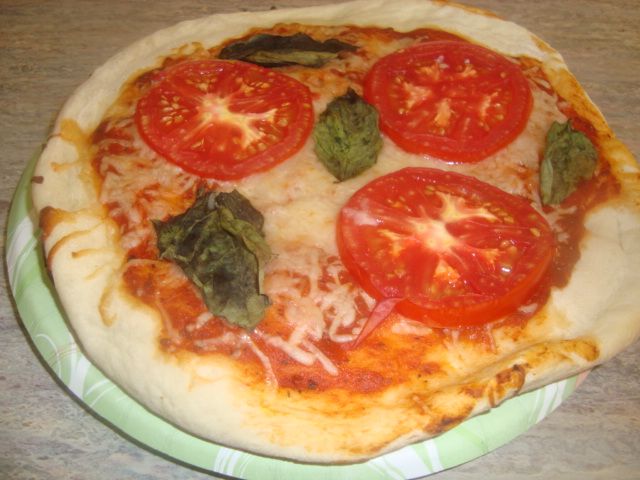
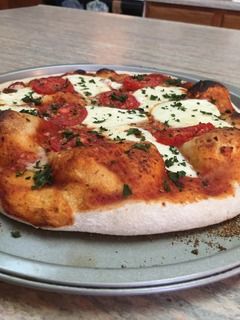
I wanted to start with a couple of simple Pizza Margherita style pies so I didn’t have very much on them for my first attempt. 

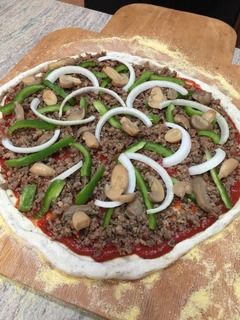
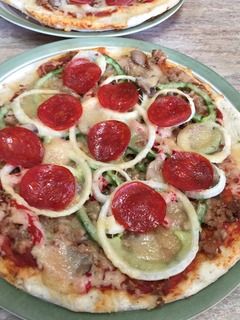
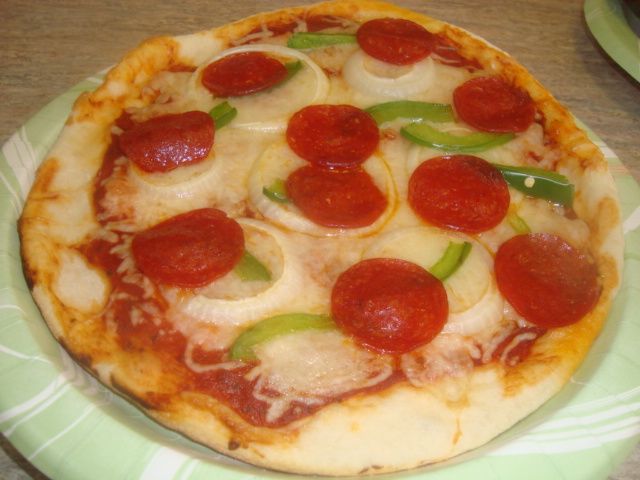
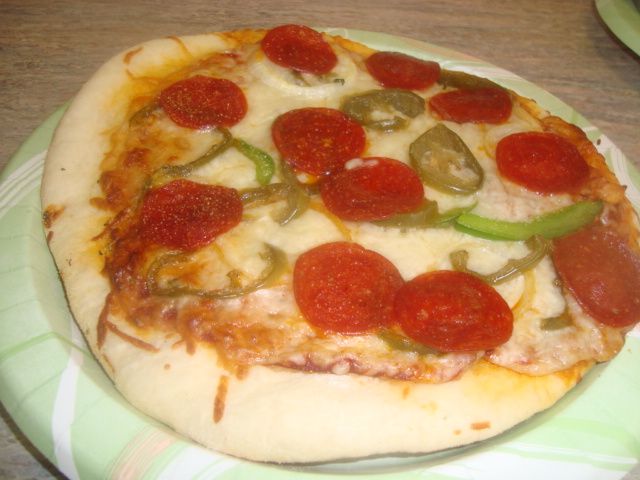
I used some frozen dough I had made up a few weeks ago that was made with 00 flour, a few herbs, and of course, salt, sugar, oil, water, and some yeast. To top the pizza, I started with some sauce, and then some mozzarella cheese, next up some small sliced tomatoes, and then some shredded parmesan cheese. I did the second pizza the same way but also added a few pieces of pepperoni. 

 photo IMG_1130.jpg

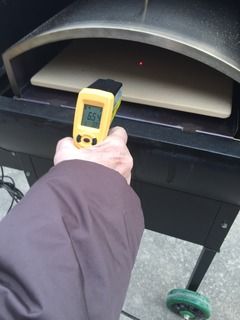
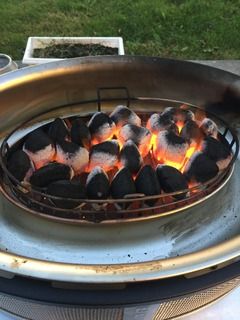
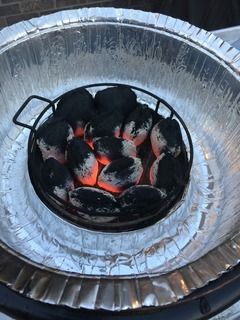
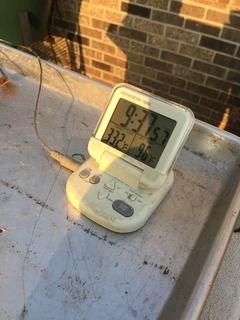
Since this was my first bake on this unit, I decided to use a little lower temperature at around 650-700 degrees for my first attempt. To get this temp, I had to set the cooker at just 275 degrees. It took about 20 minutes to get to temp on this cold 20 degree morning. 

 photo IMG_1133.jpg

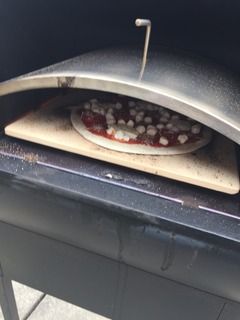
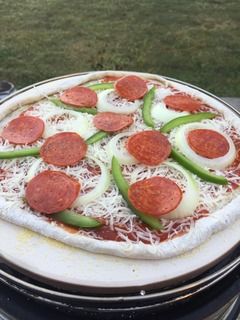
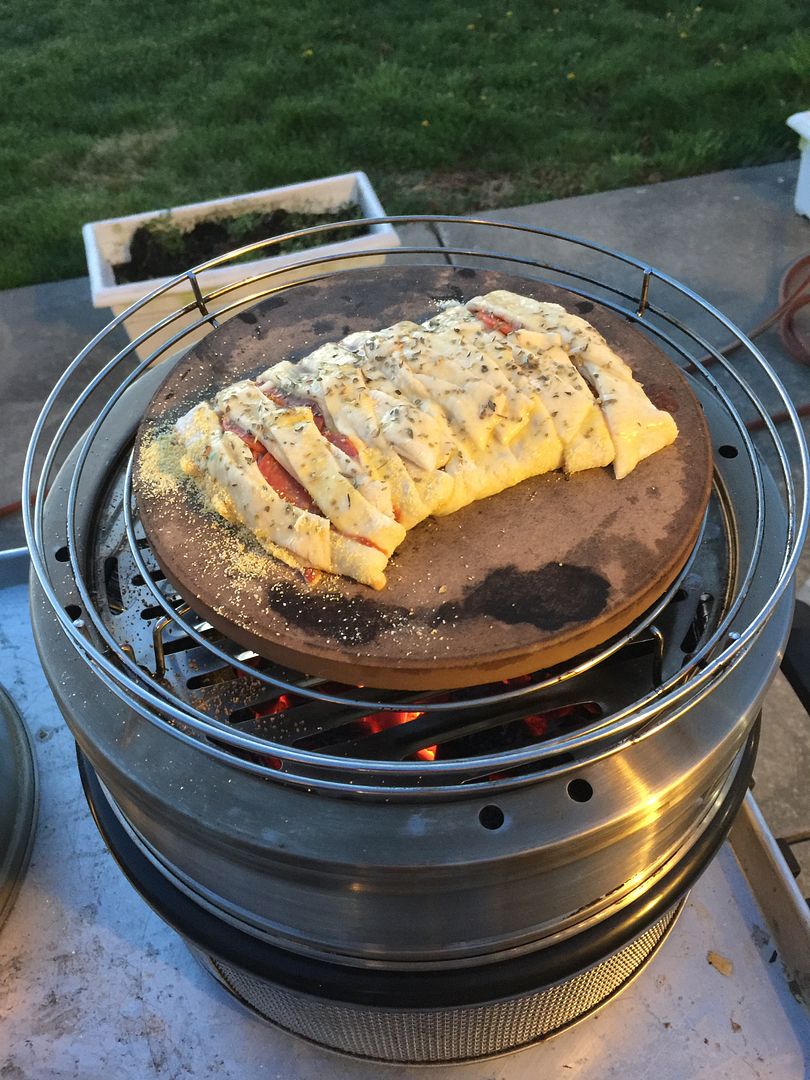
Pizza just loaded into the hot oven.

 photo IMG_1134.jpg

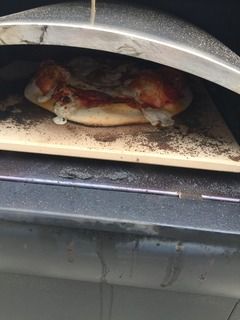
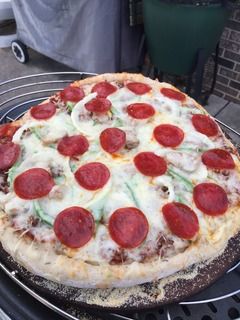
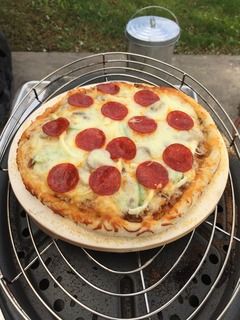
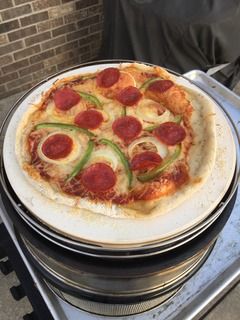
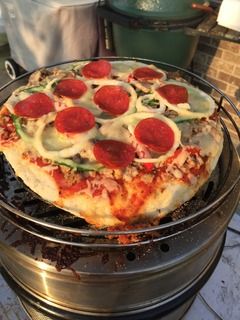
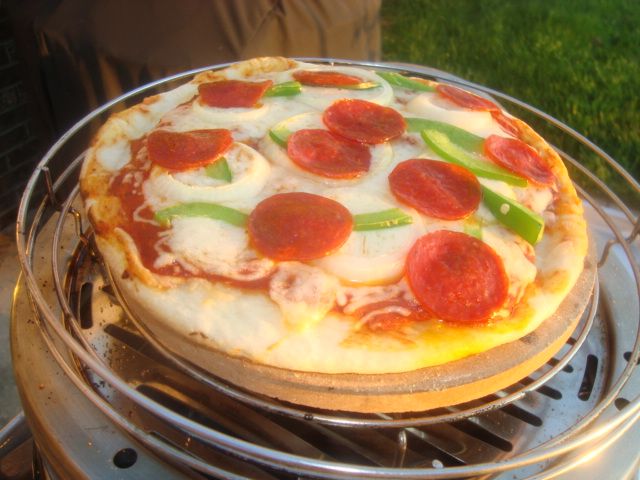
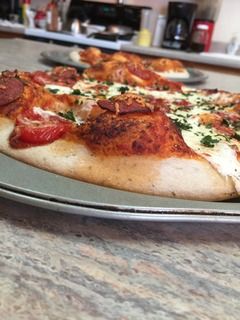
Pizza about done in the oven...note the bubbled up dough. After loading, I let it bake for 2 minutes and turned it about 90  degrees and let it go for 2 more minutes for a total of 4 minutes to complete the pizza. The 90 degree turn is all that is needed as the pizza oven heats the top of the pizza from both sides of the accessory. 

 photo IMG_1135.jpg

 photo IMG_1137.jpg

 photo IMG_1139.jpg

 photo IMG_1140.jpg

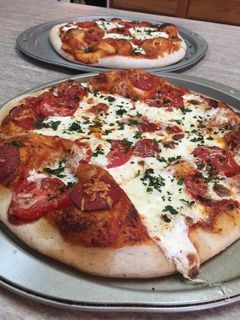
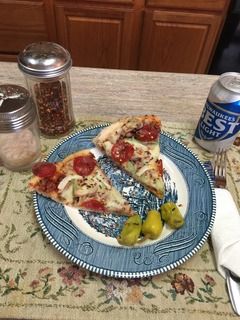
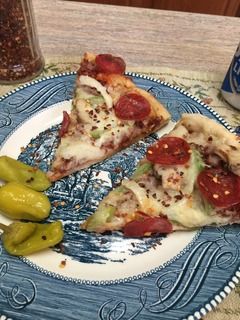
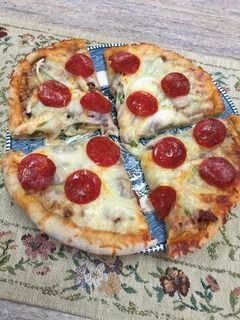
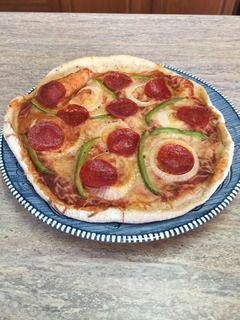
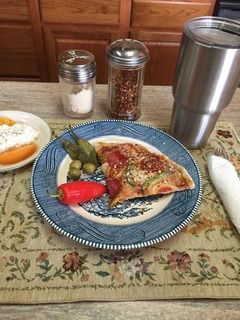
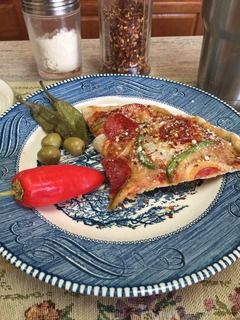
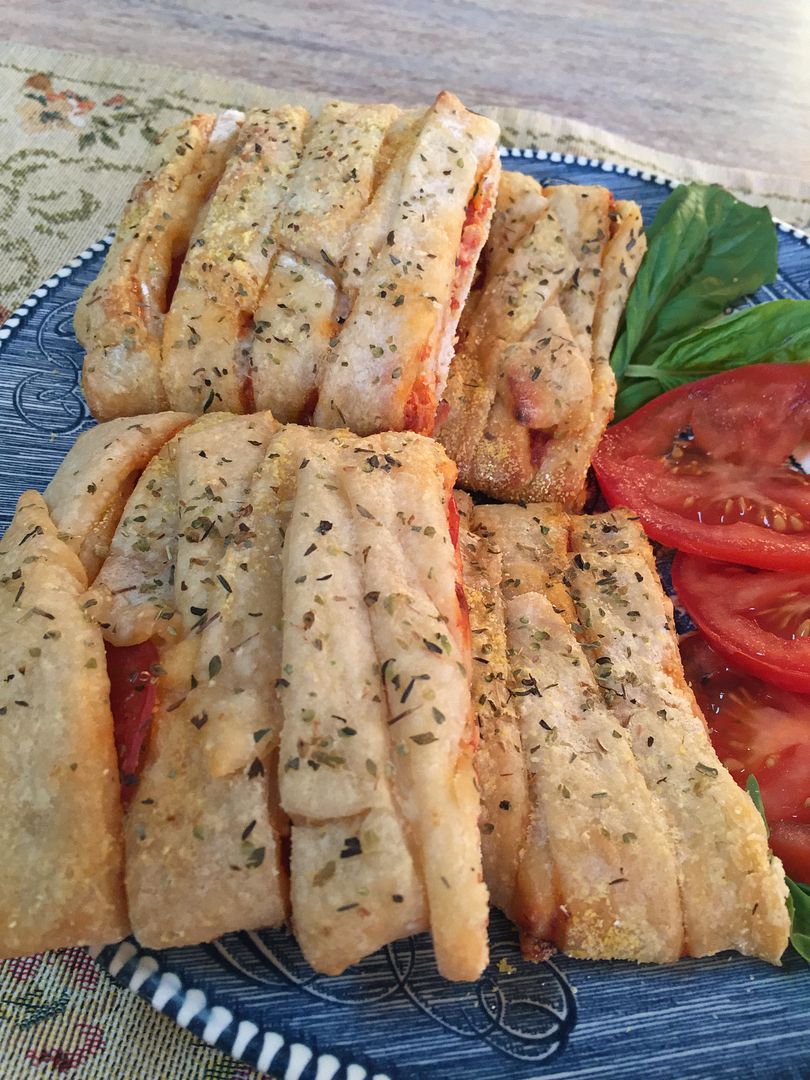
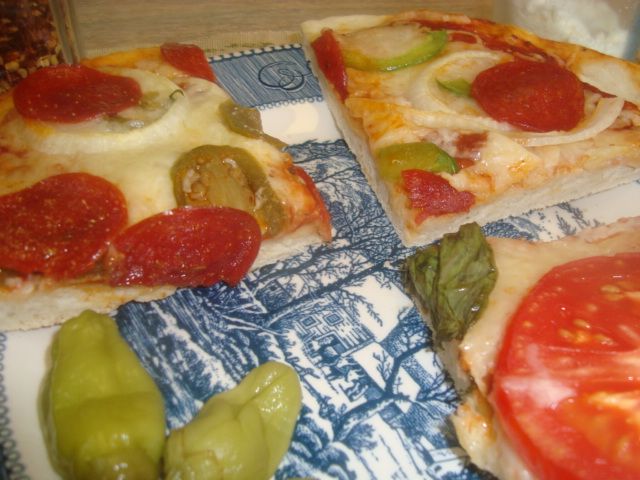
I thought my first effort came out great...love that bubbled up dough and the way everything came out. I added my chopped basil after the pizza was out of the oven. I can hardly wait to try it again at a higher temperature. 
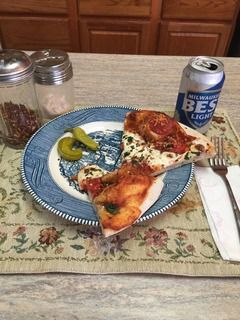
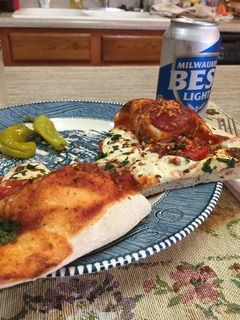
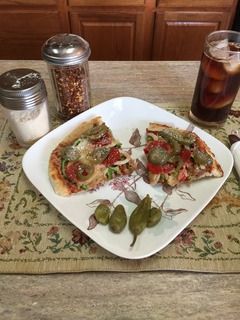
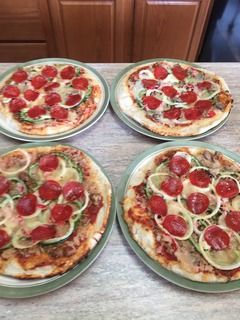
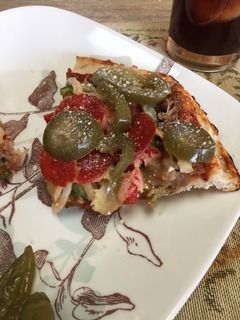
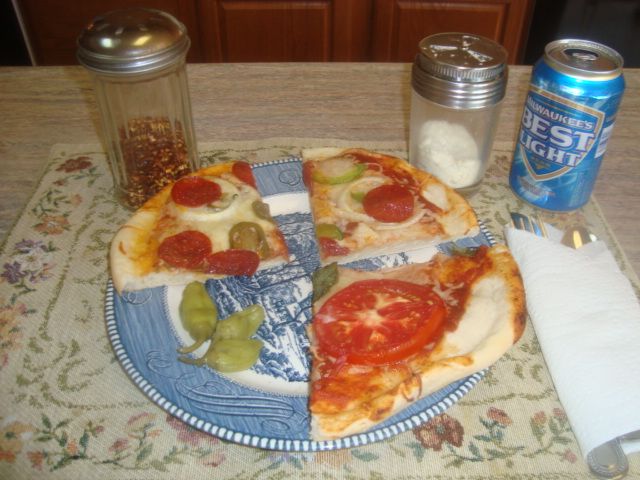
 photo IMG_1141.jpg

 photo IMG_1142.jpg

Lunch...


And I paid just over $100 dollars for this unit and I think it is a great value for the folks that own a Green Mountain grill. The grill will fit both the Green Mountain Daniel Boone and the Jim Bowie. Won't fit the Davy Crockett grill. 

Friday, November 17, 2017

First Pizza on the Cobb Supreme

Still learning how to cook on this new Cobb Supreme grill and this is my latest try in baking pizza on the cooker. 

 photo IMG_1060.jpg

 photo IMG_1062.jpg

This was a two pizza bake on my new Cobb Supreme and it sure came out well. This first pizza was baked on a 12" in diameter Pizza stone which is the largest hearth stone that will fit in the cooker. My planned second pizza will be on the very high quality Cobb Pizza Stone which I will change over after this first bake. This second Cobb Pizza Stone measures 10-1/2” in diameter and was designed for the smaller Cobb Premier cooker. 

This is my first bake on this cooker and I really loaded up the goodies on this first pizza. This pizza took 27 minutes to get done and this cooker is just a dream to bake on as compared to my Premier in my opinion. Very easy to get to the higher temperatures that I like for some real hearth baking.

 photo IMG_1050.jpg

I used some homemade dough that I had made and placed in the freezer about 2 months ago and after I formed it up, I added the pizza sauce and then some hot and spicy sausage.

 photo IMG_1051.jpg

Next up was some onions, bell peppers, and some mushrooms.

 photo IMG_1052.jpg

Added plenty of mozzarella cheese and then some pepperoni and my pie was ready to go on the fire.

 photo IMG_1053.jpg

For this two pizza bake on the Supreme, I used about 23 all hardwood briquets and fired them up in the cooker.

 photo IMG_1057.jpg

This is the first pizza done on the Cobb Supreme. It was about a 13" pizza on my 12" hearth stone so it was kinda hanging off one side of the stone but still did bake up great.

 photo IMG_1065.jpg

Another nice pizza just like the first one only slightly smaller.

 photo IMG_1063.jpg

Pizza done on the smaller Cobb Pizza Stone and ready to come off of the cooker. It as well was really loaded up and that is the way I like most of my pizzas. 


This slightly larger Cobb Supreme Grill does seem to bake quite well as shown on my first try. 

Wednesday, October 11, 2017

New Cobb Pizza Stone / Bake and Review

This thing has been talked about for many months and has finally arrived and I purchased mine for $18.00 dollars plus shipping from Cobb Grill America a few weeks ago. 

 photo IMG_0911.jpg

It is designed to fit into the Cobb roasting rack on the Premier cooker. 

The new Cobb Pizza stone is about 7/16" thick with four feet and is a very nice accessory if it will do a good job with pizza. It is very wide and doesn't have very much room (7/16") between the stone and the dome cover for the heat to come up around it to cook the top of your bread and pizza. It measures about 10-1/2” in diameter. Everything about this new hearth stone is quality. 

 photo IMG_0912.jpg

Having done a lot of baking on this cooker, I knew it might be difficult to make this stone work as expected. To help with this first bake, I used my modified cooking grid which has 24 extra larger holes in the outside edge which will help getting some heat and smoke up around this very large stone to help cook the top of my bread and pizza. 

 photo IMG_0915.jpg

I started with the maximum amount (13) of all hardwood briquets for this first bake. 

 photo IMG_0918.jpg

I decided to use a dome extension for this first pizza attempt with the new Cobb hearth stone. I figured that to keep the bottom of the pizza from burning before the top got cooked, I needed to get my hearth stone up and a little higher from the fire. 

 photo IMG_0916.jpg

I let the stone heat up for about 20 minutes and then checked the temperature on the top of the stone and found it at about 270F degrees and I also had a probe in the top of the cooker and it was registering about the same, and I had an oven thermometer inside on the stone and it as well was about 270F degrees. That sure seemed low to me for baking but that was all I could get out of the cooker with this large stone. At this point, I was wondering if I could get a good pizza off of the cooker at this low temperature.

 photo IMG_0914.jpg

I made up a very simple pizza for this first try with just sauce, cheese, onions, bell peppers, and pepperoni.

 photo IMG_0917.jpg

Loaded my first pizza onto the Cobb and started the bake. 

 photo IMG_0919.jpg

It is done on the Cobb grill and ready to come off the cooker. It took way too long to bake at over double the time of a normal pizza bake as I couldn’t get enough heat up and around this very large hearth stone to bake a good pizza. 

 photo IMG_0921.jpg

 photo IMG_0927.jpg

 photo IMG_0928.jpg

I did get a pretty good pizza off of the cooker with the kinda crispy crust I wanted but this was a very simple pizza without much goodies on it. There is just no way this stone will work very well with the average pizza cook. It’s just too big in diameter for the cooker. I’ll bet the engineer designed the hearth stone on a Friday afternoon after spending too much time in a pub for lunch! 

I wouldn’t recommend this stone for the Cobb Premier but it is a great hearth stone which I will use in my small Big Green Egg and my small Weber kettle. 


A proper sized hearth stone for this Cobb Premier shouldn’t be over 9” in diameter and will produce wonderful pizza, breads, cobblers, pies, cakes, and other baked treats. 

Sunday, September 17, 2017

More Pizza on the Cobb Grill

 photo IMG_0814.jpg

Baking on the Cobb Grill has been somewhat of a challenge to be able to get the top of anything cooked or baked before the bottom burns or overcooks to where it is not fit to eat. Just about got the problems solved and this is some pizza I have done a couple of days ago that came out quite well. 

This is one of the four I cooked in a row on the Cobb Grill and some of the comments I made after the cook. 

Added a few slices of jalapeño peppers and sprinkled on some parmesan cheese and my meal was ready.

 photo IMG_0791.jpg

I started by making up about two pounds of pizza dough for my four pizza's. The ingredients for the pizza's are as follows and I really loaded them up!

My homemade very spicy Italian sausage
Pepperoni
Onions
Bell Peppers
Smoked Red Peppers
Mushrooms
Mozzarella cheese
Pizza Sauce

 photo IMG_0792.jpg

Ready to go on the Cobb.

 photo IMG_0793.jpg

A couple more ready to be baked.

 photo IMG_0796.jpg

I used the larger charcoal basket that comes with the Cobb BBQ Kit. I loaded 22 all hardwood briquets into my Weber charcoal chimney and as soon as they were ready, I poured them into the Cobb grill.

 photo IMG_0800.jpg

I used the dome extension and the cooking grate that comes with the Cobb BBQ Kit and then also the roast rack and a 8-1/2" in diameter hearth stone for this bake. This IS the hot ticket for baking bread and pizza on the Cobb Grill.

 photo IMG_0804.jpg

I measured the hearth stone at the beginning of the cook with an IR thermometer and found it at about 410F degrees. I also measured the temperature at the top of the dome lid and it was running about 335-365F during the bake. While these numbers are not perfect, they are close enough to allow a fellow to make and bake a few nice pizza’s or a few loaves of hearth bread. 

 photo IMG_0806.jpg

One of the four pizza's about ready to come off of the cooker.

 photo IMG_0809.jpg

All four of the pizza’s done on this bake.

 photo IMG_0810.jpg

Ready to be cut and served.

 photo IMG_0815.jpg


About as good of a pizza you can make on any outside grill.

Monday, May 1, 2017

Pizza Braid on the Cobb Grill

A nice treat...

 photo IMG_0341.jpg

 photo IMG_0344.jpg

Fairly easy to make and is just something different from a standard pizza. 

 photo IMG_0339.jpg

I made it about 15" long so I had to cut it in half and bake it in two bakes in the Cobb.

I made this first one with just sauce, cheese, and pepperoni but I will load up my next one with some sausage, onions, bell peppers and mushrooms.

Information on this bake can be found on the Pillsbury Web Site:  https://www.pillsbury.com/recipes/pepperoni-pizza-braid/1f1fd667-e2d2-41e5-969a-fd8d173a50b2


Thursday, January 12, 2017

More Pizza on the Cobb Grill

Baking a nice pizza on the Cobb Premier Grill has been a little difficult to master and I have done about a dozen bakes trying to perfect it into something that would suit me. I think I have figured out a method that will produce a pretty good pie. 

Grill Setup:

 photo DSC03763.jpg

 photo DSC03762.jpg

I think the best pizza is always cooked on a hearth and I have found that the best size to use on this small grill is the smaller 8-1/2” stone. One of the biggest problems with pizza on this little cooker is getting the top done before the bottom burns. A larger stone than this will prevent the heated air from coming around this stone to get up into the dome where it can cook the top of the pie before the bottom burns. I have also placed this stone on the raised roasting rack to get it higher into the dome and away from the grid to allow more heated air to come out from under and get into the dome. I am using the grid from the Cobb BBQ Kit as this grid has many more slots that will allow more heat to  get out and around the hearth and up into the dome for the best results. I am also using the dome extension under my pizza setup which gets my fire a little farther away from my product. 

Fuel:

For most baking, I like to use the small Weber charcoal chimney to start my fire to be sure I have all the coals about the same before I pour them into the grill. 

 photo DSC03704.jpg

While I much prefer lump charcoal for about all baking, I have found that it is much harder to control in this little cooker for high temp baking. However, it’s great for steaks and chops. 

 photo DSC03644.jpg

I have found that about 22-24 briquets are about perfect for my pizza. I started with the Kingsford Professional but these so called all hardwood only briquets still have the borax stink agent on the outside to help them release from the dies and I don’t want that smell anywhere near my pizza. I found that they also produce way to much ash for this little grill and will block the incoming air to my fire. I am using the larger charcoal basket that comes with the Cobb BBQ KIt. 

I found that the best fuel for my application is the Wicked Good all hardwood charcoal briquets and this has worked quite well for all my recent bakes. They have a great sweet all wood burning smell and produce very little ash as compared to other briquets. 

Let’s make a pizza...

 photo DSC03757.jpg

I like to make my pizza dough in my Dough Maker (bread machine on the dough only cycle) as it does a great job with this task and it is just super easy to use for this lazy old fellow. 

This first pizza has sauce, cheese, fresh basil leaves, and tomatoes and is on my little wooden peel and after the picture, I carried it out and baked it on the grill. 

 photo DSC03764.jpg

About done on the grill.

 photo DSC03759.jpg

This second pizza has sauce, cheese, pepperoni, onions, and bell peppers and is about done on the grill. 

The third pizza was the same as the second but I did add some hot peppers to this one. 

 photo DSC03766.jpg

 photo DSC03768.jpg

 photo DSC03767.jpg

All three pies ready for serving. 

 photo DSC03769.jpg

 photo DSC03770.jpg


The pizza as served.