Wednesday, January 8, 2014

Pastramied Beef from Scratch and...

This is a nice treat that takes a few days to prepare but is oh so good and well worth the wait. In my opinion, it is much better than any method I have seen or tried. I have used this recipe and method for several years and love the results.

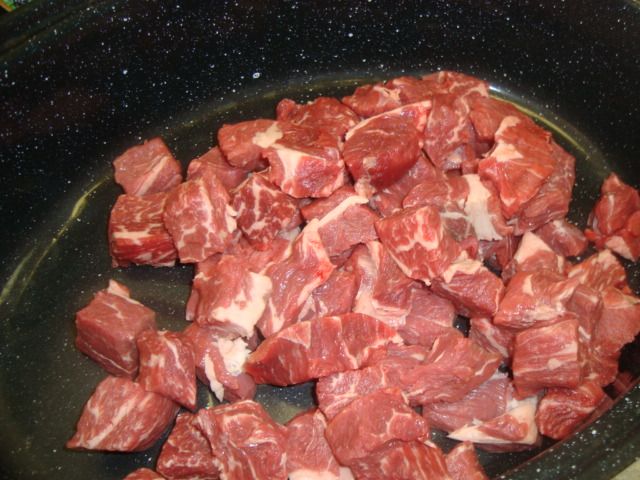
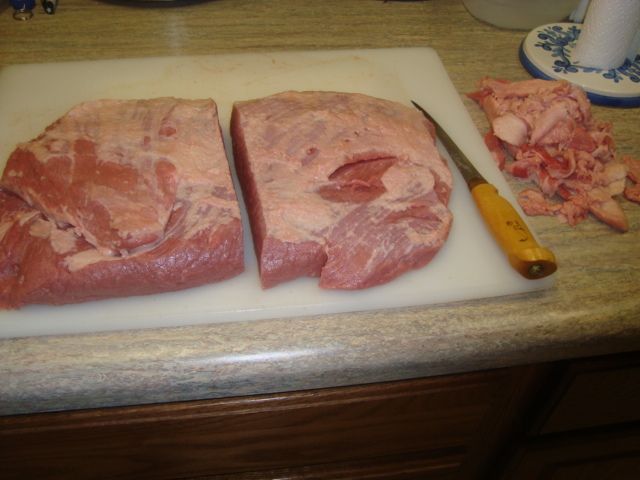
I start with a couple of choice brisket flats that weigh over 7 pounds each. In this case, these flats total 14-3/4 pounds. 


 photo DSC02103.jpg

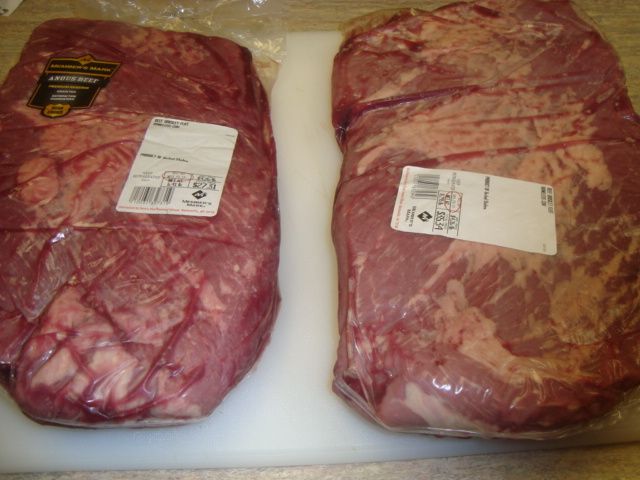
I start by trimming most of the fat off of the meat. I then cut the meat into 3-4 pound chunks for my process.

 photo DSC02104.jpg

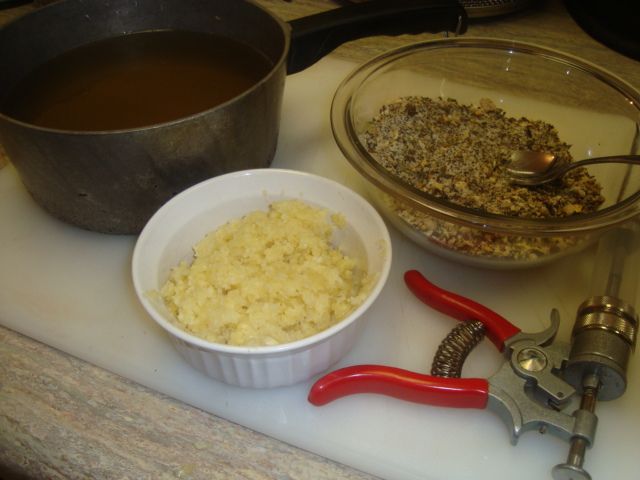
Next step is to prepare my corning cure or brine, my first rub, and get a ton of garlic ready for the meat. In this case, I cleaned about 6 total garlic bulbs and then put them thru the Suzi.

 photo DSC02108.jpg

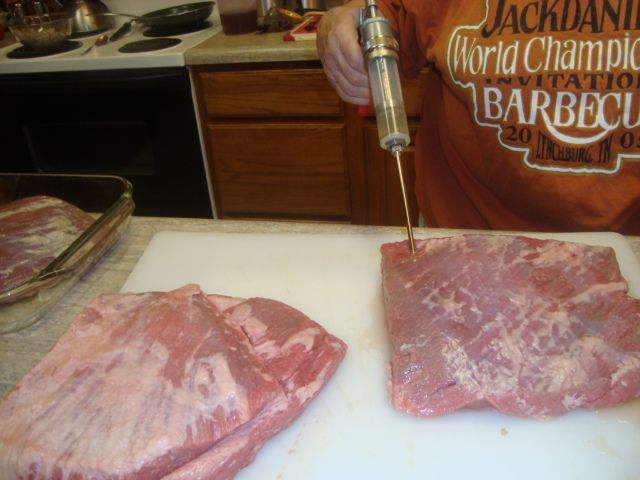
I inject the meat on the edges and also into the top and bottom. I try to get as much cure into the meat as possible. 

 photo DSC02109.jpg

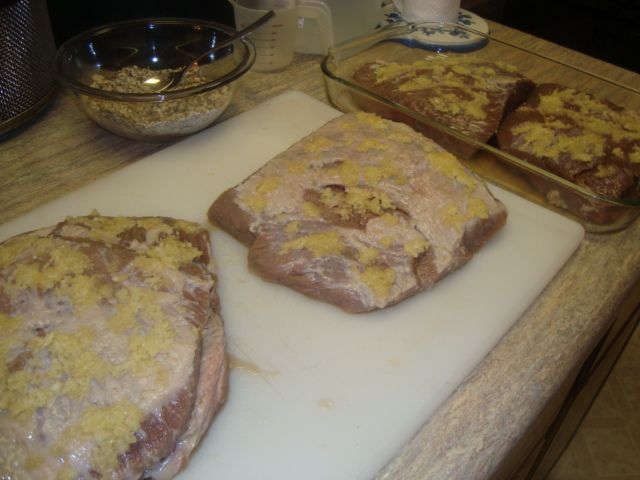
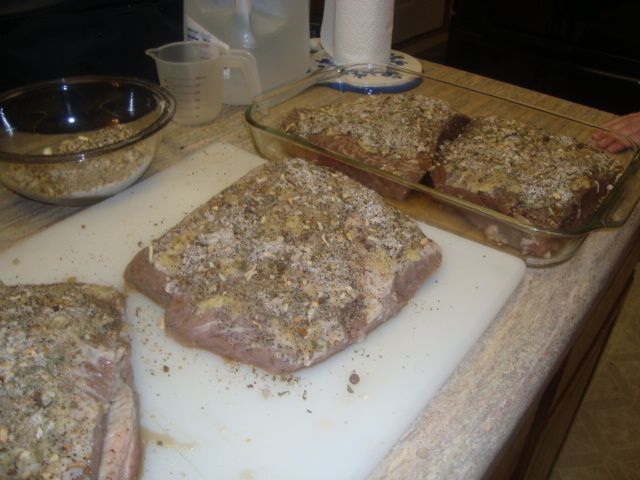
I then pack the garlic on the meat and again, you can’t use toooo much!

 photo DSC02110.jpg

Next step is to pack a heavy dose of my first rub on the meat.

 photo DSC02112.jpg

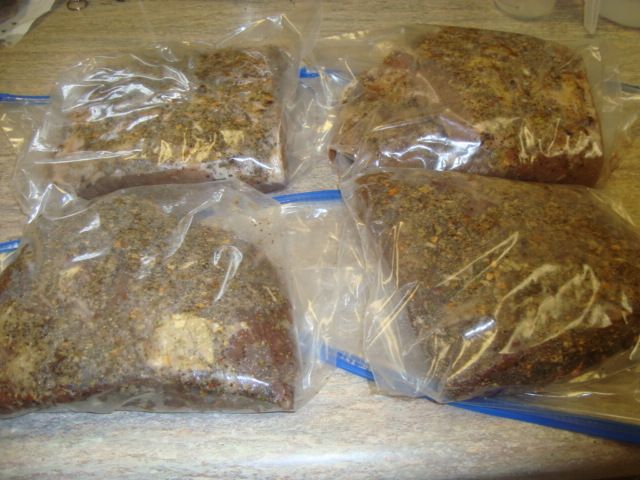
The corning prep is now finished and the pieces of meat go into large zip-lock bags and then into the fridge for about 4 days to cure. I try to turn the bags over a couple times a day when I am in the fridge.

 photo DSC02114.jpg

After the corning period, the meat comes out of the fridge, and then out of the bags. I then wash each piece under running sink water to get all the first rub and garlic off of the meat. Each piece then goes into a pan of water to soak for about one hour. 

 photo DSC02116.jpg

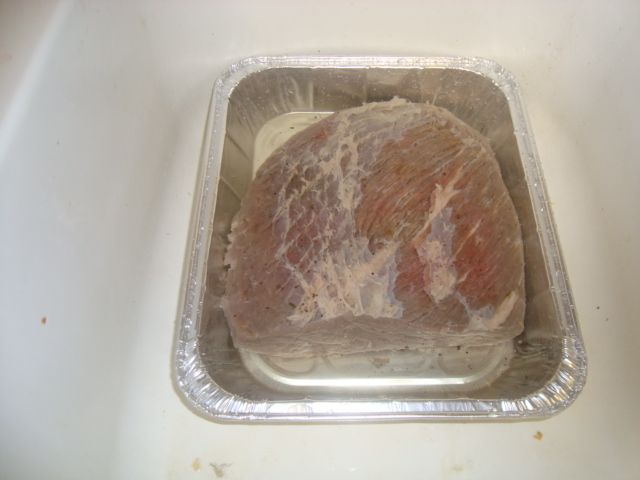
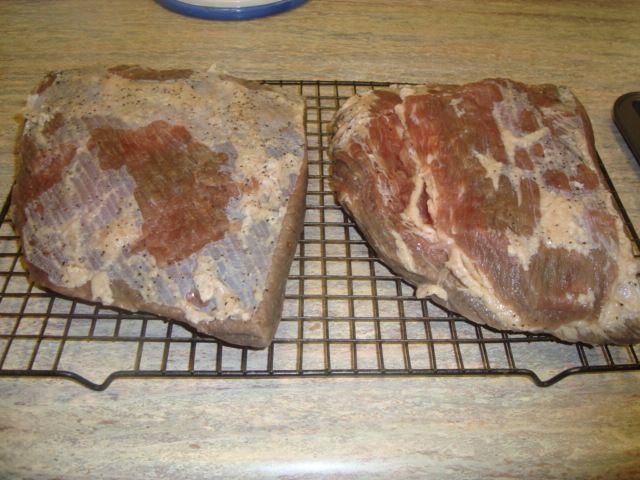
I then take the meat out of the water and paper towel off and then place on a drying rack for about 30 minutes. What we now have is uncooked corned beef. 

 photo DSC02117.jpg

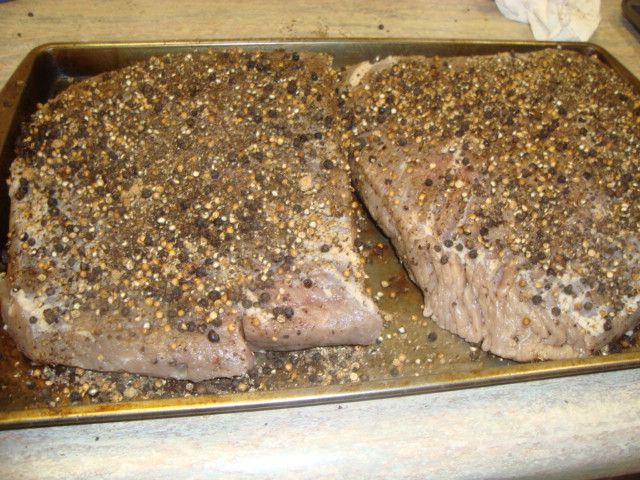
Since my plan is to pastrami the beef, I then pack on my second rub which consists of cracked black peppercorns, cracked coriander seed, and some brown sugar. The meat is now ready for the smoker.

 photo DSC02120.jpg

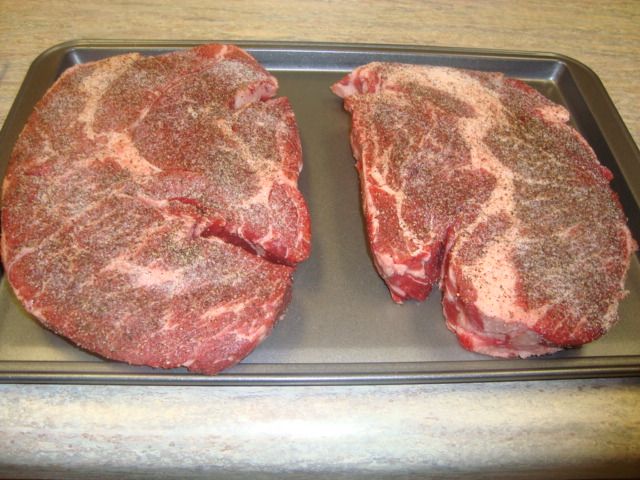
While I was at it, I also prepped a couple of chuck roasts which weighed about 5-1/2 pounds for my pulled beef. Since we use pulled beef in many different treats including Philly cheesesteaks, Chicago Italian beefs, beef Manhattans, barbecued beef sandwiches and several Mexican dishes, I just rubbed them with garlic salt and fresh cracked black peppercorns. 

 photo DSC02118.jpg

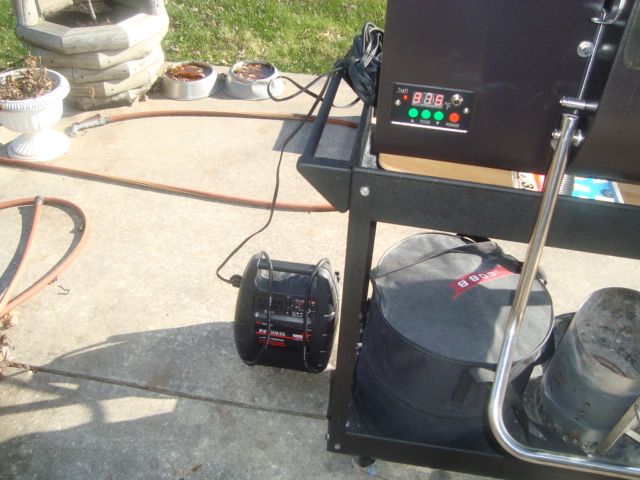
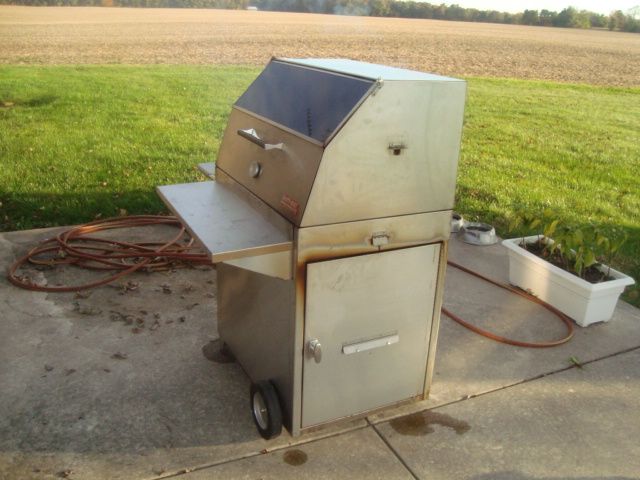
I decided to smoke the meat in my Hasty Bake Gourmet cooker and rolled it around to my cooking patio. 

 photo DSC02121.jpg

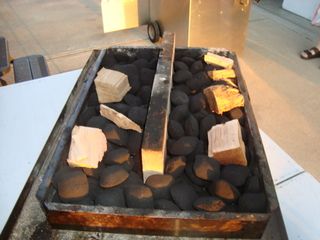
I then pulled the charcoal pan and set it up for about a 7 hour fuse burn. I used that great Stubb’s all hardwood no fillers brickettes and then placed some hickory chunks on top to create my wood smoke. The charcoal pan then went back into the cooker and I lit it off with a Weber fire cube.

 photo DSC01242.jpg

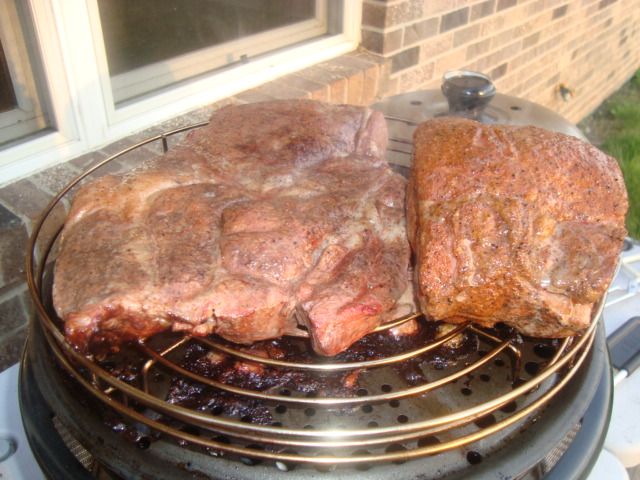
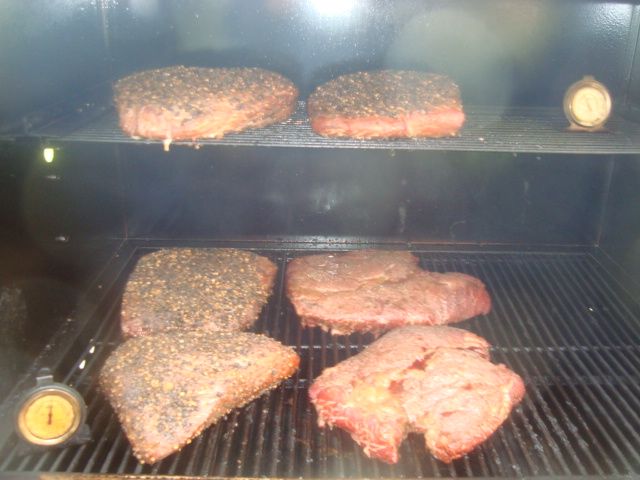
After the cooker warmed up a little, I placed 4 corned beef briskets and the 2 chuck roasts into the smoker.

 photo DSC02122.jpg

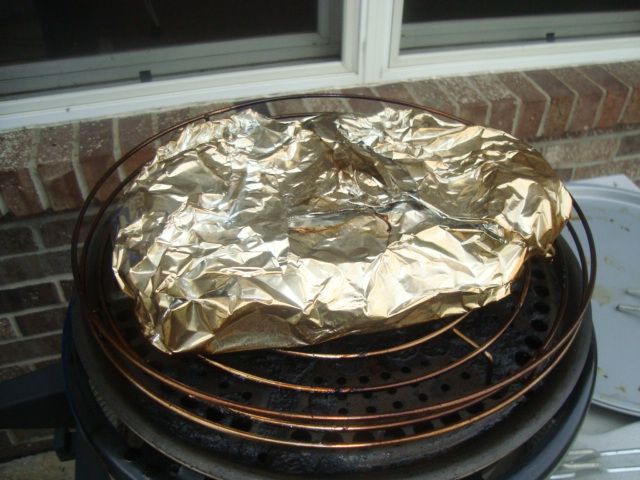
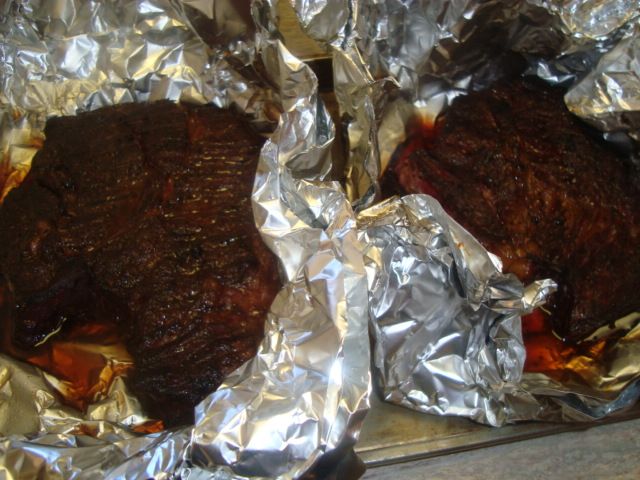
The next step was to wrap the chuck roasts when I got the right color and bark and place them back into the cooker. At this time the brisket pieces looked good. I took the chuck roasts to about 210 internal so they would pull just like a pork butt. They sure looked good coming out of the foil.

 photo DSC02125.jpg

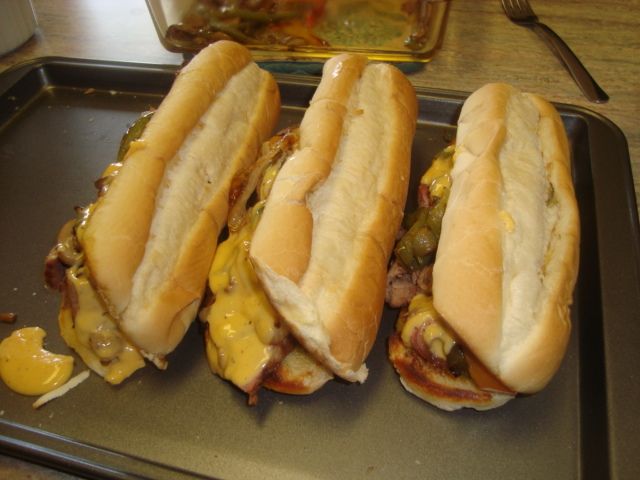
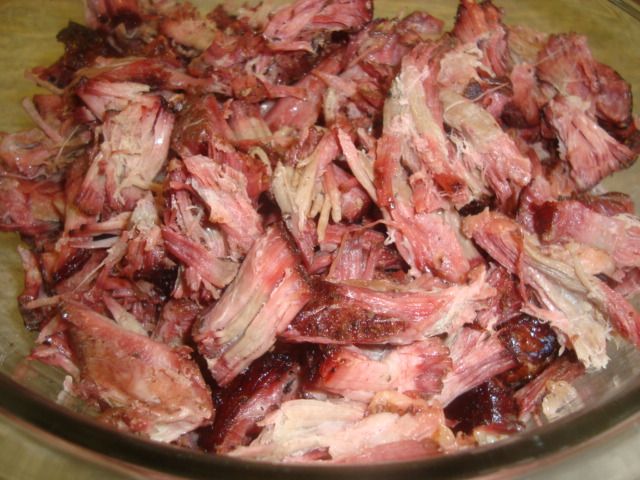
The chuck roasts pulled and shredded nicely and I sure would be proud to serve this dish to anyone. Wouldn’t you agree?

 photo DSC02126.jpg

When the pastramied beef came off the smoker, I tented them for about an hour and got my slicer ready.

 photo DSC02128.jpg

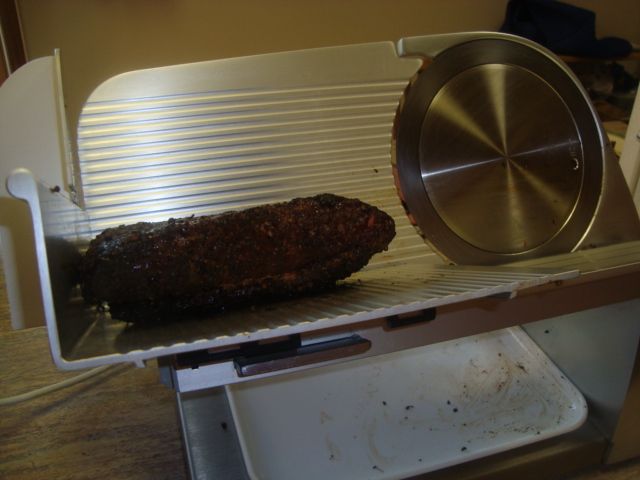
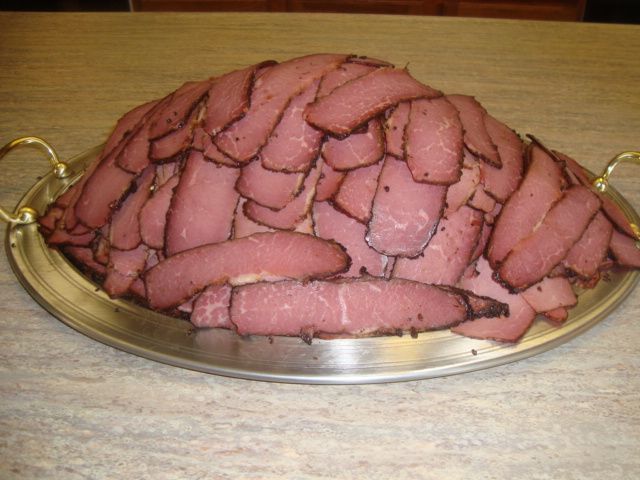
I put the pastramied beef thru the slicer and cut it thin for sandwiches. Sure made a nice platter of meat.

 photo DSC02129.jpg

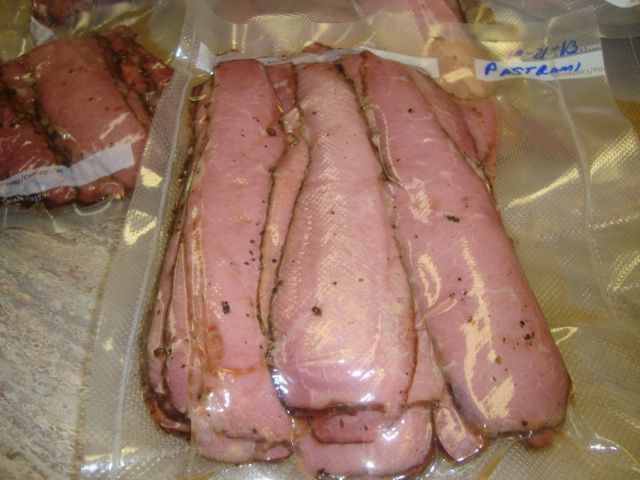
We kept about 2 pound of the meat out and I vacuumed packed the balance for the freezer.

 photo DSC02132.jpg

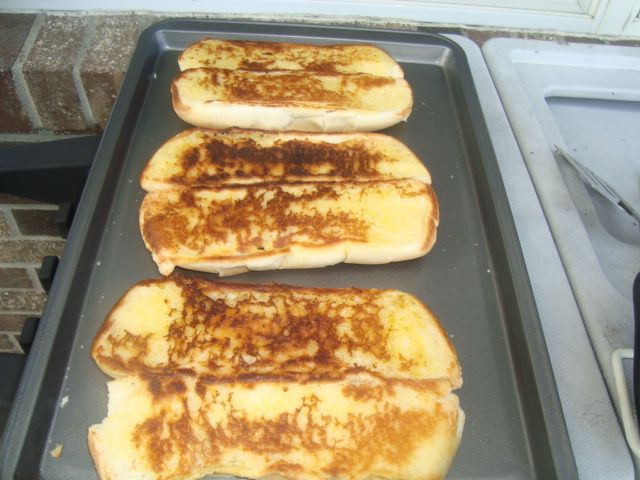
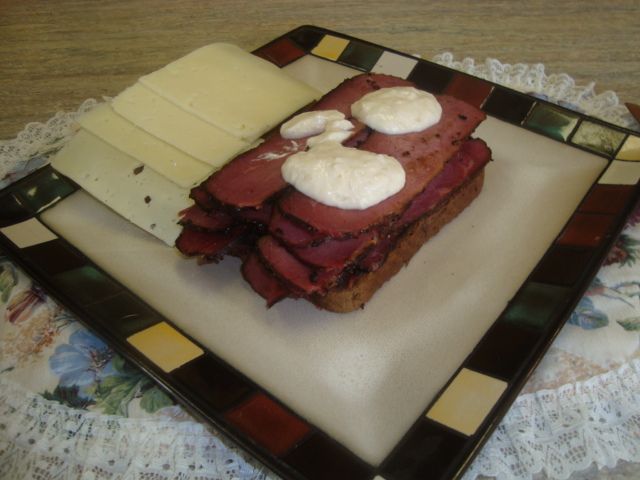
Now, for the results of this cook....I toasted 2 pieces of fresh rye bread and then placed 4 pieces of Swiss cheese on one slice. On the other slice, I piled about 3/4 pound of that wonderful pastramied beef and then added about 3 dollops of my homemade horsey sauce to the top of the meat. 

 photo DSC02133.jpg

I cut the sandwich into two pieces and finished up this treat with a few slices of tomato and a dill pickle spear. 
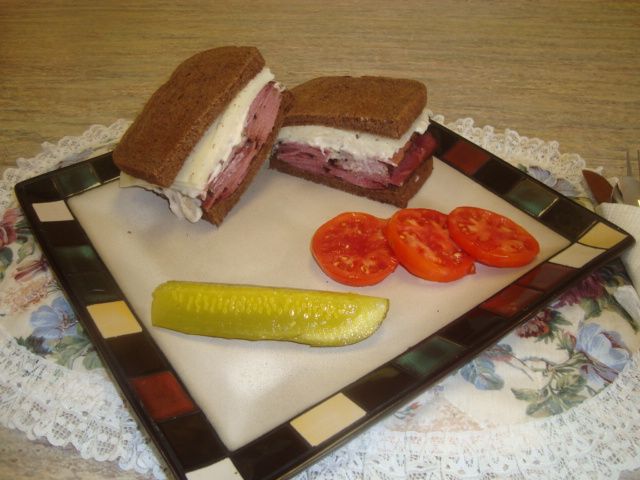
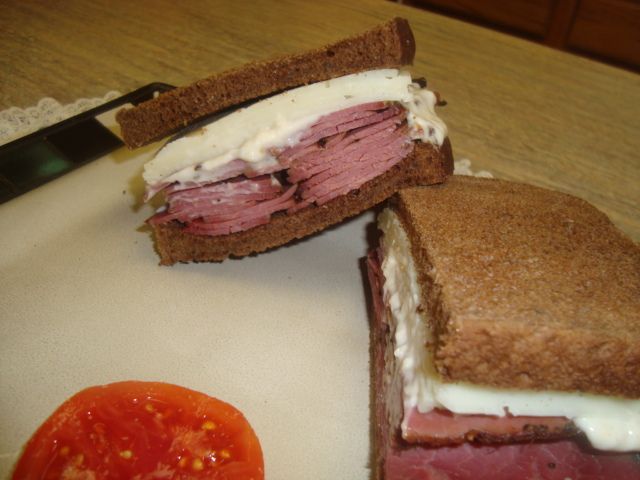
 photo DSC02134.jpg

 photo DSC02135.jpg

Was one great meal!

Note:  The recipes for my Corned and Pastramied Beef can be found here..
http://olddavespo-farm.blogspot.com/search/label/Corned%20and%20Pastramied%20Beef

Tuesday, January 7, 2014

Mixed Cook on Mixed Grills

I did this cook last September on a weekend and ended up using three of my favorite grills and cooking some of my favorite treats.

 photo DSC02058.jpg

 photo DSC02059.jpg

I started this September cook with 2-1/2 dozen breaded and smoked hot chicken wings on my GMG pellet grill. These hot and breaded wings are about my favorite appetizer.

Next up was a 2-3/4 pound chuck roast which was used for both some pulled beef and a couple of beef Manhattans. I also did a 2-1/2 pound beef tenderloin roast to be used for our Saturday evening supper. (Was later changed to be used in my Cheese Steak sandwiches).

 photo DSC02060.jpg

 photo DSC02064.jpg

These two roasts were smoked in my little Cobb Grill. For small amounts of food, this little grill is a lot of fun to work with and does make some fine food.

I then set my CB 500X up with the right side direct and the left side indirect and loaded it up with some Ozark Oak lump. This cooker was used to do all the ingredients except baking the hoagie buns of my 4 large cheesesteak sandwiches.

 photo DSC02066.jpg

I buttered up my rolls and grilled them in my black iron skillet.

 photo DSC02068.jpg

Looking good just off the grill.

Next up was my onions and these were done in peanut oil.


 photo DSC02069.jpg

 photo DSC02070.jpg

Then came my peppers.

 photo DSC02071.jpg

I also started my cheese mixture at this time. I used cheese, garlic, salt and pepper in this blend along with a little milk.

 photo DSC02073.jpg

The next ingredient I cooked was some mushrooms. 

 photo DSC02074.jpg

I then warmed up my thin slices of the beef tenderloin.

 photo DSC02075.jpg

About ready for my sandwiches. 

 photo DSC02078.jpg

 photo DSC02079.jpg

Added the meat and veggies and then slopped on the cheese for my 4 sandwiches. 

 photo DSC02080.jpg

 photo DSC02083.jpg

Three of the cheesesteak sandwiches were packaged and frozen for a later event.

 photo DSC02082.jpg

We ended up splitting the last sandwich and used it for our Saturday evening meal.
Really was a great sandwich...Pretty hard to beat a Philly Cheesesteak made with beef tenderloin.


Saturday, January 4, 2014

Turkey Cook / Davy Crockett Pellet Grill

This cook was done on my Green Mountain Davy Crockett tailgater pellet grill and came out great. I almost always brine my poultry and I wanted to try something new this year without brining and this worked out great. 

After washing and trimming up my 14 pound turkey, I injected it with Scottie’s Creole Butter and then used my no-burn rub on the outside of the bird. 

Scottie’s Creole Butter Injection

1 can of beer
1 pound of butter
1 TBL of your favorite rub
1 TBL paprika
1 TBL freshly ground white pepper
1 TBL sea salt
1 TBL garlic powder
1 TBL onion powder
1 TBL dry mustard
1 TBL freshly and finely ground black pepper
1 tsp cayenne pepper

Melt the butter in a saucepan, add the beer and spices, mix well, cool off and inject. 

I injected the bird then rubbed it with my no-burn rub the day before the cook. I also stuffed the cavity with some veggies and fruit.

 photo DSC02158.jpg

Ready to go on the cooker.

 photo DSC02164.jpg

Rolled the cooker around to my cooking patio and fired it up using my jump starter for my power. Cold morning at 26 degrees with some frost on the pumpkin. I set the starting temp to 180 degrees to create a little more smoke on the first hour.

 photo DSC02160.jpg

Loaded up the turkey and let is smoke for about an hour then I raised the temp to 325 degrees to finish the cook. This 14 pound turkey almost filled up the whole cooker but I figured I could do some sides along with it using bread pans for my baking. With the turkey on the grill, I just had enough room for one bread pan at a time.

 photo DSC02162.jpg

Later into the cook, I loaded my candied sweet potatoes in my bread pan into the cooker. These will bake about 40-45 minutes and I figured that is about the time the turkey will be done. 

 photo DSC02167.jpg

When the yams and the turkey came off, I tented the turkey and then loaded my cornbread dressing in a bread pan and then some yeast rolls in a pie pan into the cooker.

 photo DSC02168.jpg

These two items just had to be heated up so this didn’t take very long to get them ready.

 photo DSC02170.jpg

The turkey looked pretty good coming off of the cooker. 

 photo DSC02173.jpg

I then prepped the meat for the table.

 photo DSC02174.jpg

 photo DSC02175.jpg

I will do this recipe again as it was very good and simple to do.

Tavern Stew / Sweet Yeast Rolls

I have used this old recipe for over 50 years and it is the best stew recipe I have ever tasted. This stew goes by several names but the most well known are 5 Hour Stew and Tavern Stew. It is easy to make and can be changed to suit about anyones taste.

 photo DSC02012.jpg

It calls for beef stew meat and I always cut my own so I like to use a thick chuck roast for my meat.

 photo DSC02014.jpg

A fellow can cut it up into the size he wants and in my case, about 1-1/4 to 1-1/2 “ squares. 

 photo DSC02015.jpg

Then I get some celery, carrots, green bell pepper, onions, potatoes, and hot peppers all processed for my stew. You can leave out the peppers if you don't like the hotter stew. 

 photo DSC02016.jpg

All of the above is placed into a large Dutch oven for the cook. 

 photo DSC02017.jpg

I then add my spices and juice over the mixture and it is ready for the oven.

 photo DSC02018.jpg

Put the lid on and place it into a 250 degree oven or smoker/cooker for about 5 hours.

 photo DSC02022.jpg

 photo DSC02023.jpg

Looking good coming out of the oven.

 photo DSC02019.jpg

 photo DSC02021.jpg

As served...

Ok, here is the basic recipe and the method of doing this stew.

2 lbs beef stew meat
4-6 carrots sliced or chopped
4-6 potatoes cut into quarters or smaller
1 cup sliced celery
1 green bell pepper diced
1 or 2 medium onions chopped

Combine all of the above in a Dutch oven and for the hotter version be sure to include the hot peppers.

The next step and be sure to follow these directions.

3 TBL tapioca
1-1/2 tsp salt
1 tsp black pepper
1 TBL sugar

Sprinkle these items over the top of the stew but DO NOT MIX.

Pour in 12 oz or if you like more juice use 24 oz of V8 vegetable juice over the mixture but again, DO NOT MIX.

Cover and bake in a 250 degree oven for 5 hours and again DO NOT MIX or even raise the lid on the Dutch oven until its done.

Now, here are some of the things I do different from the basic recipe.

I usually always make a double batch.
I usually add some extra meat in my stew
I usually use some hot peppers in my stew.
I like more celery and green bell pepper in mine so I add that.
I use the hot V8 juice and usually about 48 oz in my larger batches

I usually bake mine at about 275 degrees and for about 6 hours to get my larger amount done.

Anyway, make it with what you like but do be sure to follow the basic directions. 


 photo DSC02202.jpg

 photo DSC02203.jpg

These are Aunt Lenora's yeast rolls from Bernard Clayton's New Complete Book of Breads. This is a multi-year winning Indiana State Fair recipe and are just about the best rolls a fellow can make.