Thursday, October 12, 2017

Breakfast on the Cobb Supreme

Still trying to figure out this new cooker and wanted to try one of the accessories called the “Frying Pan” on this breakfast cook. 

 photo IMG_0955.jpg

This cook consisted of some pancakes, sausage, and scrambled eggs. 

Added some maple syrup, berries, and some Cool Whip to the top of the pancakes and it sure made a fine breakfast.

 photo IMG_0948.jpg

I started with 13 all hardwood briquets and when they were ready, I placed the frying pan on the cooker and added the lid to let it warm up. Took about 6-7 minutes and I had a cooking grid temperature of 375-400F degrees and I started the cook.

 photo IMG_0949.jpg

It took about 3-4 minutes to get the first side done and then about an additional 2-3 minutes to finish the pancakes.

 photo IMG_0952.jpg

Next up was the sausage and then the scrambled eggs.

 photo IMG_0953.jpg

Sausage and eggs done on the cooker.

 photo IMG_0954.jpg

The results of the cook just off of the Cobb Supreme.

 photo IMG_0956.jpg

Couldn't hardly wait to get started on this breakfast meal! Doesn’t that look good?

Has been fun trying to learn how to cook on this new cooker...


Crescent Cherry Cheesecake Cobbler / Cobb Grill

Always looking for desserts that will fit on my smaller Cobb Premier cooker and this is a good one and fairly easy to fix. 

 photo IMG_1021.jpg

Added a couple dips of ice cream and a hit of cool whip and it made a fine dessert.

 photo IMG_1003.jpg

Ingredients were as follows:
8 oz tube of Crescent Rolls
12 oz cream cheese
1/2 cup sugar
1/2 stick butter
21 oz cherry pie filling
1 tsp vanilla extract
1/4 cup sugar

8X8 baking dish

 photo IMG_1005.jpg

Pam the baking dish and place 4 or half of the Crescent rolls on the bottom of the dish, add the cream cheese and 1/2 cup sugar mix.

 photo IMG_1006.jpg

Add the cherry pie filling

 photo IMG_1007.jpg

Place the other half of the Crescent rolls on top and add the 1/4 cup sugar and the butter to the top of the treat.

 photo IMG_1008.jpg

I used the larger charcoal basket with 20 all hardwood briquets which I heated up in a chimney.

 photo IMG_1011.jpg

My cobbler about done on the Cobb grill. I ran the grill at about 300F measured at the very top of the dome and the bake took about 65 minutes to complete.

 photo IMG_1022.jpg

I figured I would have a rough time getting it out of the dish but it came out better than I expected.


It’s really a fine dessert and especially for the Cobb and I will do this one again.

Cobb Supreme / Pork Steaks

Here is another cook on my new Cobb Supreme that I did in the last couple of weeks. This cooker is still a learning process for me but I have about figured it out for most cooking. 

 photo IMG_0946.jpg

I need to explain this first picture as someone may get the wrong idea of how pork steaks should be cooked. I love this treat but it must be cooked in the traditional manner  which would mean that they need to be oiled, rubbed with a spicy rub, and grilled first and then placed into a half pan with a bottle of Maull’s BBQ sauce which has been cut with beer and then simmered for about an hour to finish them up. Now, that’s the way you cook pork steaks!

Wife doesn’t like them this way so every now and then, I have to fix some for her. 

Anyway, I added a couple slices of tomatoes, a slice of corn bread, and a little dab of sour cream to the potatoes and gave her a fine meal. 

 photo IMG_0947.jpg

I prepped the meat with olive oil and then added some SPG for this cook. The potatoes were also rubbed with olive oil and salt and pepper.

 photo IMG_0937.jpg

I used 14 all hardwood briquets for this cook.

 photo IMG_0941.jpg

I used the Cobb Supreme griddle for this cook and it did a fine job.

 photo IMG_0945.jpg

The results of the cook.


Smoking Cheese in the Hasty-Bake Gourmet

I have been waiting patiently for some cooler weather as we are completely out of smoked cheese. I need a day or morning at about 50 degrees or under. 

 photo IMG_0957.jpg

This smoke was about 10 pounds of cheese including the following:

2 pound pepper jack
2 pound sharp cheddar
2.28 pound 4 year aged cheddar
1.14 pound Swiss
8oz monterey jack
8 oz mild cheddar
8 oz sharp cheddar
1.67 pound three alarm colby jack

 photo IMG_0958.jpg

I started the smoke early in the morning as I wanted the coolest temperatures of the day.

 photo IMG_0959.jpg

I used a half hotel pan full of ice to help hold down the temperature inside the cooker.

 photo IMG_0960.jpg

I used 5 all hardwood briquets for my fire and a couple of chunks of hickory for my smoke wood for this cook.

 photo IMG_0962.jpg

Was a nice morning with a cooler temperature of about 50 degrees. The cheese took 90 minutes to get done. I was able to keep the temperature inside the cooker at under 70 degrees which is great for smoking cheese.

 photo IMG_0967.jpg

The results of my smoke ready for the vacuum pack machine.

 photo IMG_0968.jpg

Bagged and ready for the fridge.

 photo IMG_0971.jpg

This should hold us for a few months.

 photo IMG_0973.jpg

Gotta love smoked cheese off of a Hasty Bake. And for any folks that have not tried real smoked cheese, you are missing out on a great treat. Most all smoked cheese available in outlets hasn’t been even close to a smoker... it is done with chemicals. 


Wednesday, October 11, 2017

New Cobb Supreme / Hot Buffalo Wings

The next cook in my New Cobb Supreme were some scorching hot chicken wings. 

 photo IMG_0987.jpg

Now, would you believe that I had this for breakfast. A fellow needs a good solid breakfast with juice and some meat!

 photo IMG_0988.jpg

I like the hot Buffalo wings breaded as I can get much more hot sauce on them this way. These wings were sauced 4 times during the cook.

 photo IMG_0974.jpg

Used an egg and milk wash and the breading consisted of black,red, and white pepper, onion powder, garlic powder, and a mix of corn meal and flour.

 photo IMG_0975.jpg

I like to bread the wings and then place them in the fridge for about an hour before the cook. Gives the breading time to set up a little before the fire.

 photo IMG_0976.jpg

You think that Supreme doesn't cook evenly?? Just look how nice the wings are cooked just before we started applying the hot sauce.
I used 14 all hardwood briquets for this cook and it took about an hour to get the wings done.

 photo IMG_0978.jpg

My sauce mix includes some Frank's Hot Sauce, some melted butter, 1/8 cup honey, 1/8 cup rooster, 4 TBL Tabasco, and about 1 TBL of ground cayenne pepper.

 photo IMG_0980.jpg

Ready to come off of the Cobb Supreme as they are done.

 photo IMG_0986.jpg


Now that's a beautiful plate of hot wings in my opinion.

New Cobb Pizza Stone / Bake and Review

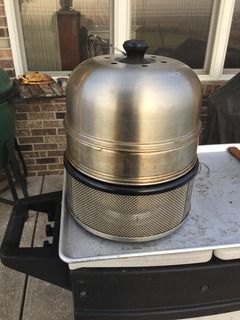
This thing has been talked about for many months and has finally arrived and I purchased mine for $18.00 dollars plus shipping from Cobb Grill America a few weeks ago. 

 photo IMG_0911.jpg

It is designed to fit into the Cobb roasting rack on the Premier cooker. 

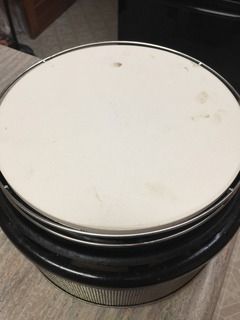
The new Cobb Pizza stone is about 7/16" thick with four feet and is a very nice accessory if it will do a good job with pizza. It is very wide and doesn't have very much room (7/16") between the stone and the dome cover for the heat to come up around it to cook the top of your bread and pizza. It measures about 10-1/2” in diameter. Everything about this new hearth stone is quality. 

 photo IMG_0912.jpg

Having done a lot of baking on this cooker, I knew it might be difficult to make this stone work as expected. To help with this first bake, I used my modified cooking grid which has 24 extra larger holes in the outside edge which will help getting some heat and smoke up around this very large stone to help cook the top of my bread and pizza. 

 photo IMG_0915.jpg

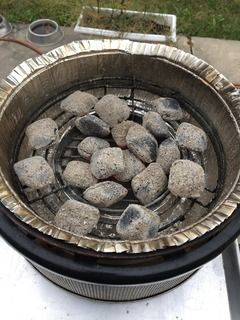
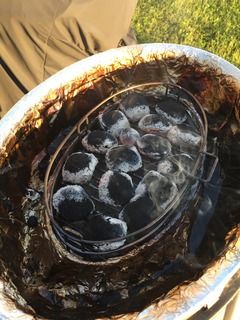
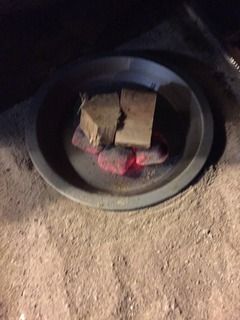
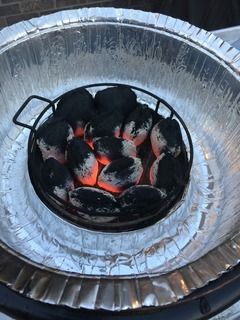
I started with the maximum amount (13) of all hardwood briquets for this first bake. 

 photo IMG_0918.jpg

I decided to use a dome extension for this first pizza attempt with the new Cobb hearth stone. I figured that to keep the bottom of the pizza from burning before the top got cooked, I needed to get my hearth stone up and a little higher from the fire. 

 photo IMG_0916.jpg

I let the stone heat up for about 20 minutes and then checked the temperature on the top of the stone and found it at about 270F degrees and I also had a probe in the top of the cooker and it was registering about the same, and I had an oven thermometer inside on the stone and it as well was about 270F degrees. That sure seemed low to me for baking but that was all I could get out of the cooker with this large stone. At this point, I was wondering if I could get a good pizza off of the cooker at this low temperature.

 photo IMG_0914.jpg

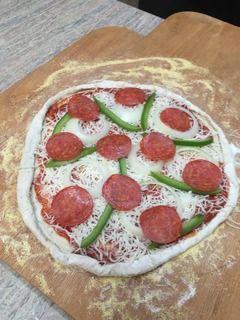
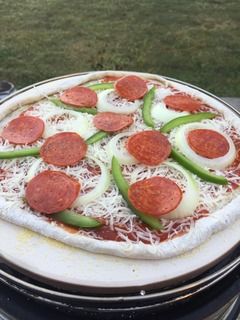
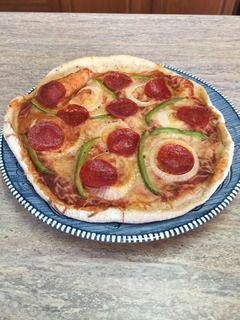
I made up a very simple pizza for this first try with just sauce, cheese, onions, bell peppers, and pepperoni.

 photo IMG_0917.jpg

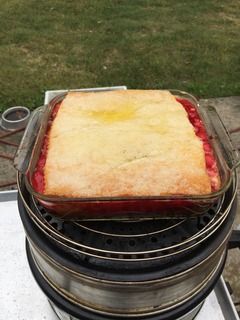
Loaded my first pizza onto the Cobb and started the bake. 

 photo IMG_0919.jpg

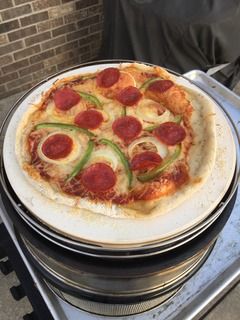
It is done on the Cobb grill and ready to come off the cooker. It took way too long to bake at over double the time of a normal pizza bake as I couldn’t get enough heat up and around this very large hearth stone to bake a good pizza. 

 photo IMG_0921.jpg

 photo IMG_0927.jpg

 photo IMG_0928.jpg

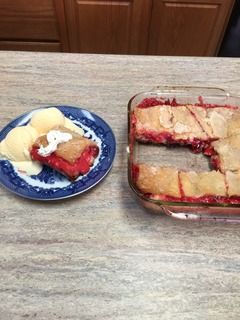
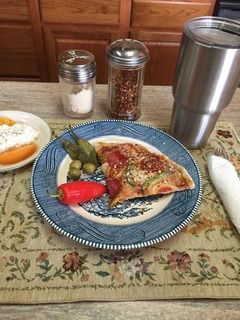
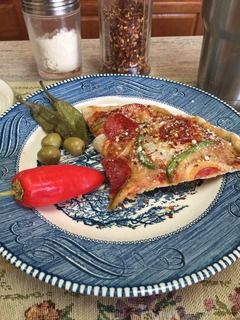
I did get a pretty good pizza off of the cooker with the kinda crispy crust I wanted but this was a very simple pizza without much goodies on it. There is just no way this stone will work very well with the average pizza cook. It’s just too big in diameter for the cooker. I’ll bet the engineer designed the hearth stone on a Friday afternoon after spending too much time in a pub for lunch! 

I wouldn’t recommend this stone for the Cobb Premier but it is a great hearth stone which I will use in my small Big Green Egg and my small Weber kettle. 


A proper sized hearth stone for this Cobb Premier shouldn’t be over 9” in diameter and will produce wonderful pizza, breads, cobblers, pies, cakes, and other baked treats. 

Hot and Fast brisket on the Cobb Supreme

This is the last cook I have done on my new Cobb Supreme cooker and it came out quite well. 

 photo IMG_0998.jpg

Added a baked potato and some mac and cheese and a cottage cheese salad and had a fine meal.

 photo IMG_0989.jpg

The brisket flat weighed 8.99 pounds and after trimming, I had a net weight of 7.89 pounds. I sprinkled on a moderate amount of butcher cut black pepper and then added my favorite beef rub about 45 minutes before the fire.

 photo IMG_0990.jpg

I started with 20 all hardwood briquets and then added two fairly large hickory chunks for my smoke wood. After the cooker got on temperature, I added my temperature probe and started my cook. Since it was raining, I had to move my cook to my covered front porch.

 photo IMG_0993.jpg

Cooker started dropping temp about 90 minutes into the cook so I added 8 more all hardwood briquets. I also added more smoke wood.

 photo IMG_0995.jpg

At about 2 hours and 10 minutes into the cook, and with my internal temperature of the meat at about 178F degrees, I wrapped the meat in heavy duty foil with some liquid goodies as I will braise it for the last period.
The meat reached an internal of about 208-211F internal in about another hour and 10 minutes and I took it off the cooker as it was done.

The total time for this cook was a little under 3-1/2 hours. 

 photo IMG_0996.jpg

These higher temp shorter brisket and pork butt cooks do give up a little on the bark but this one still had enough bark to add the flavor I wanted. Had a nice smoke ring for a short cook.

 photo IMG_0997.jpg

That is a nice plate of meat.

 photo IMG_0999.jpg

Meat came out nice and juicy and very tender. I took it to about 206F to 211F internal as this is needed to get a hot and fast brisket done.


I kept the cooker temperature at about 265-285F measured at the top of the dome lid for the duration of this short cook.

Here are some later pictures of my brisket sandwich lunch.

 photo IMG_1014.jpg

 photo IMG_1015.jpg

I like to pile on at least two layers of meat, add some horseradish sauce, lettuce, tomato, onion on a good egg bun for my sandwich. Then I want it served with some chips and a good dessert.

 photo IMG_1018.jpg

Let's eat!