Showing posts with label Green Mountain Pellet Grill Modifications. Show all posts

Wednesday, February 28, 2018

Green Mountain Pizza Oven / Details & Dimensions

I had a ton of feedback on this Green Mountain accessory  as many folks wanted to know if it could be made or modified to fit other pellet grills. Well, here are the details. Use these dimensions at your own risk!

 photo IMG_1124.jpg

These are the rough overall dimensions of the pizza oven.

18-5/8”  total width of the unit
13-1/4”  depth of the unit measured on the dome lid  (doesn’t include some of the mounting tabs
11”  total height of the unit

The pizza oven is basically just 3 pieces which consists of:

The Dome Cover with the bolted on handle and is 6” high less the handle
The hearth stone which measures 16” wide by 14” deep

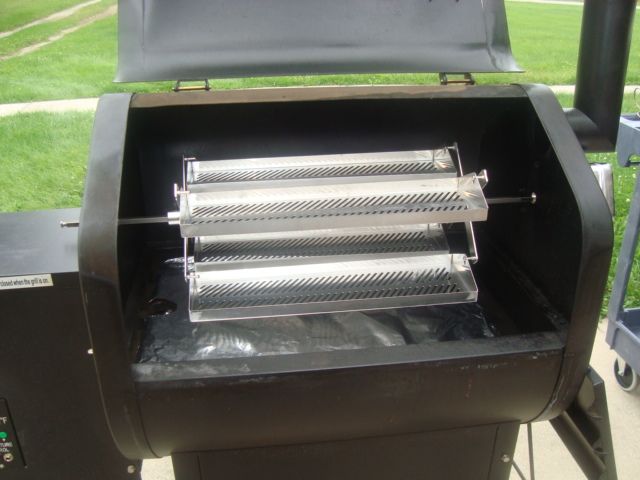
The pyramid base unit which just sits inside the Green Mountain Grill. While it is all one piece and welded together, it is made up of the pyramid part, the diffuser plate which the hearth stone sits on, and several tabs which hold the cooker at the right height in the grill and also the proper position. There are also tabs that hold the dome cover in the correct position. 

 photo IMG_1148.jpg

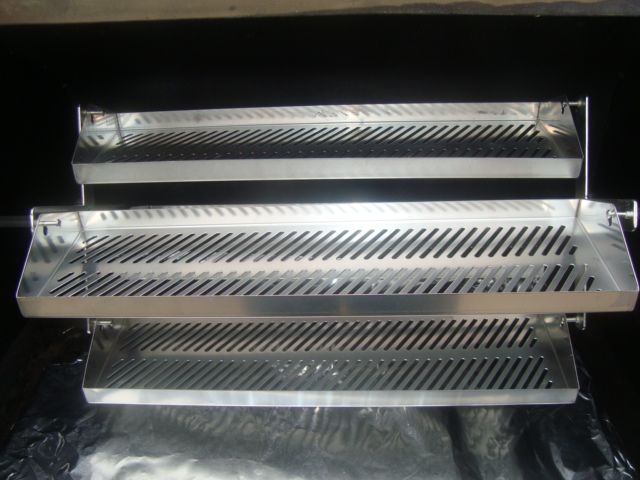
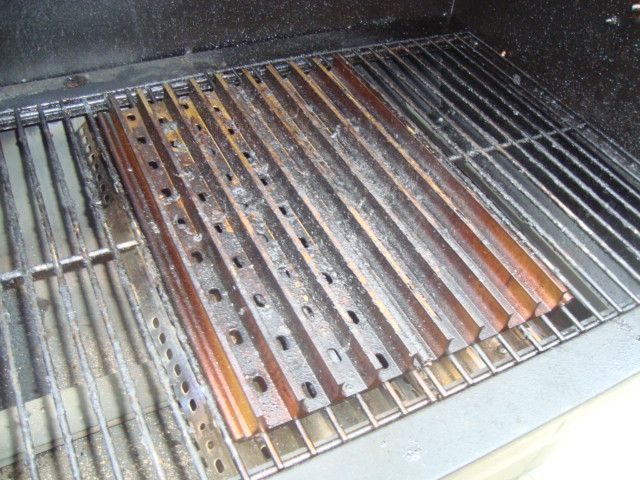
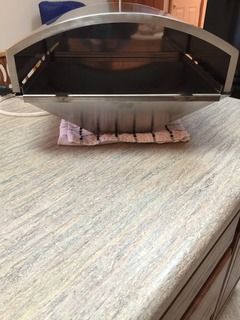
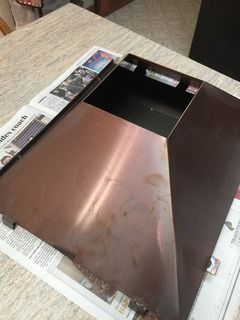
This is what it look like out of the cooker. The hearth stone is placed on top of the diffuser plate which has a small rail around the 3 sides. This plate can not be removed to do any direct cooking. Look closely and you can see two of the tabs that hold this unit in the cooker.

 photo IMG_1149.jpg

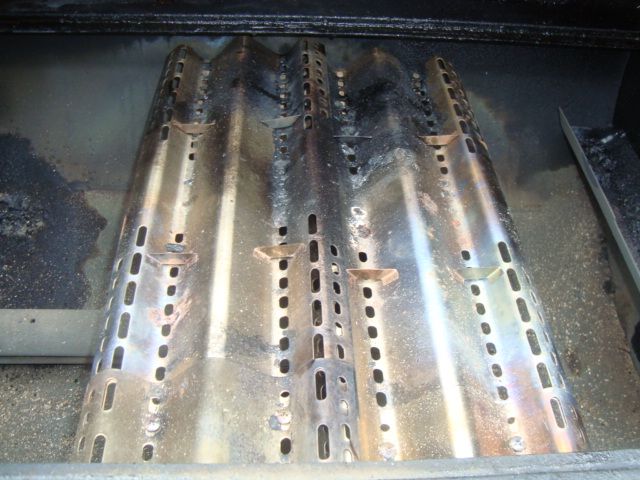
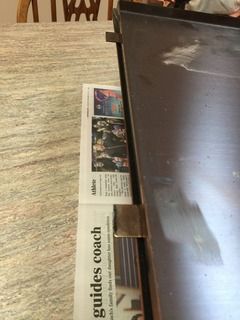
This is the left side of the pyramid part and you can see the rolled tabs that hold and position the dome cover. You will also see a gap between the lower pyramid part and the welded on diffuser plate and that gap is where the fire hot convection air comes up and is directed by the dome cover to the top of the pizza. This gap is on both sides of the unit. 

 photo IMG_1150.jpg

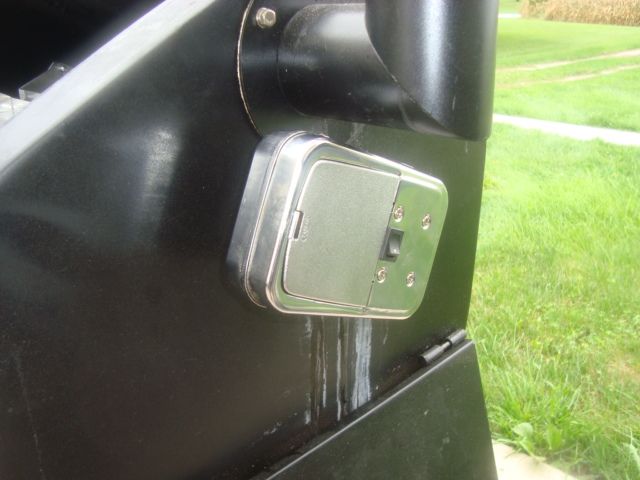
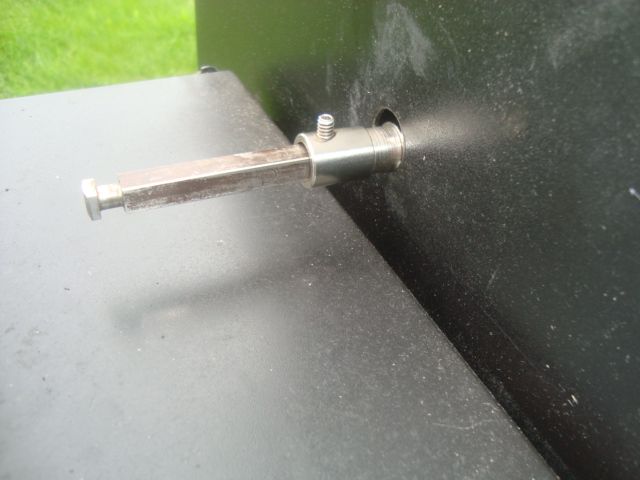
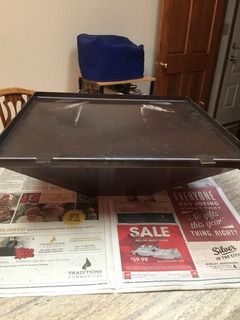
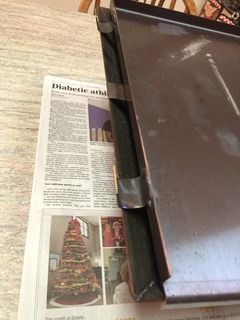
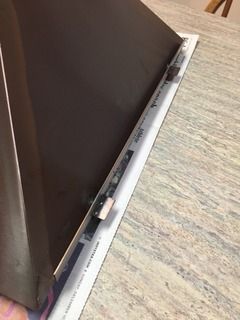
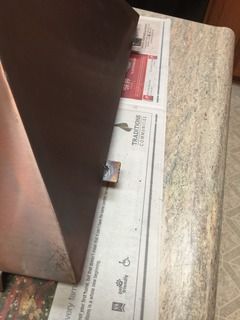
This picture shows the mounting tabs on the back side of the unit. 

Ok, this is how it measures:

19-1/4” is the width including the dome tabs
15-1/4” plus 1” for the tabs that hold it deep
6-1/4” is the height measured to the tabs that hold the unit inside the cooker. Measured to the very top of the unit would add an additional 3/4” to include the diffuser rails. 

 photo IMG_1144.jpg

The hole in the bottom of the pyramid measures 5-5/16” square and that goes over the fire box. 

 photo IMG_1147.jpg

Front of cooker

 photo IMG_1146.jpg

Back of cooker


You can see the mounting tabs on these photos. 

Tuesday, July 28, 2015

Barbecued Ham & Spiral Cut Pineapple on the Rotisserie

The Barbecued Ham recipe included a great sounding “Sticky Orange Glaze” made with fresh orange juice along with chile sauce and some other ingredients that just looked wonderful to me. 

The Roasted Spiral Cut Pineapple as well had a great looking recipe sauce including cocoa powder, cane sugar, and gobs of butter. 

I did this cook on my Green Mountain Daniel Boone pellet grill with a rotisserie setup  yesterday and it came out quite well.

 photo DSC02975.jpg

 photo DSC02976.jpg

The ham was prepped with a good rub and then mounted into my rotisserie basket. I then cleaned and cut the spiral into my whole pineapple and mounted it along side my ham and it was ready for the grill. 

 photo DSC02978.jpg

 photo DSC02977.jpg

Loaded my basket into the grill and got it spinning away at about 165 degrees for the first hour to insure I ended up with some good hickory smoke flavor in my final product. 

 photo DSC02979.jpg

After about an hour, I raised the temperature to about 275 and also loaded my candied yams in a bread pan along side my rotisserie basket. 

 photo DSC02982.jpg

Later into the cook, both the ham and the pineapple were basted with my two sauces before they came off the cooker. 

 photo DSC02984.jpg

 photo DSC02985.jpg

 photo DSC02989.jpg

My three treats came off the cooker looking very good.

 photo DSC02986.jpg

Wife made up a pan of skillet cornbread and also heated up some fresh kale greens from the garden. 

 photo DSC02990.jpg

 photo DSC02991.jpg

 photo DSC02992.jpg

It sure made a nice evening meal. 

Saturday, October 11, 2014

Rib-O-Lator in a GMG Daniel Boone

Well, I married a standard Rib-O-Lator unit with a Green Mountain Daniel Boone pellet grill and wonder how well it will cook ribs. 

 photo DSC02505.jpg

With the additional height inside the Daniel Boone, made this modification very easy.

 photo DSC02507.jpg

Looks like it will work fine....

 photo DSC02503.jpg

Used my battery operated spit motor for this modification.

 photo DSC02502.jpg

And a 1/2” spit rod bearing on the other end of the rod.

But, will it cook ribs???

Tuesday, June 18, 2013

High Temp Steak, Burger, Tenderloin and more

This is a high temp steak, burger, grilled tenderloin, and homemade brat cook on the Green Mountain pellet grill.  

 photo DSC01808.jpg

I added my steak insert which is two adjustable Brinkmann heat tents which I have sitting on a couple of firebricks for the correct height. They are used as flame tamers to keep the flame where I want it. 

 photo DSC01809.jpg

Next step was to place the standard grates back on the cooker and then I added my Grill Grates on top of the standard grates. I didn't use any of the standard drip shield or the two wind deflectors that come with the cooker.

I fired up the cooker and set the controller to 350 degrees which is all I need for my high temp grilling. Remember, this setup will grill at the tip of the flame so a fellow doesn't need those crazy hot temps that will warp and spring the parts in the cooker. 


 photo DSC01810.jpg

As soon as the cooker got up to 700 degrees which took about 10 minutes, I added the burgers. 

 photo DSC01811.jpg

By the time my burgers were done of the first side (about 3 minutes), the cooker had reached my target temp of 775 degrees. Again, the controller is set at 350 degrees. My setup allows me to cook at the tip of the flame with my insert. 

 photo DSC01812.jpg

Next up was two rib-eyes cut about 1-1/2” thick.

 photo DSC01815.jpg

The rib-eyes cooked about 3 minutes on the first side and then 2 minutes on the second side. 

 photo DSC01814.jpg

I then did my 2 grilled tenderloins and they took about 2 minutes to get done.

I also cooked 3 homemade brats on the indirect side of the grill. I didn’t want to break the skin with the high temps.

The results of the cook.


 photo DSC01819.jpg

 photo DSC01818.jpg

 photo DSC01820.jpg

 photo DSC01821.jpg

The burgers as served.

 photo DSC01825.jpg

The steak as served.

 photo DSC01822.jpg

 photo DSC01823.jpg

Now that some good stuff!!

Along with my rotisserie mod, this high temp setup is one of the better modifications I have  done to this fine cooker.


Saturday, April 6, 2013

Meatloaf Cupcakes with Mashed Potato Frosting

Saw a picture of this slick treat on the Web and just had to give it a go. It had a recipe and method with it but I decided to use my own recipe and method to keep it simple. 

 photo DSC01570.jpg

I mixed up a pound of burger and a pound of hot sausage. I then added an egg, some chopped onions and bell peppers along with some crackers. 

 photo DSC01571.jpg

I put the meat into the muffin tin.

 photo DSC01572.jpg

I used the end of a wooden spoon to open a couple of holes about a 1/2” deep in each piece and poured in a little catsup. It is now ready for the cooker.

I also took a head of Romaine lettuce and split it in half and drizzled on some olive oil, added some sea salt, some garlic powder, and some fresh ground black pepper. 


 photo DSC01576.jpg

This cook followed a Hot Beef Strip cook running at 150 degrees so after I got the meat off for that cook, I raised the temp on the Green Mountain grill up to 350 degrees for this cook and loaded the meatloaf and lettuce. The lettuce is loaded cut side down. 

 photo DSC01575.jpg

Romaine lettuce done with this method is just KILLER!! 

 photo DSC01577.jpg

Cooked for just a short time until I started getting some char and then turned over. Next step is to add some shredded Parmesan cheese. 

 photo DSC01578.jpg

Looked good coming off the grill. 

 photo DSC01581.jpg

My meatloaf cupcakes just off the cooker and out of the muffin tin.

I fried up some bacon for the top of both treats and then heated up some mashed potatoes and placed them into a ziplock bag and cut the end off a corner so I could use it like a pastry bag. 


 photo DSC01582.jpg

I piped the mashed potatoes onto top of the cupcakes and added some bacon bits. I also added some bacon bits to the lettuce. 

 photo DSC01583.jpg

 photo DSC01584.jpg

Made for a nice presentation and also a great meal.

Brisket & Burnt Ends with A-Maze-N-Tube Smoker Accessory

This is my first brisket cook on my Green Mountain pellet cooker and it came out great. It was also the first use of my A-MAZE-N-TUBE smoker in one of my cookers.


 photo DSC01538.jpg

 photo DSC01539.jpg

I started with a CAB full packer cut brisket that weighed in at just under 13 pounds. Was really a nice piece of meat but loaded with way too much fat.

 photo DSC01540.jpg

 photo DSC01541.jpg

I trimmed off about 2-3 pounds of excess fat and then made up my injection for this cook.

2 cups beef broth
1/4 cup worcestershire sauce
2 TBL SGH rub
1 tsp onion powder
1 tsp garlic powder
1/2 tsp cayenne pepper


 photo DSC01542.jpg

The meat was injected with the above liquid which will give me some additional flavor and help keep it moist in my higher temp cook.

 photo DSC01543.jpg

The brisket was then rubbed with a generous amount of Smokin’ Guns Hot rub on both sides.

I loaded the A-Maze-N-Tube with some pecan pellets and placed it into the pellet cooker and fired it up with a propane torch. I then fired up the pellet grill and brought it up to 165 degrees which seems to be about the best temp for adding smoke to my meat. 


Pellet cookers are notorious for not providing enough smoke flavor to the product and this accessory is supposed to help and can be used on any cooker/smoker.

 photo DSC01544.jpg

Loaded the brisket into the cooker and then covered the cooker with my welding blanket as the ambient was at 33 degrees.

After about 75 minutes at the lower “smoke” temp, I raised the temperature up to about 315 degrees measured at the cooking grid for the balance of the cook. 


 photo DSC01546.jpg

I did check the meat at 3 hours into the cook and all looked good.

 photo DSC01547.jpg

The cook went an additional 1 hr and 45 minutes for a total of 4 hours and 45 minutes and I pulled the meat at an internal of about 202-205 degrees. 

 photo DSC01548.jpg

Looked good just off the cooker. I then cut the point off of the brisket and wrapped the flat in foil to rest for about an hour. I cut the point up into some nice 1-1/2” squares for my burnt ends. I placed the burnt ends in a pan and added some more rub and cayenne pepper, poured in some beef broth mixed with some Blues Hog sauce and placed them back into the cooker for about 2 more hours to get them as done as I wanted. 

 photo DSC01549.jpg

I cut a couple of nice slices of my homemade sourdough bread and loaded up one piece with some sliced brisket. I then added some pink horseradish to the meat. I added the lettuce, the onion, and the tomato to the other piece of bread. 

 photo DSC01550.jpg

I then put the sandwich together. 

 photo DSC01551.jpg

 photo DSC01552.jpg

 photo DSC01553.jpg

All plated up for serving. Made for a nice lunch.

The A-Maze-N-Tube did a great job of added some additional smoke flavor to this higher temp pellet cook.


When the burnt ends were done enough to suit me, I took the chunks out of the pan and drained them on some paper towels. They then went into the fridge for a another meal.

 photo DSC01558.jpg

This is what they looked like when I pulled them out of the fridge for my lunch.

 photo DSC01559.jpg

I selected about 5 pieces from the bowl and then heated them up for my meal and then added a dribble of Blues Hog sauce. Served with a baked potato, a piece of my sourdough bread, and some tomato slices.

 photo DSC01561.jpg

 photo DSC01560.jpg

This treat is just so much better than the standard brisket in my opinion and a fellow just doesn't get enough of it off of each brisket.