Wednesday, February 28, 2018

Scorching Hot Chicken Wings on the Air Fryer

This is one of my favorite recipes for hot wings on a cooker or grill and need to adapt it to the NuWave 10 Quart Air Fryer. 

 photo IMG_1305.jpg

 photo IMG_1306.jpg

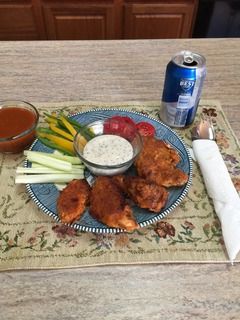
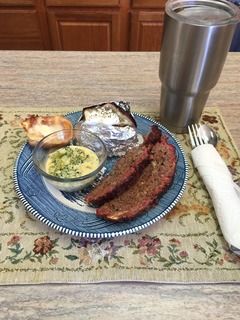
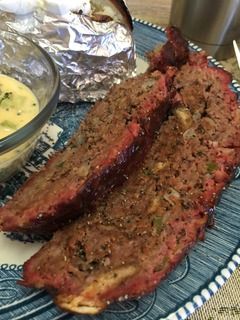
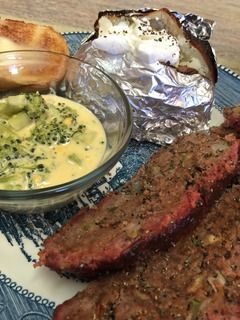
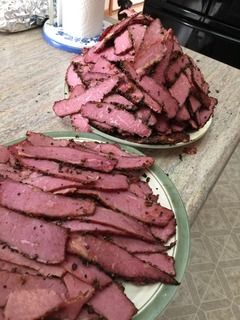
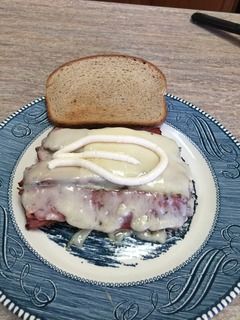
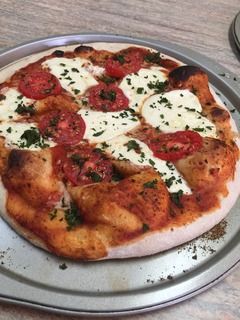
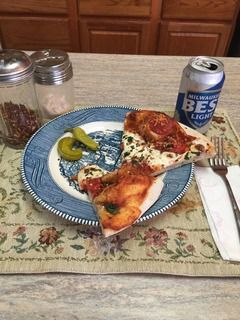
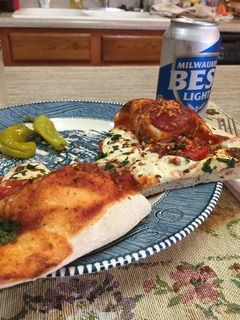
I think they look pretty good. I served them with some veggies and a poppy seed dip and it sure made a fine lunch. 

I like to bread them as the breading will hold more of the hot sauce and this old chili head loves this type of food.

 photo IMG_1296.jpg

Here is my recipe for this treat.

For about 20-25 wing pieces
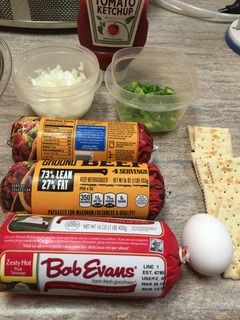
1/2 cup milk
1 egg
1/2 cup flour
1/2 cup corn meal
1 tsp white pepper
1 tsp fresh ground black pepper
2 tsp garlic powder
2 tsp onion powder
2 tsp cayenne pepper (optional on this amount) Wimps might use a 1/2 teaspoon

I am a chili-head and often double the spices in this recipe if I am cooking the wings just for myself.

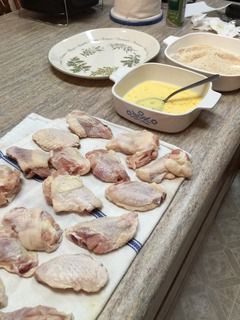
Prep the milk and egg wash and then the dry ingredients. Wings into the wash and then rolled in the dry coating. Fridge the wings for about 45 minutes for the coating to set.

Make up your favorite hot wing sauce for basting the wings. I am sure my mixture will be tooo hot for most folks but here it is.

1 cup Louisiana hot sauce
1/4 stick of melted butter
1/8 cup honey
1/8 cup rooster
2 TBL Tabasco
2 tsp ground cayenne pepper

 photo DSC03332.jpg

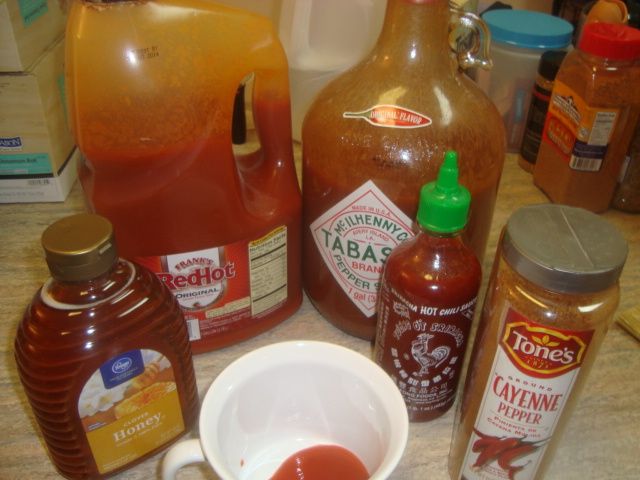
Making up my scorching hot sauce for the wings.

 photo IMG_1297.jpg

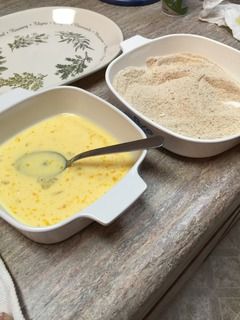
Egg wash first, then into my breading, and then on a plate.

 photo IMG_1299.jpg

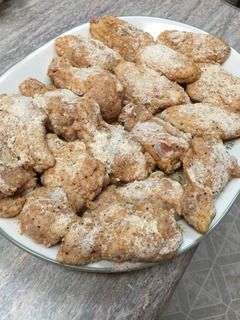
They go into the fridge for about an hour to allow time for the breading to set up.

 photo IMG_1300.jpg

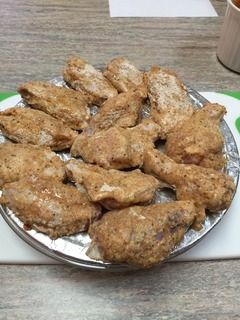
Ready to go into the air fryer. I did hit them with some olive oil spray to help prevent them from sticking to the grid.

 photo IMG_1301.jpg

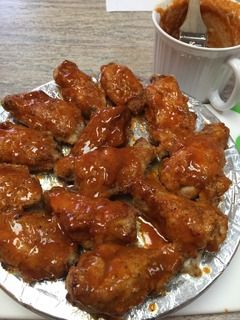
I pulled them out of the air fryer after the first 16 minutes, sauced them, and turned them over and sauced them and placed them back into the cooker.

 photo IMG_1302.jpg

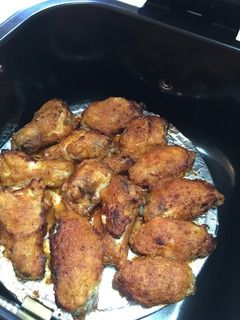
They were cooked at 390 degrees for 16 minutes and then sauced and turned over and sauced on that side and then cooked for 12 more minutes.

 photo IMG_1309.jpg

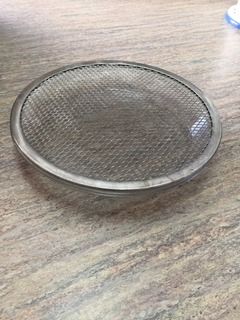
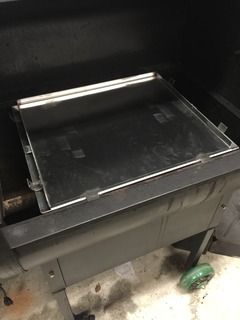
I used a glass pie pan under my wings and a pizza screen on top and then foiled the pizza screen. Cooking without any heat coming from the bottom of the air fryer is kinda difficult as the breading tends to stick to about anything I have used to cook them on. I did oil the foil and the wings came out very good with not much sticking and the breading stayed on the wings quite well. 

 photo IMG_1303.jpg

 photo IMG_1304.jpg

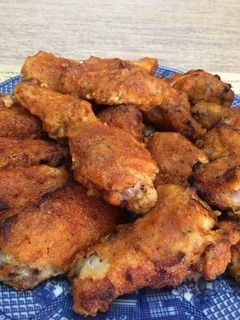
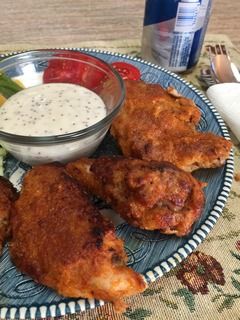
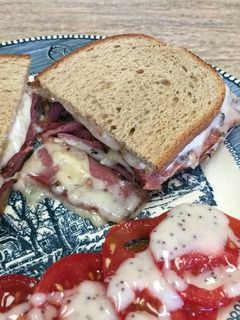
They didn't get quite as crisp at the ones I do on an outside grill but were still great.

 photo IMG_1305.jpg

That is a poppyseed dressing dip in the bowl on the plate.


All in all a pretty good cook but did have one small problem. The fat from the wings didn’t have anyplace to go and wanted to make the bottom side of the breading on the wings slightly soggy...I had to turn them more times that I wanted to prevent this. I should have poked some holes in the foil to allow the fat to run off the cooking grid. 

Meat Loaf & Baked Potatoes in the Cobb Supreme Grill

This cook and smoke was done on the Cobb Supreme Grill which is their largest Stainless Steel grill.

 photo IMG_1343.jpg

I served the meatloaf and potatoes with some broccoli with cheese sauce and a piece of garlic bun. I even got a pretty nice smoke ring on the meatloaf.

 photo IMG_1329.jpg

The ingredients for this meatloaf were about 2 pounds of fatty hamburger and a pound of zesty hot pork sausage. To that I added some chopped onions, chopped bell peppers, some crackers, a little catsup and a couple of eggs.

 photo IMG_1330.jpg

Ready to be mixed up and formed into a loaf.

 photo IMG_1332.jpg

I formed my meatloaf on a pizza screen as I didn't want to use a pan of any kind as I wanted as much smoke to get to the meat as possible. The potatoes were rubbed with peanut oil and I sprinkled on a good rub for some additional flavor.

 photo IMG_1333.jpg

I started with about 18 all hardwood briquets and then added some hickory pieces for my smoke wood. I do like smoke flavor on my meatloaf.

 photo IMG_1326.jpg

I planned to operate the cooker at about 225-250F degrees so I blocked off 4 of the exhaust holes to make it easy to control the cooker where I wanted it. It operated like a dream although I did have to add 7 more briquets to get the cook done.

 photo IMG_1335.jpg

My cook going on the cooker..notice all the smoke.

 photo IMG_1337.jpg

Was a cool morning with the ambient temperature at about 28F degrees. Just a great morning to do a cook.

 photo IMG_1338.jpg

Ready to come off of my Cobb Supreme. I took the meatloaf to 165F internal and pulled it off of the cooker. The cook took about 1 hour and 45 minutes and I ran a temperature of about 215F to about 265F during the cook.

 photo IMG_1341.jpg

The first few slices off of my 3 pound meatloaf.

 photo IMG_1344.jpg

I think that is a nice looking slice of meatloaf.

 photo IMG_1345.jpg

Sure made a nice lunch.


EZ Corned and Pastramied Beef Brisket on the GM Daniel Boone

 photo IMG_1223.jpg

My first sandwich is made on toasted rye bread and then I added a generous amount of the pastramied beef brisket, three slices of baby Swiss cheese, and a big helping of horseradish sauce. This is probably my most favorite sandwich.

 photo IMG_1183.jpg

My local Kroger store had some Corned Beef Brisket Flats on sale so I purchased 4 of them for my treat. Got home and found out that they were the points which is about too fatty for good pastramied brisket. Took them back and they called another Kroger store in the next town and found me some flats. Wife picked them up and when I opened them up, I found whole briskets that had been cut in half diagonally. Man, I can’t win!

Anyway, I started with the 4 purchased corned beef brisket halves  and then trimmed them up of most of their fat.

 photo IMG_1184.jpg

The cuts of meat were not as good as I usually get but I will make them work. Had to cut off way too much fat with these lousy briskets.

 photo IMG_1185.jpg

Since the purchased corned beef brisket is bathing in salt water and brine, which will work great for something like corn beef and cabbage but not good for making into pastrami, I need to de-salt the meat somewhat for my treat. I do this in this container for about 24 hours changing the water 3-4 times during this period to remove the excess salt.


This is the meat ready to go on the cooker. I piled on a rub consisting of large butcher cut black pepper, coriander, brown sugar, and a few other spices.

 photo IMG_1210.jpg

I loaded my meat into my Green Mountain Daniel Boone and set the cooker for maximum smoke and ran it that way for the first 3 hours and then turned it up to 290 degrees to finish my cook. 

 photo IMG_1216.jpg

I took the meat off of the cooker at an internal of about 185 degrees and it looked pretty good. 

 photo IMG_1217.jpg

Put all the meat thru my slicer.

 photo IMG_1218.jpg

The finished meat looked ok but the slices were not very wide.

 photo IMG_1220.jpg

We kept out enough meat for a couple of sandwiches and then vacuum packed the balance for the freezer.

 photo IMG_1221.jpg

Ready for the freezer.

 photo IMG_1222.jpg

Start of my sandwich on toasted rye bread. 

 photo IMG_1224.jpg

I added a small tomato salad and had a fine lunch.


Green Mountain Pizza Oven / Details & Dimensions

I had a ton of feedback on this Green Mountain accessory  as many folks wanted to know if it could be made or modified to fit other pellet grills. Well, here are the details. Use these dimensions at your own risk!

 photo IMG_1124.jpg

These are the rough overall dimensions of the pizza oven.

18-5/8”  total width of the unit
13-1/4”  depth of the unit measured on the dome lid  (doesn’t include some of the mounting tabs
11”  total height of the unit

The pizza oven is basically just 3 pieces which consists of:

The Dome Cover with the bolted on handle and is 6” high less the handle
The hearth stone which measures 16” wide by 14” deep

The pyramid base unit which just sits inside the Green Mountain Grill. While it is all one piece and welded together, it is made up of the pyramid part, the diffuser plate which the hearth stone sits on, and several tabs which hold the cooker at the right height in the grill and also the proper position. There are also tabs that hold the dome cover in the correct position. 

 photo IMG_1148.jpg

This is what it look like out of the cooker. The hearth stone is placed on top of the diffuser plate which has a small rail around the 3 sides. This plate can not be removed to do any direct cooking. Look closely and you can see two of the tabs that hold this unit in the cooker.

 photo IMG_1149.jpg

This is the left side of the pyramid part and you can see the rolled tabs that hold and position the dome cover. You will also see a gap between the lower pyramid part and the welded on diffuser plate and that gap is where the fire hot convection air comes up and is directed by the dome cover to the top of the pizza. This gap is on both sides of the unit. 

 photo IMG_1150.jpg

This picture shows the mounting tabs on the back side of the unit. 

Ok, this is how it measures:

19-1/4” is the width including the dome tabs
15-1/4” plus 1” for the tabs that hold it deep
6-1/4” is the height measured to the tabs that hold the unit inside the cooker. Measured to the very top of the unit would add an additional 3/4” to include the diffuser rails. 

 photo IMG_1144.jpg

The hole in the bottom of the pyramid measures 5-5/16” square and that goes over the fire box. 

 photo IMG_1147.jpg

Front of cooker

 photo IMG_1146.jpg

Back of cooker


You can see the mounting tabs on these photos. 

Green Mountain High Temp Pizza Oven Accessory

I purchased this Green Mountain wood fired pizza oven a few weeks ago when they were on sale and finally got it installed in my Daniel Boone to try it out. WOW, it is one great accessory. Pizza as high as 850-875 degrees is what it is designed to do. Imagine, a 2 minute pizza!

 photo IMG_1124.jpg

This accessory is all Stainless steel except for the hearth stone and it sure looks like a quality unit. To install it, I just took the grids and drip pans out of the cooker and just dropped it into the Daniel Boone. The unit fits over the fire box in the cooker so all the heat is directed up into the unit. 

 photo IMG_1125.jpg

The base of the unit installed in the cooker. 

 photo IMG_1127.jpg

Ready to go in the cooker. The top part just lifts up and off of the unit if needed (for rookies that can’t handle a pizza peel) but I found that it wasn’t needed for my pizzas. I had plenty of room for using both a wood and metal peel.

 photo IMG_1126.jpg

I wanted to start with a couple of simple Pizza Margherita style pies so I didn’t have very much on them for my first attempt. 

I used some frozen dough I had made up a few weeks ago that was made with 00 flour, a few herbs, and of course, salt, sugar, oil, water, and some yeast. To top the pizza, I started with some sauce, and then some mozzarella cheese, next up some small sliced tomatoes, and then some shredded parmesan cheese. I did the second pizza the same way but also added a few pieces of pepperoni. 

 photo IMG_1130.jpg

Since this was my first bake on this unit, I decided to use a little lower temperature at around 650-700 degrees for my first attempt. To get this temp, I had to set the cooker at just 275 degrees. It took about 20 minutes to get to temp on this cold 20 degree morning. 

 photo IMG_1133.jpg

Pizza just loaded into the hot oven.

 photo IMG_1134.jpg

Pizza about done in the oven...note the bubbled up dough. After loading, I let it bake for 2 minutes and turned it about 90  degrees and let it go for 2 more minutes for a total of 4 minutes to complete the pizza. The 90 degree turn is all that is needed as the pizza oven heats the top of the pizza from both sides of the accessory. 

 photo IMG_1135.jpg

 photo IMG_1137.jpg

 photo IMG_1139.jpg

 photo IMG_1140.jpg

I thought my first effort came out great...love that bubbled up dough and the way everything came out. I added my chopped basil after the pizza was out of the oven. I can hardly wait to try it again at a higher temperature. 

 photo IMG_1141.jpg

 photo IMG_1142.jpg

Lunch...


And I paid just over $100 dollars for this unit and I think it is a great value for the folks that own a Green Mountain grill. The grill will fit both the Green Mountain Daniel Boone and the Jim Bowie. Won't fit the Davy Crockett grill.