Monday, June 26, 2017

Portobello Pizza / Cobb Grill / Low Carb Treat

This is a nice treat and also low carb and fairly easy to make and bake on any size cooker or kitchen oven. 

 photo IMG_0183.jpg

The Ingredients for my cook were as follows:

3-4 Portobello Mushrooms
Pizza Sauce
Sliced black olives
Sliced bell peppers
Sliced onions
Pepperoni
Pound of Italian sausage
Mozzarella cheese

I cooked the sausage in advance and used a mellon ball tool to clean out the gills on the bottom of the mushrooms. 

 photo IMG_0185.jpg

Started with the sauce

 photo IMG_0187.jpg

Next, I added the sausage, the olives, onions, and bell peppers

 photo IMG_0188.jpg

Finished up by adding the cheese and pepperoni and they were ready for the grill. 

 photo IMG_0189_1.jpg

Placed the first three treats on the Cobb which I had running at about 325-350 degrees. Took about 15-18 minutes to get done. 

 photo IMG_0190.jpg

Done on the grill

 photo IMG_0191.jpg

I did the 4 mushrooms in two cooks or bakes

 photo IMG_0192_1.jpg

 photo IMG_0196.jpg


Served with some fruit and a Smoked Amber Ale and I had a great meal. 

Stuffed Pork Loin Cobb Grill

I did this stuffed pork loin on my Cobb grill using the rotisserie and it came out quite well. 

 photo IMG_0529.jpg

My pork loin was butterflied and trimmed up a little and then I added a couple of layers of the following: Prosciutto, sandwich cut pepperoni, provolone cheese, and baby spinach. I then cut up some fresh sage, fresh thyme, and some fresh rosemary and just took a small hand full and added it to my treat.

 photo IMG_0530.jpg

Next step was to fold it over and tie it with some string to hold it together. It was about two inches too long for my rotisserie setup so I cut it into two pieces and again used some string to hold it together.

 photo IMG_0531.jpg

I put it all together on the kitchen countertop to see if it would work and then sprinkled on some garlic salt and some fresh cracked black pepper. Next step was to sear my pork loin treat.

 photo IMG_0532.jpg

I started the fire and after it was hot, placed my Grill Grates on the cooker smooth side up and gave it about 10 minutes to warm up and I just seared the two flat sides of the meat for about 5 minutes each while it was on my spit rod.

 photo IMG_0535.jpg

Added a big pack of Hickory smoke chips to the fire and put the rotisserie setup together and turned it loose running the cook as hot as I could with my 13 hardwood briquets.

 photo IMG_0538.jpg

The cook took about two hours and 15 minutes to complete. I started with 13 all hardwood briquets and then added 5 more about 70 minutes into the cook.

 photo IMG_0539.jpg

This is the stuffed whole half loin just off of my Cobb rotisserie and cooling down for slicing.

 photo IMG_0543.jpg

I served the stuffed pork loin with a wilted spinach salad, sliced tomatoes, and some garlic bread.

 photo IMG_0544.jpg


Made a fine lunch.

Spaghetti Pie Cobb Grill

Here is a nice treat that can be done on about any cooker and I just tried it out on my Cobb Grill and it came out very good. 

 photo IMG_0479.jpg

The ingredients are as follows and I did it in a 8” in diameter cake pan that is 3” deep.

1 pound of either hamburger, sausage, or other ground meat (cooked)
1 pound of pasta  (cooked)
1 medium onion chopped  
About 2 cups marinara or spaghetti sauce of some kind
1/2 cup ricotta cheese
2 TBL fresh minced flat-leaf parsley
3 large eggs
About 2/3 cup grated Parmesan
1 cup shredded mozzarella
Italian seasonings

 photo IMG_0481.jpg

I used the larger charcoal basket and loaded 18 all hardwood briquets for this bake.

 photo IMG_0483.jpg

I baked this treat using the dome extension on a raised standard grid in the Cobb. It took about 40 minutes to get it as done as I wanted (175 internal).

 photo IMG_0485.jpg

Just out of the cooker and pan cooling on the counter top. 

 photo IMG_0489.jpg

Cut it like you would cut a pie.

 photo IMG_0487.jpg

 photo IMG_0488.jpg

I like to serve this treat with some extra sauce over the top and a piece of garlic bread.


This is a great tasting treat and fairly easy to prepare. 

Rotisserie Chicken Cobb Grill

This cook was done on the Cobb Grill and was a small fryer chicken that weighed only four pounds so it was a small chicken. I didn’t do a thing to it other than apply a rub and just put it on the grill and get it spinning.

 photo IMG_0511.jpg

The start of the cook.

 photo IMG_0515.jpg

I used heavy smoke for the first 15 minutes with some JD Oak Chips. 

 photo IMG_0517.jpg

At about the 45 minutes mark into the cook, I started mopping the chicken every 10 minutes with the Roadside Chicken Sauce which is a great marinade, sauce, dip, mop, glaze etc..and works great on any poultry. 

 photo IMG_0519.jpg

Just off of the Cobb and cooling.

 photo IMG_0521.jpg

Chicken was about too small to cut up so I just halved it for our meal. 

 photo IMG_0524.jpg

 photo IMG_0525.jpg


Add some pots and gravy, some sliced tomatoes, a wedge of cornbread and had a great meal. 

Triple Dipped and Beer Battered Chicken

Found this recipe for “Deep Fried” chicken on the web and it had one statement that really got my attention and here is the statement:  

Quote--”This is the crispiest, spiciest, homemade fried chicken I have ever tasted! It is equally good served hot or cold and has been a picnic favorite in my family for years.”

So I said to myself---self, why couldn’t a fellow just grill this recipe and see how well it would do as I just can’t cut much grease anymore. 

I did this cook on my little Cobb Grill and it came out well but a little under-spiced in my opinion. I will spice it up some more on my next cook.

 photo IMG_0499.jpg

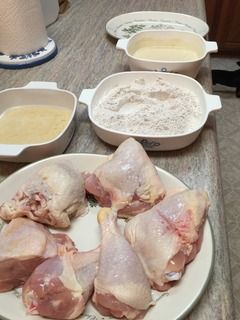
The recipe has a dry mixture, a beer batter mixture, and a plain bowl of beer. The recipe is for one whole chicken.

Dry mixture ingredients:

3 cups all purpose flour
1-1/2 TBL garlic salt
1 TBL black pepper
1 TBL paprika 
1/2 tsp poultry seasoning

Beer batter mixture ingredients:

1-1/3 cups all purpose flour
1 tsp salt
1/4 tsp pepper
2 egg yolks, beaten
About 1-1/2 cups (12oz) of beer -more or less as you don’t want the batter too thick

Bowl of a few oz of beer

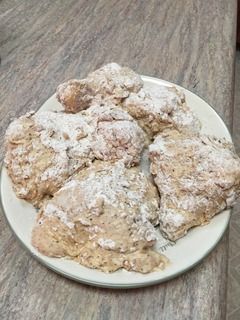
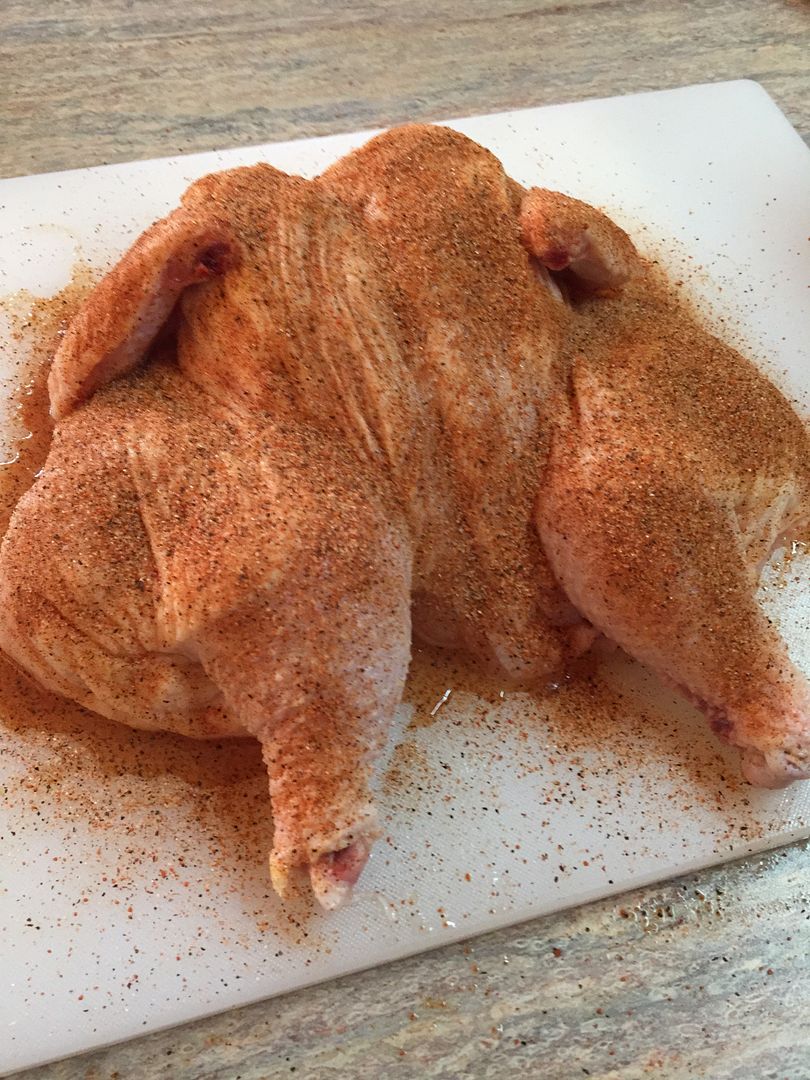
Ok, to prep--the chicken pieces go into the plain beer bowl first, shake it off, dip it into the dry mixture next, dip it into the beer batter next and kinda shake it off, and then back into the dry mixture and then onto your plate. 

 photo IMG_0500.jpg

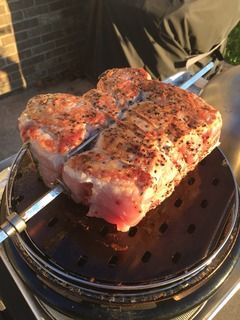
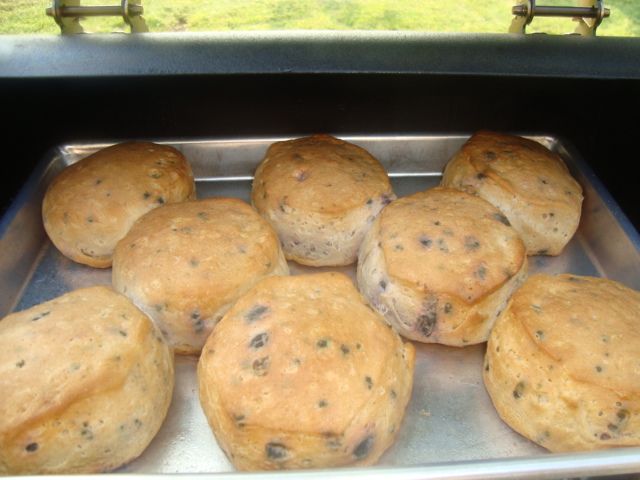
I covered my plate with plastic wrap and put it into the fridge for about an hour so the breading could set up a little before the fire. I didn’t have a whole chicken but only about 5-6 pieces on this first cook as I didn’t think I could get a whole chicken in pieces on the little grill. 

 photo IMG_0501.jpg

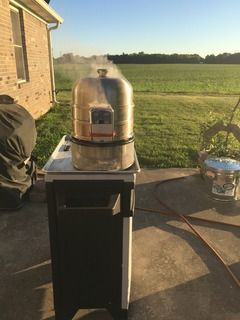
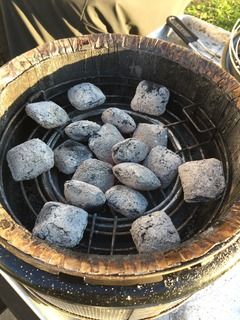
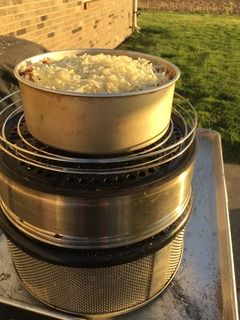
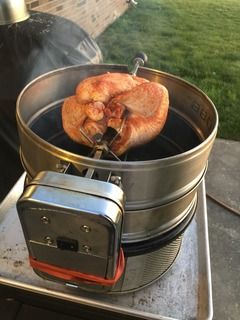
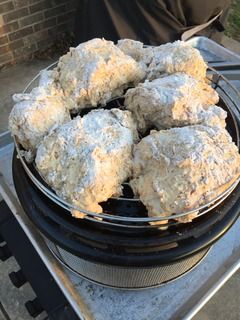
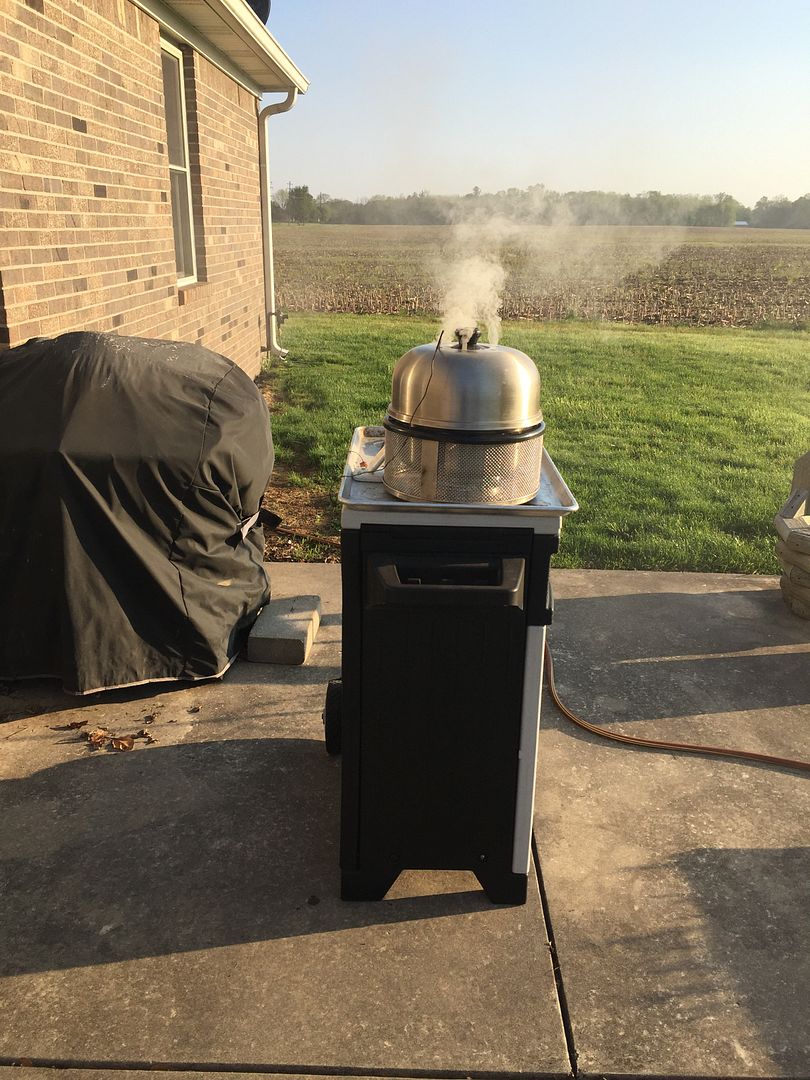
Chicken going on the Cobb Grill. 

 photo IMG_0502.jpg

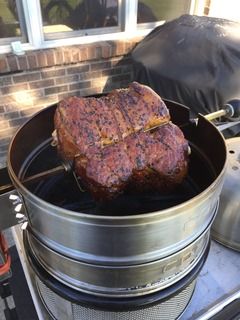
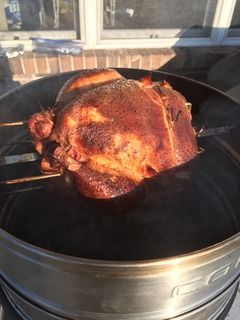
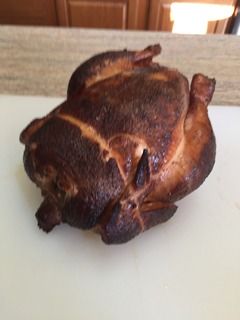
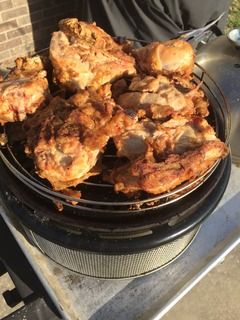
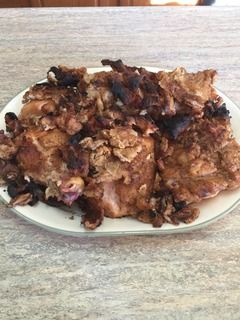
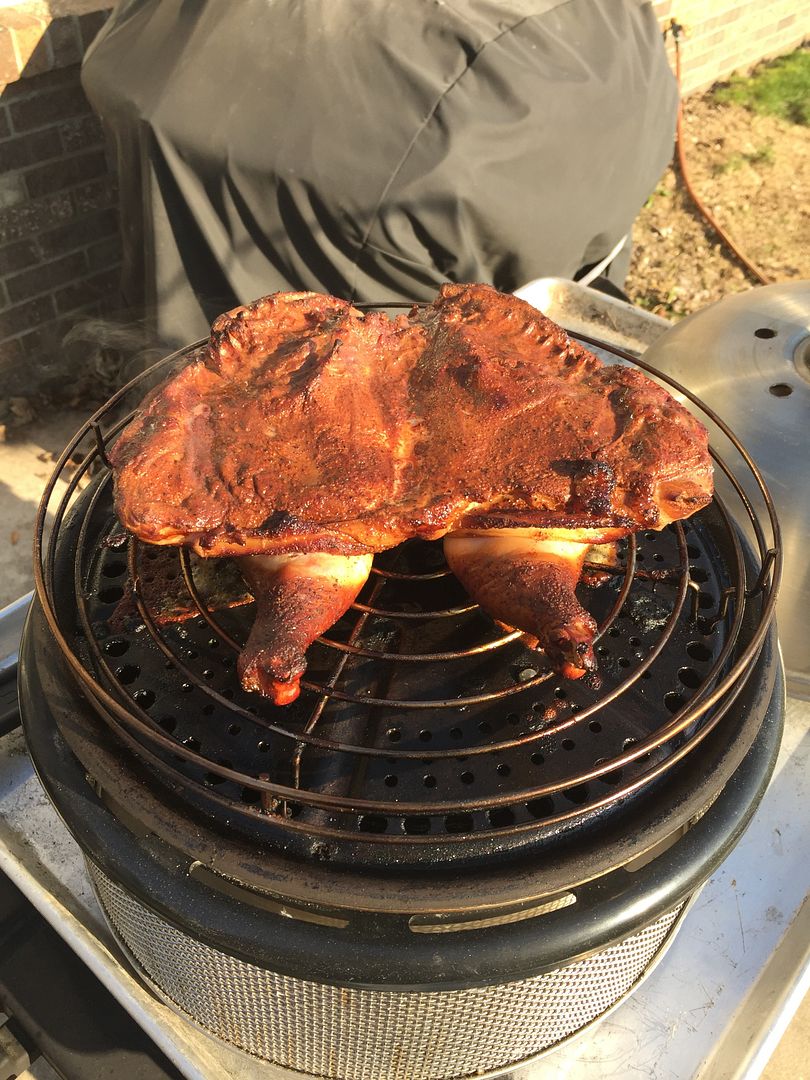
Chicken about done on the grill.

 photo IMG_0504.jpg

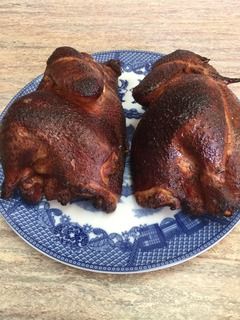
My chicken lost a little breading as I used a roast rack to help hold the chicken and some of the breading stuck to it. Would have been better to just have placed it on the cooking grid. I also think it would have been better if I would have used another grill that I could run much hotter at about 350-375 for better results. The little grill with that big of load was struggling to get to the higher great chicken cooking temperatures. 

 photo IMG_0506.jpg

 photo IMG_0507.jpg

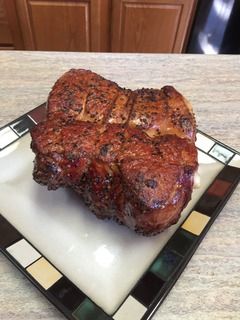
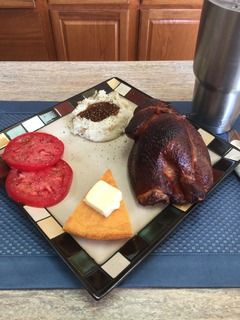
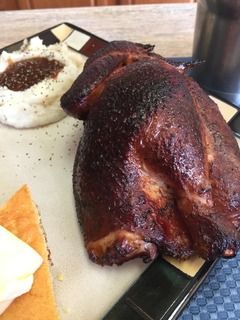
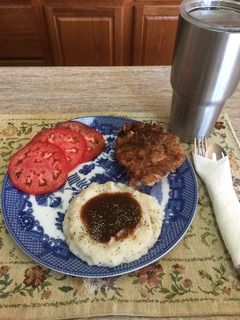
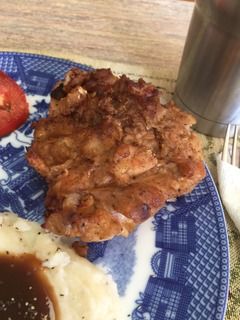
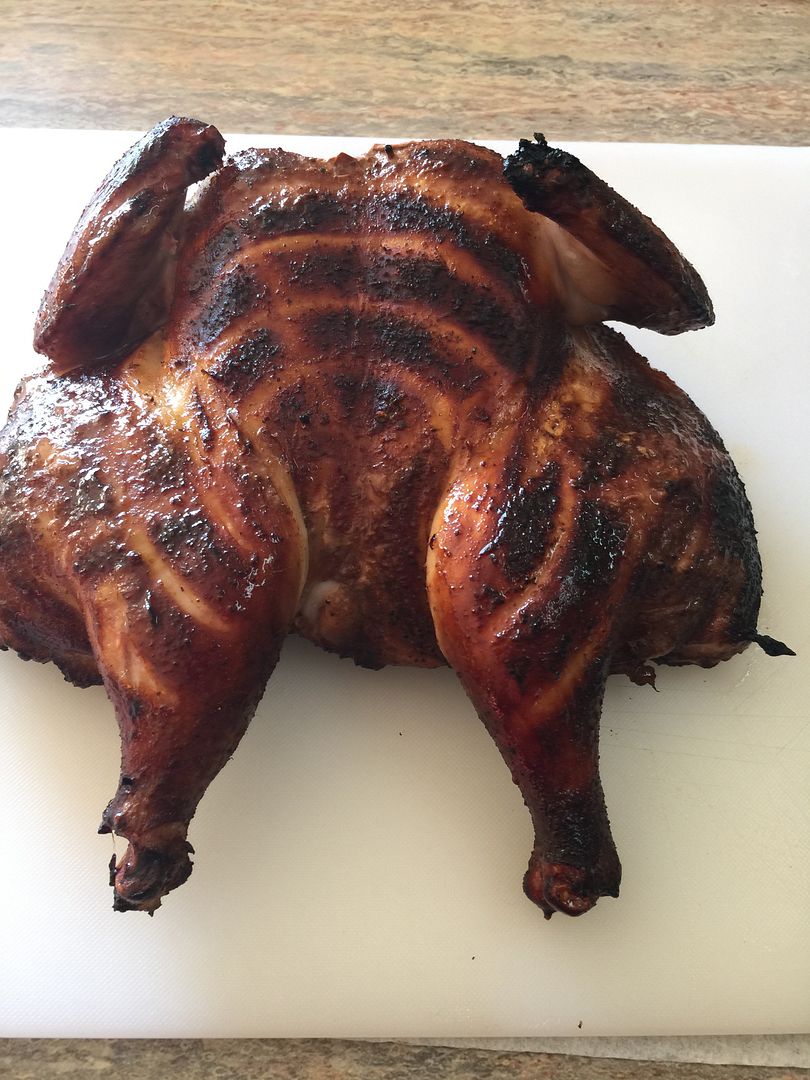
Jan made up some mashed pots and sliced some tomatoes for my treat. This was some very good breaded and non deep fried chicken and with a few tweaks will be a winner!!  More spices including ground cayenne pepper, white pepper, addition of onion powder, and a little more garlic of some type and then cooked on the Weber Performer or a pellet cooker at about 375 degrees should put this out of sight!


EZ Fruit Turnover

There are many treats that can be made with the Pillsbury refrigerated pop-open dough tubes and this is just one of them. These biscuits are great to take along for camping as they can be turned into hundreds of different treats. We just place them in a zip-lock bag and throw them into the cooler.

 photo IMG_0498.jpg

 photo DSC02457.jpg

And you can always use them for your diner rolls or biscuits as they can be baked in about any type of grill, smoker, or cooker. I think the ones on the picture are the blueberry rolls. 

Ok, for the turnovers. Jan had some cooked apples made up and along with our frozen berries that we purchase by the pound and eat quite often for dessert, we had a couple of fillings for our turnovers.  

 photo IMG_0490.jpg

For each turnover, I use two of the biscuits together and just roll them out and put the filling on one side of the dough but not too close to the edge, and then I brush on a little water on the outside edge, and roll them over and using a fork, I press the edges together to get a good seal for my treats. 

I had a couple of extra biscuits so Jan made a couple of doughnuts out of them. 

 photo IMG_0491.jpg

Going on the Cobb Grill.

 photo IMG_0492.jpg

Done on the grill. Took about 20 minutes.

 photo IMG_0493.jpg

Didn’t have enough room to do all three at one time so I did two rounds on the Cobb. 

 photo IMG_0496.jpg

 photo IMG_0497.jpg

Add a couple dips of ice cream and you have a great dessert and very EZ to make. 


Sunday, June 4, 2017

Butterflied & Kickin Chicken with an Attitude / Cobb Grill

Did this cook yesterday on the little Cobb Grill and it came out very well. 

 photo IMG_0420.jpg

I started with a chicken that weighed a little over four pounds, a box of that great pre-cooked bacon, some jalapeno pepper slices, and my favorite chicken rub. 

 photo IMG_0423.jpg

I spatchcocked the chicken by cutting the backbone out and then I trimmed off the two wing tips and then broke the keel bone so it would lay flat on the grill. Next step was to give it a good coat of rub on both sides and it was ready for the grill. 

 photo IMG_0431.jpg

I fired the grill up using 13 all hardwood briquets and I made up a tinfoil pouch of JD chips for my smoke wood and just put them right on top of my ashed over briquets. Loaded the chicken and ran the cooker at about 275-320 degrees measured on the cooking grid. The cook took 55minutes to get my chicken to an internal of 170 degrees which was my finish temperature for this cook. 

 photo IMG_0432.jpg

The chicken just before it came off of the grill. It was cooked skin side down thru out the whole cook to be sure that the skin held all the wonderful juices, moisture, flavor, and goodness inside the meat and not run out on the fire if I would have turned it to skin side up at any time during the cook. 

 photo IMG_0433.jpg

I let the chicken cool down for about 10 minutes and then I removed the skin for my next step in this process. I also pulled and chopped up my chicken at this time. 

 photo IMG_0434.jpg

I chopped up the chicken skin into smaller pieces, did the same with my pre-cooked bacon, and then chopped up my jalopeno slices into smaller pieces. 

 photo IMG_0435.jpg

I added a little oil to my Cobb frying pan and put it back on my grill and loaded my chicken skin and fried it until it was slightly crispy. 

 photo IMG_0437.jpg

Next up was to add both the bacon and jalapeno peppers to the pan with the fried chicken skin and cook them a few minutes to get them as done as I wanted for my treat. 

 photo IMG_0439.jpg

 photo IMG_0440.jpg

Poured my hot goodies right on top of my pulled chicken and then mixed it up for my sandwiches. 

 photo IMG_0441.jpg

 photo IMG_0442.jpg


I made up a slider with my Kicked up chicken and added some veggies and a bowl of slaw and a big dip of pit beans and had a fine meal with my treat. The Bride thought it was a little too hot to suit her but she did eat most of her sandwich anyway.