Showing posts with label Lasagna. Show all posts

Friday, November 17, 2017

Lasagna on the Cobb Supreme

I tried some more baking on my new Cobb Supreme and it came out quite well. 

 photo IMG_1031.jpg

I added a couple slices of tomatoes and a slice of garlic bread and it made a fine meal.

 photo IMG_1033.jpg

Lasagna is one of my favorite meals.

 photo IMG_1023.jpg

I used about a 1-1/4 pound of my homemade Italian sausage, some burger, onions, garlic, sauce, spices. and a little water. The cheese mix was ricotta, parmesan, mozzarella, and eggs. I used the oven ready lasagna noodles. Added some pepperoni to the top of my treat.

 photo IMG_1024.jpg

Ready to go on the cooker.

 photo IMG_1026.jpg

Got my bake started very early this morning to beat the rain.

 photo IMG_1029.jpg

My Supreme always seems to run a little hotter than my Premier so for most cooks, I close off some of the exhaust vents to control the temperature. I wanted to run about 350F degrees measured on the cooking or baking surface so I closed of half or 4 of the vent holes.

 photo IMG_1027.jpg

A 9X13 baking pan just fits the cooker and this picture shows the lasagna done at 170F degrees internal. I used 14 all hardwood briquets and the bake took one hour.

 photo IMG_1030.jpg

Cooling down for serving.


I think that this larger Cobb Supreme does bake a little better than the standard Cobb grill. I will try a pizza next to see just how well it does at a higher baking temperature. 

Friday, March 10, 2017

Lasagna Loaf / Cobb Grill

This bake was done on my Cobb Grill using Wicked Good all hardwood briquets. 

 photo IMG_0235.jpg

Ingredients:

About 1 lb of my homemade Italian sausage
12 oz marinara sauce
15 oz ricotta cheese
3 cups shredded mozzarella cheese
8 slices of mozzarella cheese
1/2 cup shredded parmesan cheese
2 oz pepperoni
2 eggs
About 8 oz lasagna noodles

 photo IMG_0236.jpg

Ready to go on the Cobb.

 photo IMG_0237.jpg

A cool morning at about 30F degrees. Used a charcoal chimney to start this cook. 

 photo IMG_0238.jpg

Needed a baking temperature of about 350-400 degrees so I used the larger charcoal basket and about 20 briquets for this bake.  

 photo IMG_0240.jpg

Just about ready to come off of the grill.

 photo IMG_0242.jpg

As cut for serving.

 photo IMG_0253.jpg

 photo IMG_0249.jpg

I dribbled on some more sauce and served this treat with a slice of garlic toast and some mixed fruit. Turned out that the second piece of lasagna was a little too much for this old fellow. Was a great lunch...


Friday, October 10, 2014

Dutch Oven Lasagna and Dessert

I did this cook using the new “oven ready” lasagna noodles and it was also my first cook in my new camp style dutch oven that I received from my children for my birthday. 

Nice thing about these noodles is that they don’t have to be cooked first as you just layer them uncooked into the DO along with your other ingredients. I did change my recipe by adding more sauce to help with the final product.

 photo DSC02379.jpg

I started with a little sauce on the bottom and then my first layer of the noodles. I then added 3 more layers consisting of my meat (a mixture of my homemade and super spicy Italian sausage and some 72% burger along with my sauce and spices), my wet cheese mixture, shredded cheese, and more noodles.

I did use some shredded cheddar for color on the last layer of ingredients. 

 photo DSC02382.jpg

Was a cooler morning with intermittent showers so I setup my cooking area with my WSM which I sometimes use for DO cooking in bad weather to shield my oven from the elements. 

 photo DSC02381.jpg

I cooked my lasagna until it was done at about 375 degrees and I did have to use the lid of the WSM a couple of times to avoid the rain showers. 

 photo DSC02384.jpg

Just before it came off of the fire. 

 photo DSC02385.jpg

I started some more charcoal and then made up my dessert which was a cherry chocolate cake in another DO. 

 photo DSC02386.jpg

I figured the rain was done so I did this short cook on my table. 

 photo DSC02387.jpg

Just before it came off of the fire. 

 photo DSC02391.jpg

 photo DSC02392.jpg

 photo DSC02393.jpg

The results of my cook.

Now, as plated.


 photo DSC02388.jpg

 photo DSC02389.jpg

 photo DSC02390.jpg

I did add a scoop of ice cream to my dessert.

The felt the cook was still a little short on sauce so I will add more on the next cook and I sure like the “oven ready” noodles as they save me a step on the cooking process especially for camping. 

Saturday, March 7, 2009

Hot and Super Spicy Italian Sausage

This is a great recipe for Italian sausage but it is very hot and spicy and by far, the best recipe I have ever tasted for this wonderful treat. This sausage stuffed into casings and eaten as a sandwich may be too hot and spicy for some of the family but used loose (bulk) in all other recipes is just something that you won't soon forget! It is really that good!

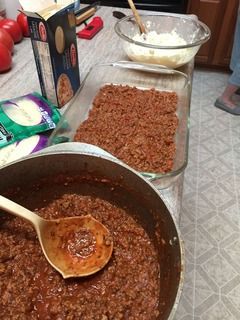
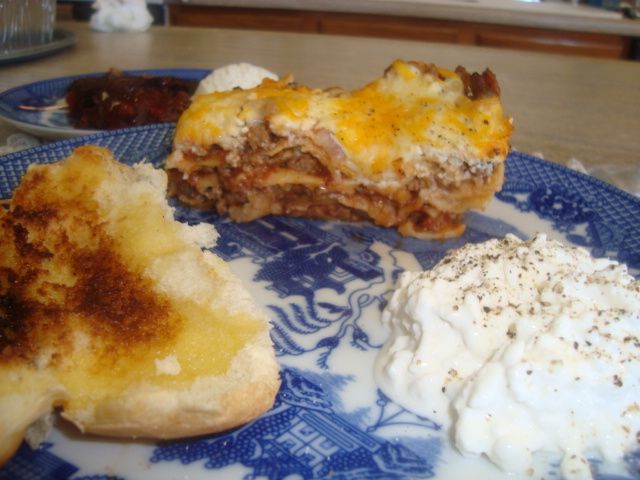
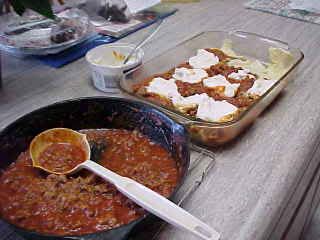
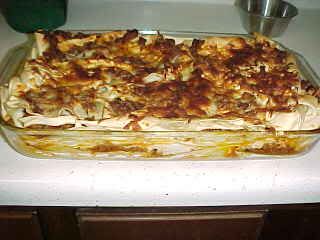
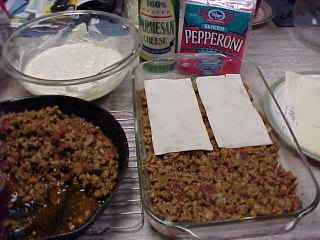
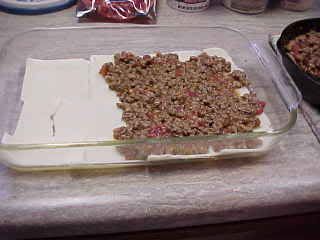
We use it in our pizza, meatloaves, meatballs (both over spaghetti and in meatball hero sandwiches), calzones, stromboli, stuffed bell peppers, fatties, lasagna, marinara sauce, spaghetti sauce, and some other casseroles.


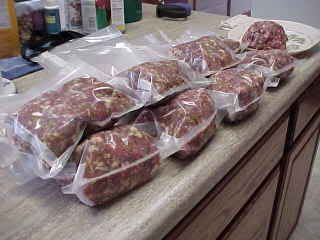
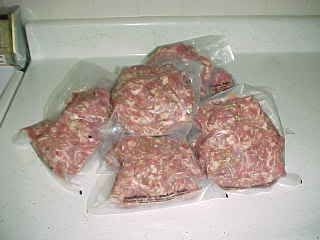
This picture shows about 18 pounds of my Italian sausage ready for the freezer.

We usually make it up in batches of about 8 pounds to as much as 18 pounds. It does freeze well and will hold fine in the freezer for about 6 months.

Ok...Let's get started. You will need a way to grind up the pork butts for this treat or if you are lucky and have a local store that still has a real meat department, just have them grid the butts up for you when they are doing their own sausage. I usually grind my own pork in my Kitchen-Aid mixer and I also use the mixer to mix each 4 pound batch of meat. You will need some method of grinding up some of the spices for this meat and I usually use a mortar and pestle but I think a small spice grinder would work as well. If you plan to stuff the sausage into casings, you will need a stuffer of some type and of course, the casings of your choice. The Kitchen-Aid with the correct attachment will do it but it is a two person operation for the best results.


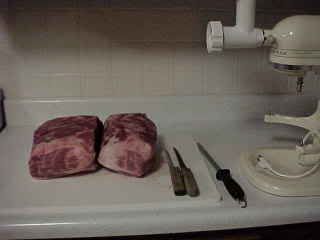
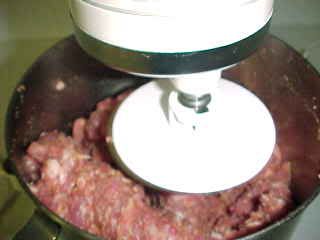
I start by cutting up the pork butts into pieces small enough to fit into the neck of my Kitchen-Aid grinder attachment.


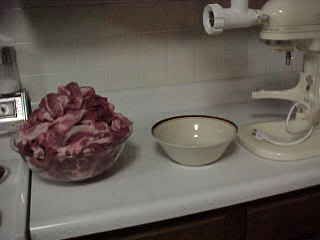
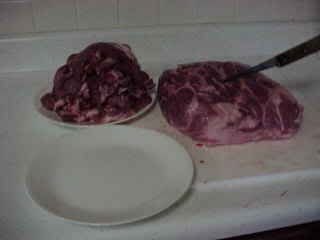
It is now ready to go thru the grinder.


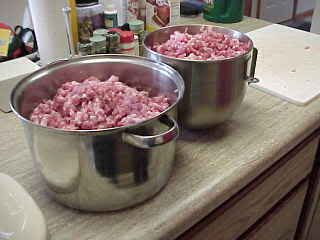
I then run the pork thru the grinder and into a few bowls or pans.


My recipe is for about 4 pounds of ground pork per batch as that is the largest amount I can mix in my Kitchen-Aid so I usually weigh out my ground pork into bowls of 4 pounds each. You can do larger amounts if you want to mix by hand.


Again, for 4 pounds of ground pork butts:

4 TBL crushed fennel seed
4 TBL crushed red pepper
4 TBL oregano
4 TBL very finely chopped onion
2 TBL MSG
2 tsp coriander seed (crushed)
2 tsp paprika
2 tsp fresh ground black pepper
1 tsp white pepper
1 tsp caraway seed
1 tsp salt
1 tsp sugar
Bout 14 cloves of fresh garlic (crushed)
Bout 8oz water or wine

Grind or crush up the seeds and items in the recipe as needed and place them in a large cup of about 8 oz of water or wine and let this soak for about 20 minutes before use.


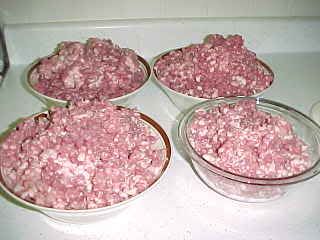
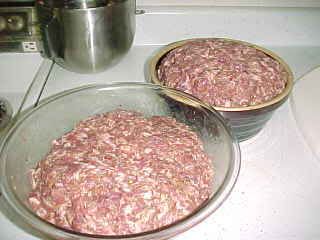
This is 2 batches ready to be mixed into the ground pork by hand or mixed up in the Kitchen-Aid.


I place the ground pork back into the mixer bowl and pour the spice mixture over the pork. I use the dough hook on the mixer to mix up the spices in the sausage. Again, I am making 4 pound batches of the sausage.


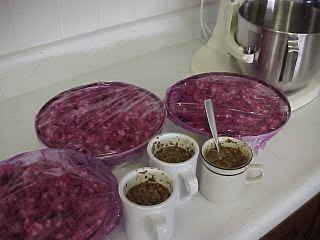
About 8 pounds of my Italian sausage as it was finished up in two batches in the mixer.


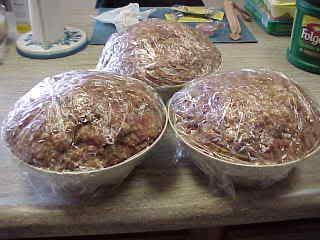
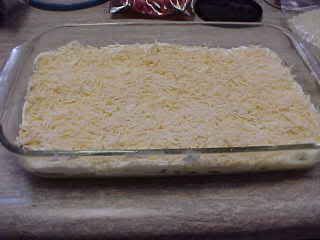
This is about 12 pounds of sausage.


This is about 17 pounds of sausage.

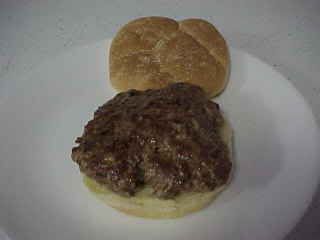
At this time, I will usually fry up a pattie for a sandwich and taste it for the seasonings and make a change here if needed. At least, that is the excuse I use to the old woman to get a sample this wonderful treat as early as possible.


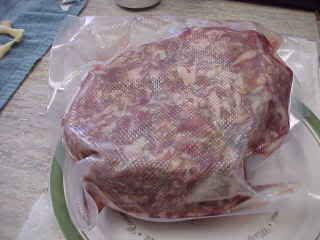
The meat then gets covered and goes into the fridge for about 2-3 hours to let the seasonings work into the meat before I vacuum pack it for the freezer or stuff it into casings.


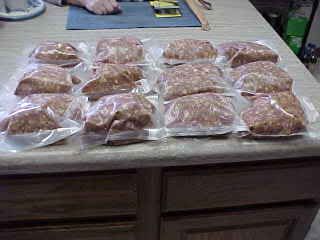
I usually put either a pound or a pound and a half in each bag. I think this picture shows 1-1/2 pound bags ready for the freezer.


This batch is one pound bags of sausage.


Try that on a pizza...Good Stuff...Nuff Said!

Wednesday, January 7, 2009

Lasagna / Regular and Low Carb

This is one of my favorite treats on an outside cooker/smoker and I make it both regular and low carb. Low carb doesn't contain any pasta but you would never know it as I can fool all my guests with that recipe.

The meat I prefer to use is my super spicy home made Italian sausage.


This is about a 1-1/2 pound package of my Italian sausage that was ground and mixed in my Kitchen-Aid mixer.

I also like to make my own home made pasta noodles for this regular dish. Fresh is always the best for this great treat.


This is the start of my home made noodles coming out of my Kitchen-Aid mixer.


This is enough fresh home made lasagna noodles for two casseroles.


I brown the sausage and then pour off the grease and then add all the ingredients to make up my home made sauce and simmer it for about 10 minutes. I then layer the noodles, my home made sauce with the meat, the cheese which might be some mozzeralla, ricotta, maybe some romano, and parmesan into a large baking dish.


This is the lasagna ready to go on the cooker. I like to bake it at about 325-350 degrees with a very clean burning fire and NO smoke wood in any of my cookers. I take it to about 160 degrees internal and pull it and let it rest before I cut it.


This is what it looked like coming out of my Backwoods cooker. I don't have a picture of my regular lasagna recipe on a plate but I do have a picture of my low carb recipe on a dish.


I make up my low carb lasagna without any noodles or pasta products. For every layer that would need the noodles, I substitute a layer of sliced mozzarella cheese. I carefully bake this casserole to about 160 degrees internal and this won't completely melt the sliced mozzarella and will leave the dish with the same consistency and texture of a dish that was made with the noodles. My guests never know the completed dish doesn't have a pasta product in it.


This is my low carb lasagna going on the cooker and this is about as good as the high carb but only has about 4-5 grams of carbos per serving.


This bake was done on my large Big Green Egg at about 325 degrees without any smoke wood.


It is a very good low carb treat.


Here is another low carb lasagna as I prepared it for the cooker. After I Pam the dish, I usually start out with a layer of the mozzarella slices and then add a layer of meat.


More layers going into the dish.


Dish is about ready for the cooker.


Just coming off the cooker.

Both of these recipes are great for lasagna.