Thursday, March 31, 2016

First Rotisserie Cook on the Cobb Grill

One of my Winter projects was to try to come up with a rotisserie setup for my little Cobb Grill. I got that task completed and this was my first cook on this modified rotisserie setup.

 photo DSC03494.jpg

My first cook was a 7.83 pound Cumberland Gap boneless ham. I added a sticker and then my favorite rub and it was ready to be carried out and placed on my little Cobb Grill.

 photo DSC03495.jpg

I had started my fire with 14 Stubbs briquets and then added a tin foil package of Jack Daniels wood chips for some smoke.

 photo DSC03498.jpg

Added the prepped ham and rotisserie unit to my Cobb base and just turned it loose.

 photo DSC03499.jpg

About 2-1/2 hours into the cook, I started my Honey-Sriracha glaze and applied it three times to my ham. I also added a few more briquets to my charcoal basket.

 photo DSC03502.jpg

I took the ham off at about four hours total and it looked good. Rested the ham and then cooled it down in the fridge to get it ready for the slicer.

 photo DSC03503.jpg

 photo DSC03504.jpg

Put the ham thru the slicer and got a nice pile of meat.

 photo DSC03505.jpg

 photo DSC03506.jpg

I piled about 6 ozs. on some rye bread, added some Swiss cheese, then some lettuce and tomato, and finished it off with some horsey sauce. Along with some chips and green onions and a fine ale, it made for a great lunch.

Rotisserie on a Cobb Grill

This modification was one of my Winter projects this year and I thought it would be a great accessory to an already fine little cooker. I love rotisserie cooking over charcoal or wood and do it on several of my other cooker as well so I had a little experience of setting up something that would work well.

I started out by looking for a rotisserie kit of some type that might work on the Cobb Grill and found a couple of what looked like very light duty kits in Europe that were designed for the grill. Probably be expensive to ship and I didn’t feel they would work for the type and weight of the meat I wanted to cook so I decided against ordering one of those kits.

I decided to go ahead and built something out of some parts I had on hand and then order the few parts I needed to complete the modification.

Since I am writing this to help others make this modification, I will assume that these folks will be starting from scratch with only the Cobb Premier Grill or one of the other round models.

I will start with a bill of material and then explain the details:

Cobb Dome Extensions with Chicken Roasting Stand (Qty 2)

A very small motor mount of about 2” or less in width to fit the Cobb Dome Extension

A standard 3 inch battery operated rotisserie motor

A 5/16” spit rod that is at about 16 inches in length

A spit rod handle

A couple of spit rod forks

A 5/16” spit rod bearing

An adjustable counter balance system would also be nice on larger pieces of meat


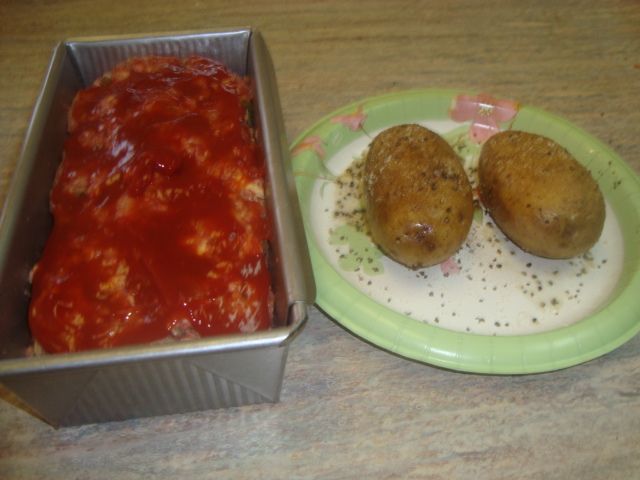
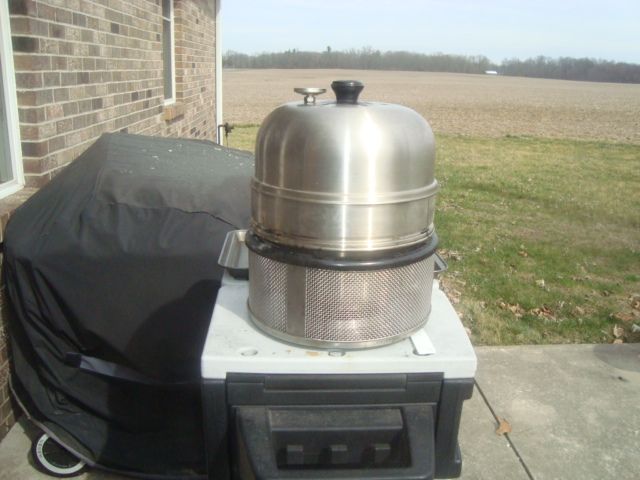
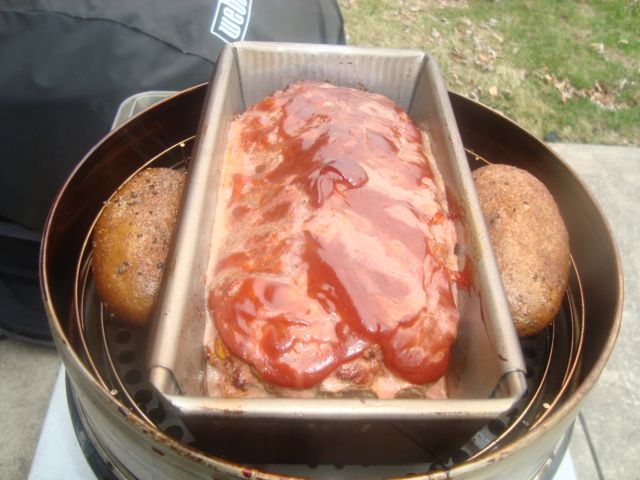
The two Cobb Dome Extensions are needed to give you enough height for the rotisserie setup. These will give you room to spin a piece of meat up to about 7-1/2” in total thickness with good results. One of these units with the chicken roasting stand is a nice addition to the Cobb Grill anyway for cooking the “Beer Butt” type of whole chicken. I also use one quite often for tall cuts like pork butt, pork ribs, meatloaf in a loaf pan, and some raised grid or two layer cooking in the grill. It is a nice accessory.
The Cobb Dome Extension with Chicken Roasting Stand can be purchased from
www.cobbgrillamerica.com at $26.50 each.

I think there is only one compact motor mount out there that is small enough in width to work well on one of the Cobb Dome Extensions and this can be found at www.cajunbandit.com and is called “The Rotisserie Motor Mount KIt” and the price is $16.99.

After looking around and trying to piece meal together the balance of the parts, I found a kit with everything else that is needed and then some for less money from
http://www.onegrill.com/Universal_Gas_Grill_Rotisserie_Kits_s/130.htm It is called...
OneGrill™ Universal Complete Grill Rotisserie Kit - 19” x 5/16” w/ Chrome Cordless Motor
and this kit is on sale for $48.44 with free shipping.
This kit comes with some mounts that are not needed but is still a less expensive way to purchase the balance of the parts.

Once I got this setup together, I found that with the spit rod at about 3 inches longer than was needed, and the spit rod handle that came in the kit at 4-1/2” in length added to this extra spit rod length, was sticking out too far on the one side of the grill and might be a problem so I made one more purchase of a round spit rod knob that wouldn’t stick out that far. I found a suitable round plastic knob at https://www.amazon.com This is called:
J.W. Winco DG110 WD595 Plastic Ball Knob, 3/8-16" Brass Insert, 1 1/2"Diameter
The cost of this round knob was $4.12

Well, that is the parts I used to modify my little Cobb Grill into one great rotisserie cooker.


The tools required for this modification are as follows:

An electric drill with a set of twist bits suitable for stainless steel
A 3/4” hole saw also suitable for stainless steel
A hammer and a center punch
A hack saw with a blade that will cut stainless steel or a cut off saw of some type
A 2X4 about 15” long

Stainless steel is a little more difficult to work with and your standard Harbor Freight tools may not work with this metal.

I did this modification on my kitchen countertop with some help from the wife in about 45 minutes after I got the layout completed and the six holes counter punched. I used the block of wood for center punching and drilling my holes.

Be super careful with the layout of the 3/4” hole on the motor mount side of the dome extension as it needs to be right.

 photo DSC03511.jpg

I didn’t drill a smaller pilot hole for this first 3/4” hole saw and the drill drifted just a little and I got the hole about 1/16” too high. Still clears alright but it is close to the spit rod rubbing the bottom of the hole. I drilled the holes from the inside of the extension out on the block of wood.

 photo DSC03512.jpg

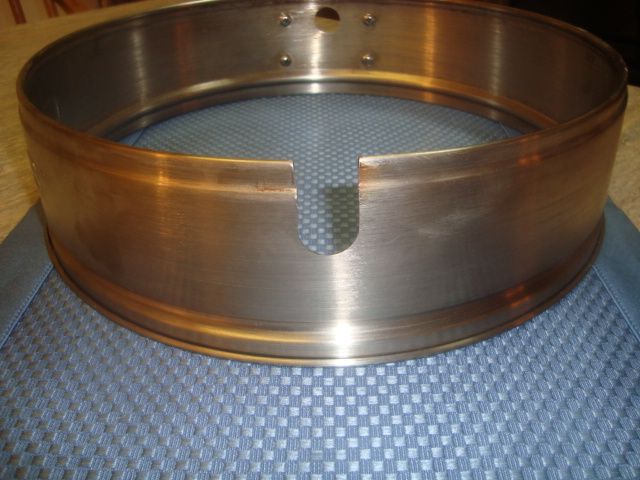
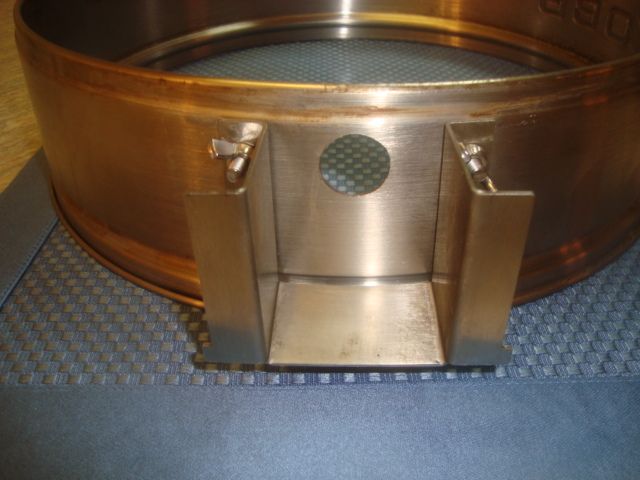
At 180 degrees from the first hole, I drilled the second 3/4” hole in the same position as the first hole and did use a pilot hole first and got this one right where I wanted it. Then you can use the hacksaw or a cut off wheel to cut the slot down to the 3/4” hole like you see on the picture.

Last step is to drill your holes for the motor mounts. Be sure when you layout the motor mount that you do so with the lid on the dome extension to be sure you don’t get the mount too high and interfere with the lid closing properly.

 photo DSC03515.jpg

 photo DSC03513.jpg

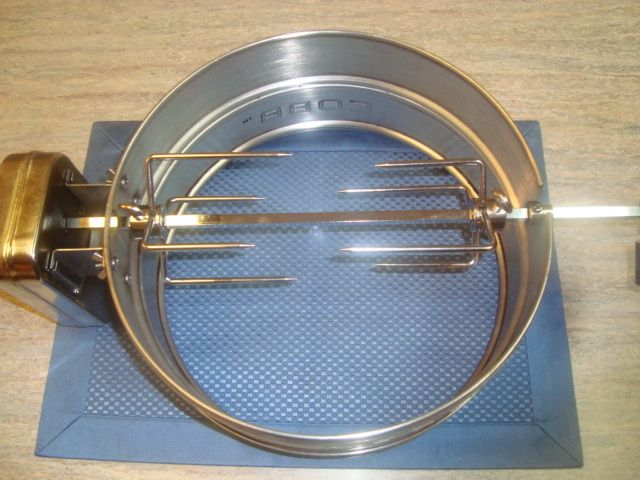
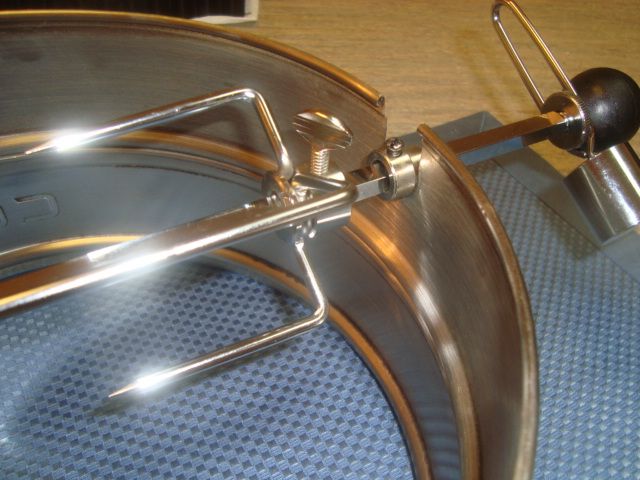
After you mount the spit motor mount, put the knob on the spit rod and place the spit rod bearing on the rod with the smaller end facing the knob end of the rod. Then place the spit rod into the dome extension and adjust the bearing to keep the spit rod from coming out of the motor. Next step is to place the two forks on the spit rod being sure to keep the thumb screws on the same flat on the spit rod as the bearing adjustment screw as this will make it easier to load the meat. The spit rod fork on the bearing side of the cooker needs about 5/8” clearance from the bearing to make it easier to install the unit in the extension. Picture 513 show this distance.

 photo DSC03499.jpg

 photo DSC03504.jpg

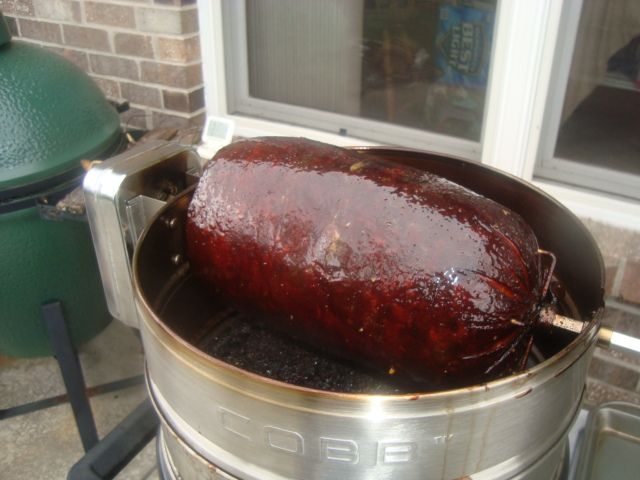
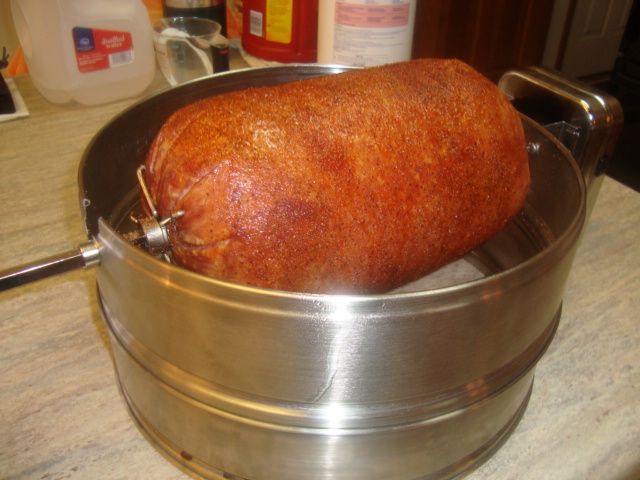
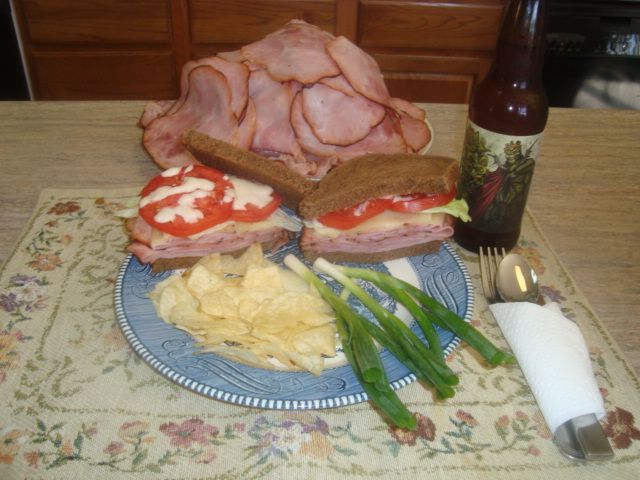
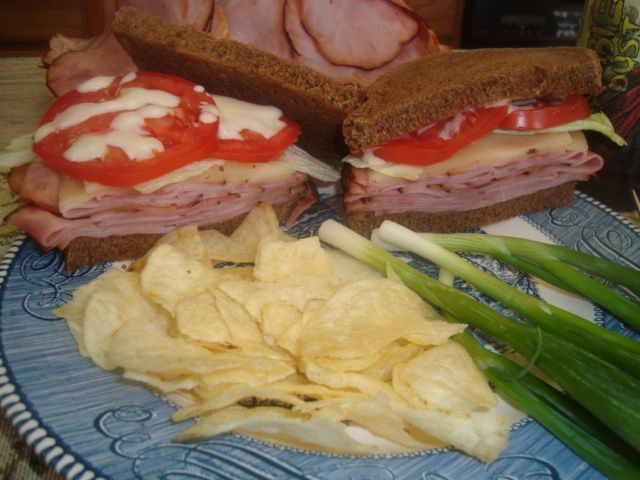
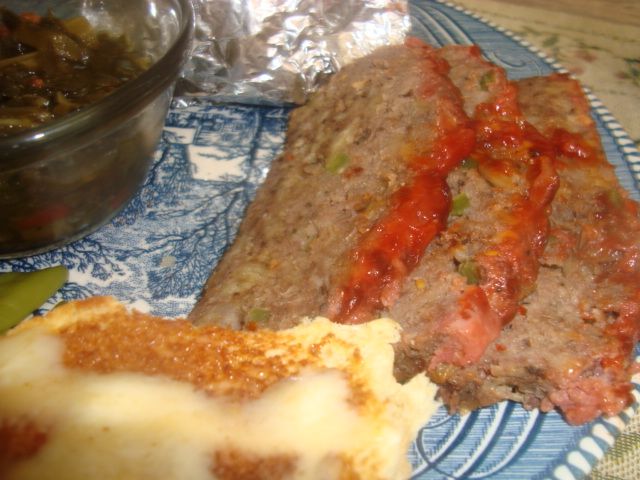
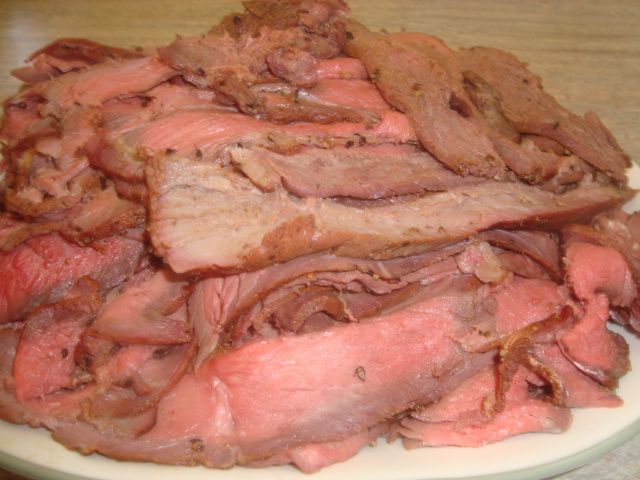
The above is a 7.83 pound ham in the grill. Imagine that...the little cooker will make about 25 nice sandwiches for your hungry crowd!

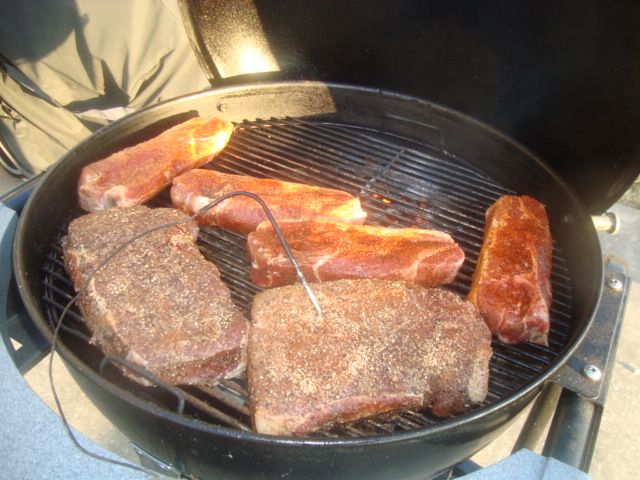
This modification and setup will work with a piece of meat up to about 9” in length and a width or top to bottom of about 7-1/2 inches in diameter. This will include the boneless ham, whole chickens, turkey breast, beef round roast for roast beef, boneless leg of lamb, cornish hens, pork loin, maybe a 3-4 bone prime rib, and probably some others that I can’t think about at this time.

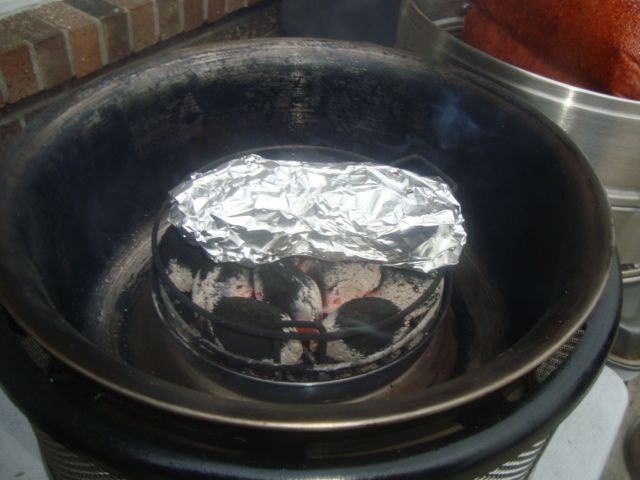
Many of the cooks will require the addition of some more charcoal during the cook and this can be done by using gloves and carefully just lift the bottom two dome extensions along with the rotisserie and meat in one unit off of the grill and set it aside and then stir the charcoal and add some more briquets and put it back together and you are on your way again. Can do it in less than a minute.

Wednesday, March 16, 2016

Meatloaf on the Cobb Grill

Did this cook yesterday on my little Cobb Grill using the extender ring as I needed a little more height in the cooking area to fit my meatloaf pan. Used Stubbs briquets (12) and some Jack Daniels chips for my smoke wood.

 photo DSC03466.jpg

The small loaf was made up with about 1-1/4 pound of burger and one pound of hot sausage along with some veggies consisting of onions and bell peppers. Also used some crackers, some SPG seasoning, and an egg. My pots were rubbed with some peanut oil and then I sprinkled on some SPG for additional flavor.

 photo DSC03473.jpg

Nice cool morning without much wind will make for a nice cook.

 photo DSC03467.jpg

Was a tight fit but I got it loaded into the grill and I was on my way to a nice lunch.

 photo DSC03469.jpg

Took the potatoes off at about 204-207 internal and then wrapped them in foil. The meatloaf took about 20 minutes longer and I took it off at about 165 degrees internal.

 photo DSC03470.jpg

Sliced up the meatloaf and it looked great.

 photo DSC03471.jpg

 photo DSC03472.jpg

Dressed the potato and added some greens and a garlic bun and had a fine lunch.

That grill is just fun to cook on and always puts out some fine food.

Friday, March 11, 2016

Steak & Pork Burger on the Davy Crockett Grill

The first part of this cook was done on the Davy Crockett pellet cooker with my cast iron grilling insert and using a grid temp of about 450 degrees.

 photo DSC03446.jpg

Ribeye was trimmed up a little and then rubbed with one of my steak rubs and then left out on the counter top to warm up for about 45 minutes.

 photo DSC03447.jpg

Steak was on the grill for about 7 minutes total and this resulted in a nice medium rare cook.

 photo DSC03448.jpg

Came out looking pretty nice and sure smelled good.

Dropped the temperature on the Davy Crocket grill to about 350 degrees, removed my grilling insert, and added a round cast iron griddle for my pork burgers.

 photo DSC03450.jpg

I formed up 4 patties of my homemade pork burger and then added some simple SPG rub and they were ready for the fire.

Placed my four (6 oz each) pork burgers on the cast iron griddle and cooked them until done.

 photo DSC03451.jpg

 photo DSC03455.jpg

Sure made a nice lunch.

Old Dave's Homemade 60/40 Burger

Time to make up some good burger (60/40) blend with four nice choice chuck roasts and the wonderful fat I cut off of my choice whole ribeye loin. I use this burger meat for grilling up the very best medium rare hamburgers that I have ever tasted.

 photo DSC03439.jpg

My four choice chuck roasts weighed a total of 12.29 pounds and the choice ribeye steak fat came in at 3.42 pounds.

 photo DSC03440.jpg

 photo DSC03441.jpg

Got the meat and fat cut up and ready for the grinder.

 photo DSC03442.jpg

Yea buddy....this gonna be some good stuff. Look at all that white color (fat) in the container of meat. Fat is flavor, fat is moisture, and fat is everything in a burger sandwich.

 photo DSC03443.jpg

Ready for the vacuum sealer.

 photo DSC03444.jpg

Vacuum sealed 15 packages of about a pound each of that beautiful burger meat.

A burger made out of this wonderful meat blend and cooked to about 130 degrees (medium rare) will require a person to use a bib as the juice will not only run down both sides of your chin, the juice will also run down your arm!

Prepping a Whole Boneless Ribeye Loin for Steaks

My steak cooking partner came out early Friday morning and brought me a very nice 17.65 pound choice Whole Boneless Ribeye Loin. His Kroger had them on sale for $5.99 a pound so that was a bargain.

 photo DSC03431.jpg

 photo DSC03432.jpg

This should make some fine practice steaks.

 photo DSC03433.jpg

 photo DSC03435.jpg

 photo DSC03436.jpg

I cut the tail off of the loin and did a little more trimming and hacked out 15 very nice 1-1/4” thick and about 16 oz each ribeye steaks. Perfect for several steak contest practice cooks. The tail and the rest of the trimmings as seen on the right side in the last picture will be used in my 60/40 “Fat Burger” meat. Now I gotta find me some cheap chuck roasts.

 photo DSC03437.jpg

 photo DSC03438.jpg

Ready for the freezer.

While my buddy was here, we did a practice cook with my homemade steak rub on my steak and his favorite purchased rub on his steak.

 photo DSC03427.jpg

This is the steak I cooked and I think it looked great.

 photo DSC03429.jpg

This is the steak he cooked and it looked pretty good as well.

After the taste test, both me and Jan liked my steak rub the best with his a close second. He took both of the steaks home and and his wife and family liked the taste of his purchased steak rub over my homemade rub. I guess I have to call this cook a draw and get back to the drawing board.

Top Round & Country Ribs on the Performer

I hadn’t had my Weber Performer out of the barn in a while and I decided to do this cook of that fine cooking machine. The cook consisted of two top round beef roasts that weighed a total of 5.03 pounds and 4.12 pounds (4 pieces) of pork shoulder cut country ribs that were about 1-1/2” thick each.

Rolled the cooker around to my cooking patio and fired it up with some Wicked Good charcoal briquets and brought it up to temperature.

 photo DSC03459.jpg

I prepped the top round roasts by trimming off a little of the thicker fat on the edges and then sprinkling on a medium amount of SPG. The country ribs didn’t need any trimming so I sprinkled on a medium amount of Smokin’ Guns hot rub and both meats were ready for the fire.

 photo DSC03460.jpg

Checked the temperature of the kettle and found it at about 340 degrees so I added a big chunk of hickory smoke wood and loaded up my meat.

 photo DSC03461.jpg

At just under an hour, my round roasts were up to about 120 degrees internal (rare) so I pulled the meat off the cooker and wrapped it in foil to rest for a while. The picture shows the roasts just off of the cooker.

 photo DSC03464.jpg

Cooked the country ribs to about 165 internal and wrapped each of them in foil with about 2oz of Stubb’s Pork Marinade and placed them back on the cooker. Cooked them in the foil to about 195 degrees internal in the foil and then took them out of the foil and placed them back on the cooker for a nice glaze job with a blend of Blue’s Hog Sauces for about 20 minutes. They sure looked good coming off of the cooker.

 photo DSC03462.jpg

Cooled the top round roasts and put them thru the slicer. We love this meat and use it for many different treats including Philly Cheese Steaks, Chicago Italian Beefs, Beef Manhattans, Beef Salad, Beef Hoagies, and just plain barbecued beef slider sandwiches.

Had one of the one pound country ribs for supper and it was great. Beef Manhattans for tomorrows lunch.

Nashville Style Hot Wings

There is a new recipe out there on many recipe and forum web sites for this great sounding treat.

It is a deep fried hot wing and the three pound recipe calls for an overnight buttermilk soak, a 1/2 cup of ground cayenne pepper as the first ingredient in the rub, and a sauce that starts with a 1/2 cup of lard.

Now, that probably doesn’t sound very good to a “normal” person but for me as a chili head it looked great and I couldn’t hardly wait to try it.

Anyway, I did this recipe and followed all the directions and this is what it looked like.

 photo DSC03456.jpg

 photo DSC03457.jpg

 photo DSC03458.jpg

These came out looking great but were so hot that a fellow couldn’t really taste anything other than the cayenne heat and it was overbearing with heat. If a fellow wanted just pure heat, this would work. I think my smoked hot wing is better and don’t think I will be making any more of this recipe.